
Windows
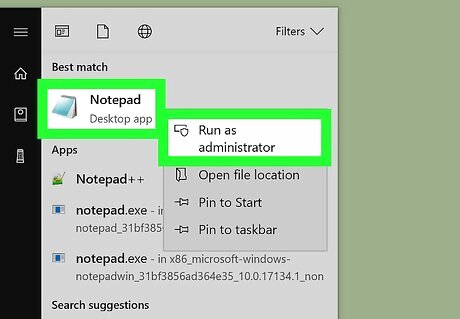
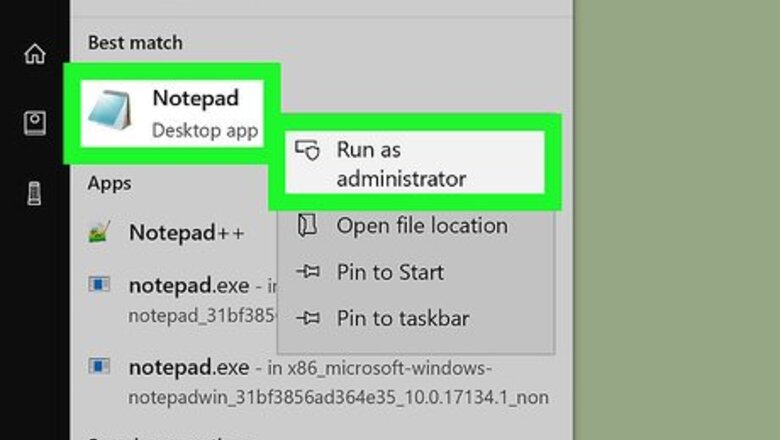
Open Notepad as an administrator. Press the Win key and enter Notepad. Right-click on the app and select Run as administrator. This option will open Notepad using your administrator privileges. If you don't open Notepad in administrator mode, you won't be able to edit the "hosts" file. On a laptop with a trackpad instead of a traditional mouse, use two fingers to tap the trackpad instead of right-clicking.
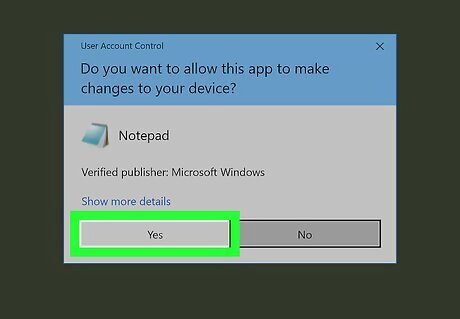
Click Yes when prompted. Doing so will confirm your decision and open Notepad.
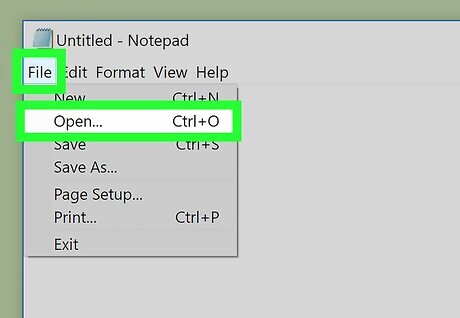
Click File, then click Open…. You'll find Open in the File drop-down menu.

Go to the Hosts file's folder. In the window that opens after clicking Open..., do the following: Click the This PC tab on the left side of the window. Double-click your computer's hard drive (e.g., OS (C:)). Double-click the Windows folder. Scroll down and double-click the System32 folder. Scroll down and double-click the drivers folder. Double-click the etc folder.
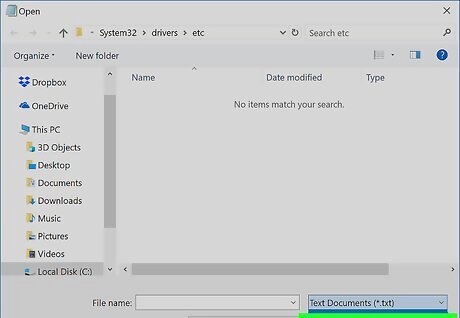
Show all file types. Click the "Text Documents" drop-down box near the bottom of the window, then click All Files in the drop-down menu. You should see several files appear in the window.
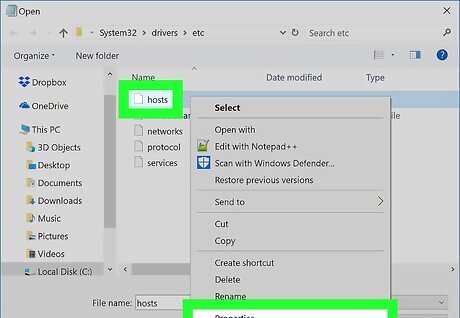
Allow editing for the "hosts" file. Right-click the "hosts" file, then do the following: Click Properties Click Security Click Edit Check the "Full Control" box. Click OK, then click Yes when prompted. Click OK to exit the Properties window.
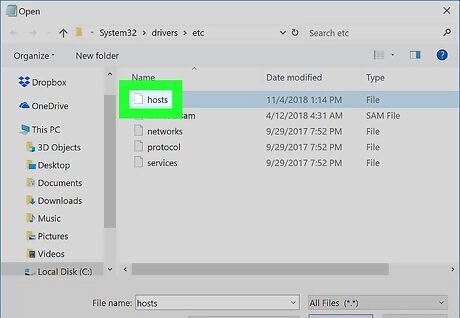
Double-click the "hosts" file. This will open the "hosts" file in Notepad, allowing you to view and edit its contents.

Scroll down to the bottom of the "hosts" file. You'll see two "localhost" lines of text here.
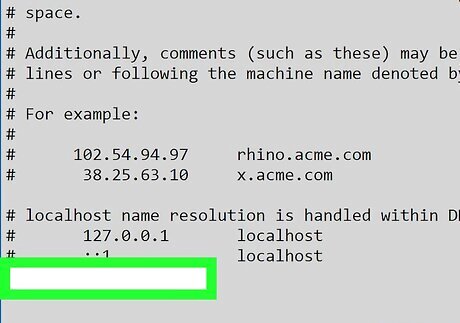
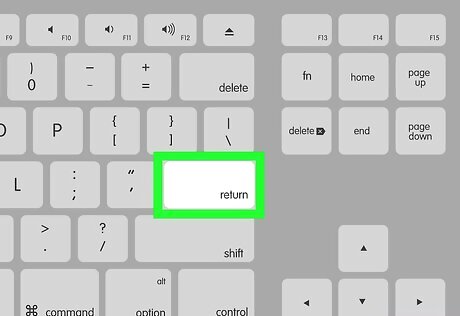
Click below the last line of text. It will say either "::1 localhost" or "127.0.0.1 localhost" at the bottom of the page. Your cursor must be directly below the last line of text on this page. Be careful not to delete anything that is already in the hosts file.
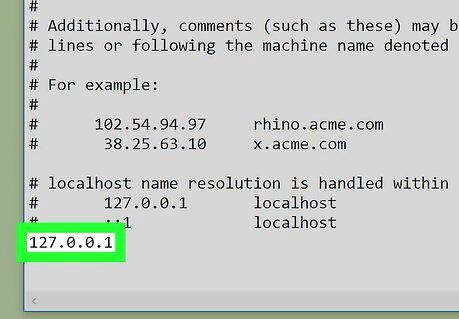
Type in 127.0.0.1 and press Tab ↹. This is the loopback address to your own computer, which is what will return an error page in your web browser when someone tries to visit the blocked site.
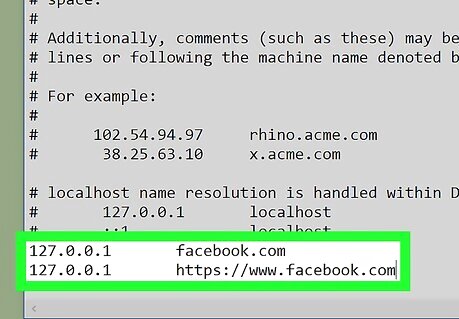
Type the address of the site you want to block. For example, if you wanted to block Google, you would type www.google.com. If you're blocking sites on Google Chrome, you'll need to place a space and then the "www.[site].com" version of the website's address after the "[site].com" version. To block Facebook, for example, you would type in 127.0.0.1 facebook.com www.facebook.com.
Press ↵ Enter. This moves your cursor to a new line. The code you entered will tell your computer to redirect the website to your loopback address instead. You can add as many sites as you want to block, one per line, using the same number (127.0.0.1) as before. If you want to be as thorough as possible, enter different variations of the address (e.g., "google.com" and "https://www.google.com/") as well.
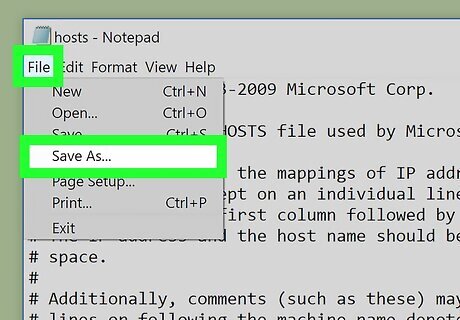
Save the Hosts file. Your changes won't be saved if you simply save using File > Save, so do the following to confirm your changes: Click File Click Save As... Click Text Documents, then click All Files in the drop-down menu. Click the "hosts" file. Click Save Click Yes when prompted.
Mac
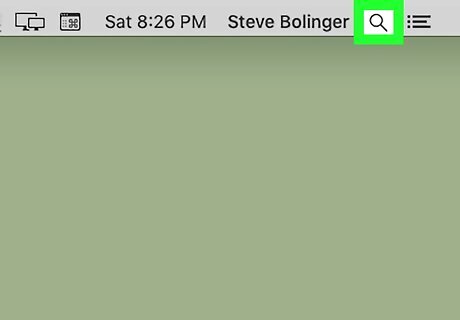
Open Spotlight Mac Spotlight. Click the magnifying glass icon in the top-right side of your Mac's screen.
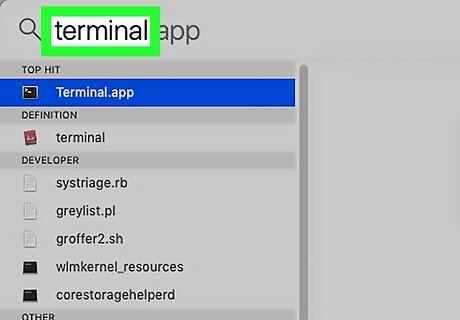
Type terminal into Spotlight. This will prompt Terminal to appear at the top of the search results.
Double-click the Terminal icon Mac Terminal.
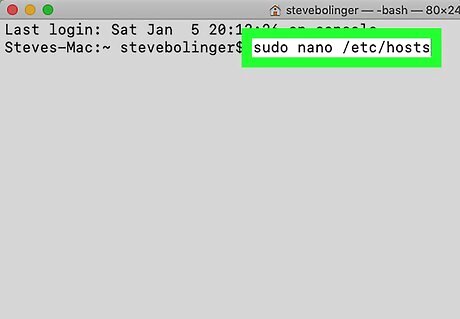
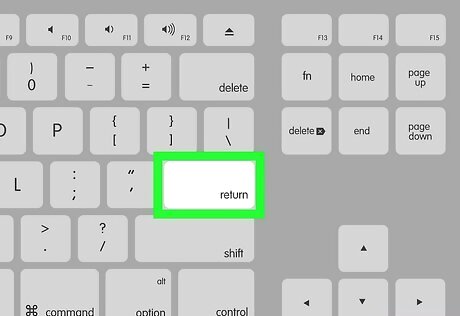
Open the Hosts file. Type the following code into Terminal and press ⏎ Return: sudo nano /etc/hosts
Enter your Mac's password when prompted. Type in the password that you use to log into your Mac, then press ⏎ Return. Terminal won't display the password characters as you type them.

Move the blinking cursor down to the bottom of the page. To do so, press the ↓ key until the cursor is below the last line of text on the page.
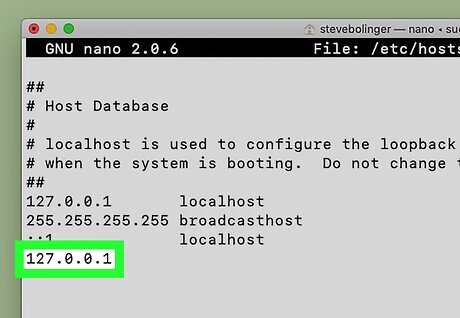
Enter the local host address. Type 127.0.0.1 into the blank line. This is the loopback address to your own computer.
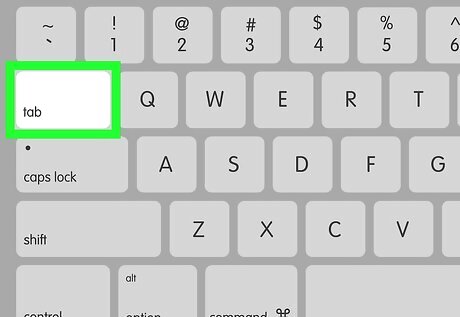
Press Tab ↹. The cursor will move to the right. Don't press ⏎ Return yet.
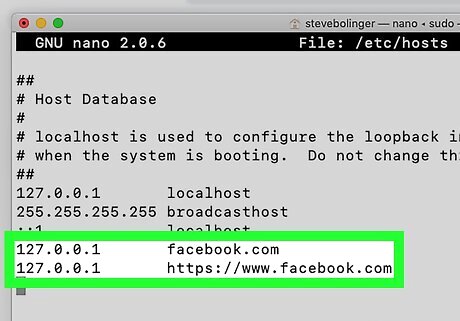
Type the address of the site you want to block. For example, if you wanted to block Google, you would type www.google.com. This line would then read 127.0.0.1 www.google.com. If you want to be as thorough as possible, enter different variations of the address (e.g., "google.com" and "https://www.google.com/") as well. If you're blocking sites on Google Chrome, you'll need to place a space and then the "www.[site].com" version of the website's address after the "[site].com" version. To block Facebook, for example, you would type in 127.0.0.1 facebook.com www.facebook.com.
Press ⏎ Return. This will tell your computer to redirect the website to your loopback address instead. You can add as many sites as you want to block, one per line, using the same number (127.0.0.1) as before.
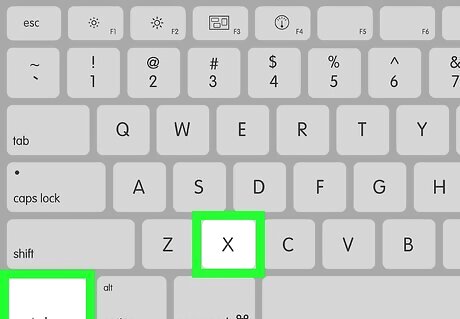
Press Control+X. This is the command to exit the hosts file in the text editor. It will prompt you if you'd like to save your changes.
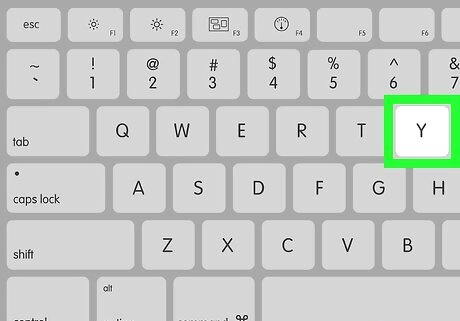
Press Y to save your changes. It will then ask you what filename you'd like to save it as. You want to overwrite the original hosts file, so don't change the filename.

Press ⏎ Return. This will save your changes to the original hosts file. Doing so exits the text editor and returns you to the main Terminal window. The website you added will now be unreachable in any web browser on the computer.
iPhone, iPad & Mac

Open your device's Settings iPhone Settings App Icon. It's a grey app with gears on it. You'll likely find Settings on the Home Screen. You can use Screen Time on iPhone, iPad, and Mac to block adult content from your web browsers.

Tap Screen Time. This option is usually in the second grouping of menu items next to an icon of an hourglass. To access this menu on a Mac, go to System Settings > Screen Time. Select Turn on Screen Time if you're prompted and select if the phone is yours or a child's. If your phone belongs to a child, you'll be prompted to enter the passcode.
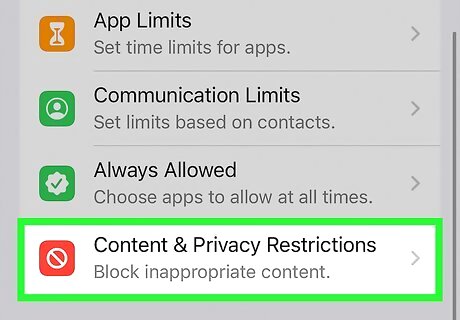
Tap Content & Privacy Restrictions. This is near the bottom of the screen next to a red icon with a circle that has a line through it. If you haven't yet enabled restrictions, first tap Enable Restrictions, then enter your desired passcode twice when prompted.
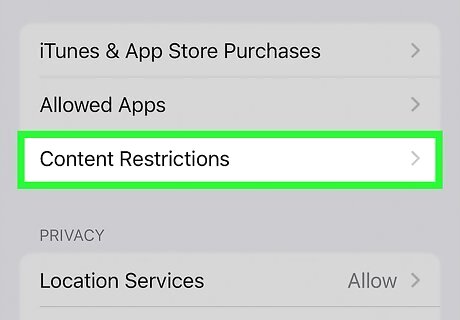
Tap Content Restrictions. This is usually the third listing in the menu.
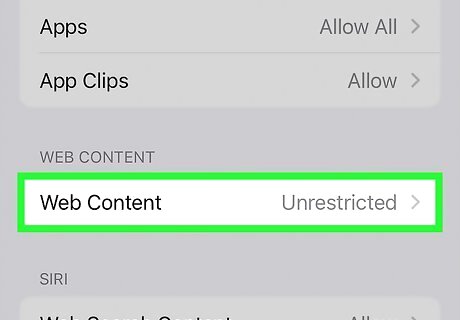
Tap Web Content. It's the last entry beneath the "Web Content" heading.
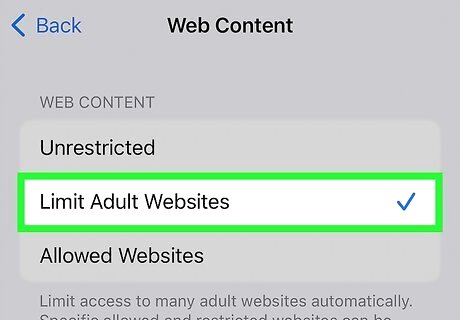
Tap Limit Adult Websites. You'll see a blue checkmark appear to the right of this option.
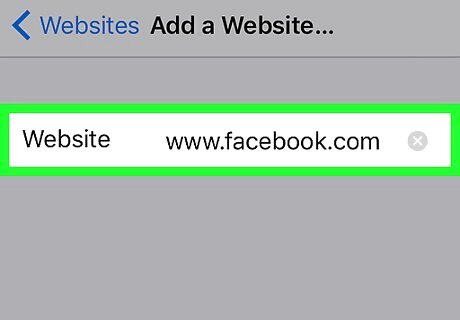
Block a specific website. If you want to block a specific site, like Facebook, tap Add a Website below the "NEVER ALLOW" heading and type in the web address of the website you wish to block. The address must start with "www" and end with a domain tag (e.g., ".com" or ".net"), but you can leave the "https://" section out if applicable. For example, if you wanted to block Facebook on your iPhone or iPad, you would type in www.facebook.com. This setting also applies to other popular iPhone browsers such as Chrome and Firefox.
Android

Open Freedom. It's a highly rated and popular site and app blocking apps that you can download for free from the Google Play Store. If you don't like Freedom, you can use other similar apps. You can pay to unlock more features with Freedom, but you can use the free version without a credit card.

Tap Sign up. It's at the top of the screen. If you already have a Freedom account, tap Log In. Follow the on-screen instructions to create an account with your email and password.
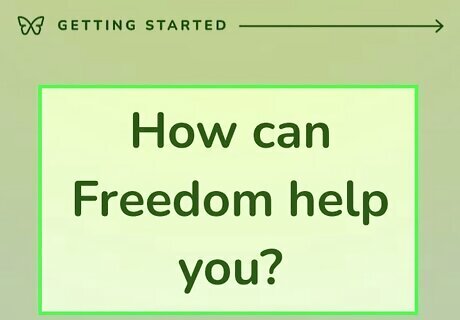
Select how Freedom can help you. Choose any of these reasons to continue. Continue making selections through the "Getting started" pages and tap Continue when prompted.
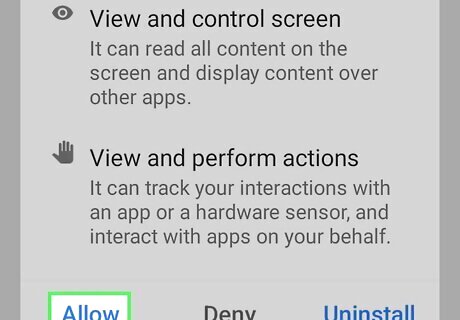
Give the app permissions. You'll need to allow blocking permissions for Freedom to be able to block websites and applications. Tap Enable to open "Settings", then go to Installed Apps > Freedom and tap the toggle to enable it. Tap Allow and then close the window and return to the app.
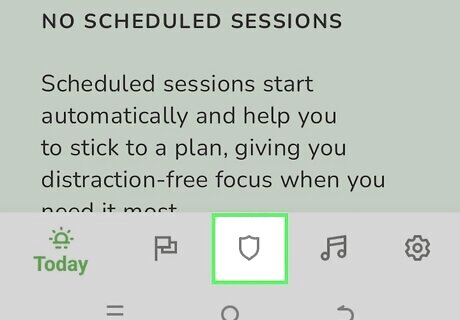
Tap the shield icon. It's your tab for "Blocklists" and is centered at the bottom of your screen.
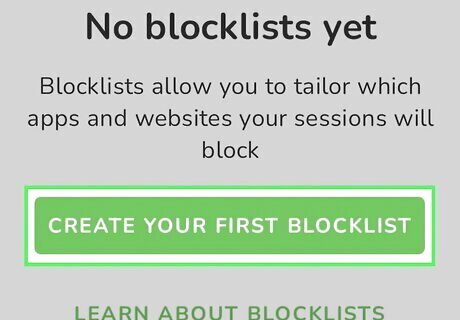
Tap Create Your First Blocklist and create a blocklist. These are the sites that your Android will block when you're running a Freedom session. Here's what you need to do to create a blocklist: Enter a blocklist name. Select any apps to block. Add domains to block and tap Add Block. If you have a long list of domains to block, you can simply block by category. For example, enabling the toggle next to "Social" will block 41 websites and apps including facebook.com, instagram.com, and swarmapp.com.
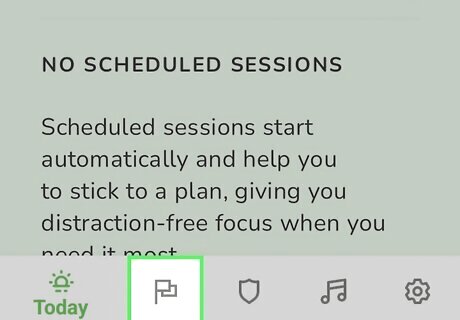
Start a session. Tap the flag icon at the bottom of your screen and tap Start Session. Here's what you need to do to use the blocklist you just created: Select your blocklist from the blocklist section. Select a duration for the session. For example, you can create a session for 3hrs and 25 minutes that blocks all the apps and websites on your blocklist during that time. Unlocking Premium will allow you to schedule sessions ahead of time.

Tap Start Session. Once you start the session and the app has all the accessibility permissions it requires, you can't access blocked websites or open blocked apps. Tap the session in Freedom and select End Session to stop blocking sites and apps. You can also use this app on other platforms, including Windows.


Comments
0 comment