

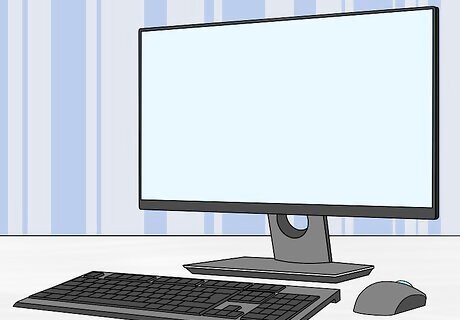
Adding an Internal Hard Drive
Make sure that you have a Windows desktop computer. Generally speaking, modern laptops do not have the space for a second hard drive. Additionally, modern Mac computers—both desktop and laptop versions—don't have room for a second hard drive. You can still install an external hard drive on both Windows and Mac computers.

Buy a SATA internal hard drive for your computer. If you don't already have a SATA hard drive that you want to install, buy one before proceeding. You'll generally want to buy a hard drive made by the same company which made your computer (e.g., HP). Some hard drives aren't compatible with certain computers. Before buying a hard drive for your computer, search for your computer's model and the hard drive's name (e.g., "HP Pavilion compatible with L3M56AA SATA") to see if they'll work together.
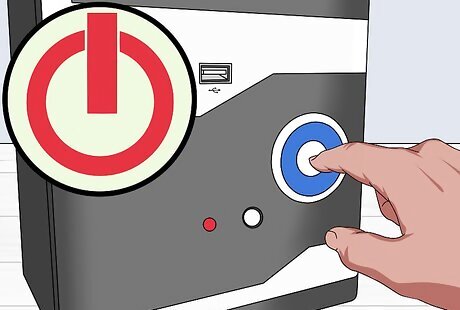
Turn off and unplug your computer. You should never attempt to alter your computer's internal components while the computer is running, as you may seriously harm both yourself and the computer. Some desktop computers will take a couple of minutes to finish running after unplugging them. If this is the case for your computer, wait until the computer's fans have stopped running before proceeding.
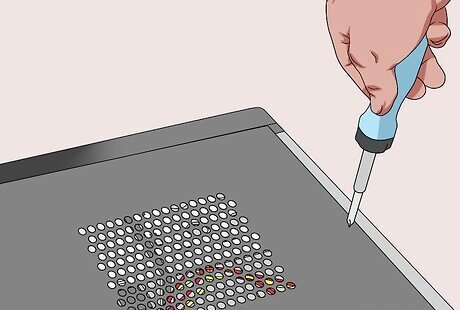
Open your computer's case. This process will vary from desktop computer to desktop computer, so consult your computer's manual or online documentation for specific instructions if you don't already know how to open the case. You'll usually need a Phillips-head screwdriver for this step.
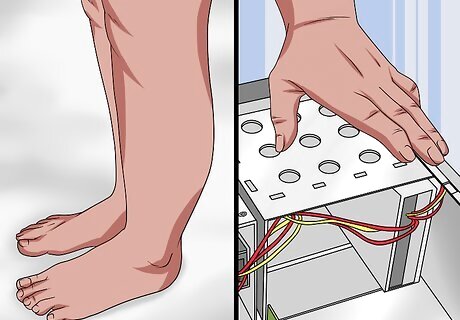
Ground yourself. This will prevent accidental damage to your computer's sensitive internal parts (e.g., the motherboard).
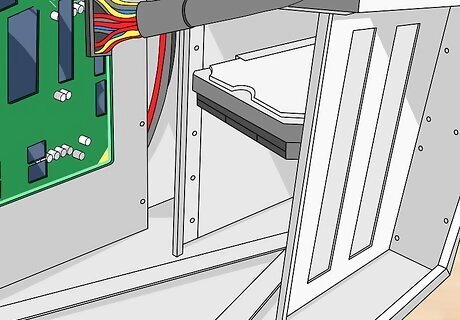
Find an empty mounting space. Your primary hard drive will be mounted in a rack that's somewhere in the computer's case; there should be a similar, empty rack near the hard drive. This is where your second hard drive will go.
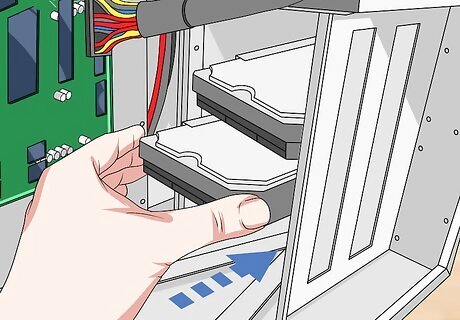
Slide your second hard drive into the mounting space. It should fit under or next to the primary hard drive, with the cable side of the hard drive facing you. In some cases, you'll have to tighten the mounting space with screws.
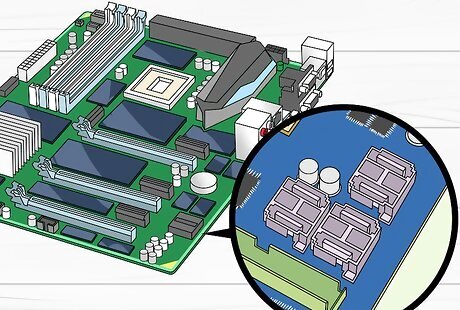
Find the hard drive attachment point. Follow the current hard drive's cable all the way down to where it plugs into the motherboard, which is a green panel with circuits on it. If the hard drive's cable resembles a ribbon, your current hard drive is an IDE-type hard drive; you'll most likely need an adapter to plug the second hard drive into the motherboard.
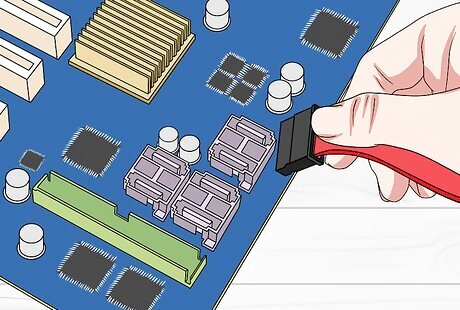
Attach your second hard drive. Make sure that one end of the second hard drive's cable is firmly plugged into the second hard drive, then plug the other end of the cable into the motherboard. It should fit into a slot next to the primary hard drive's cable. If your computer's motherboard only supports IDE connections, the slot on the motherboard will be a couple of inches wide. You can buy a SATA to IDE adapter that plugs into this slot, at which point you can plug your hard drive's cable into the adapter's back.
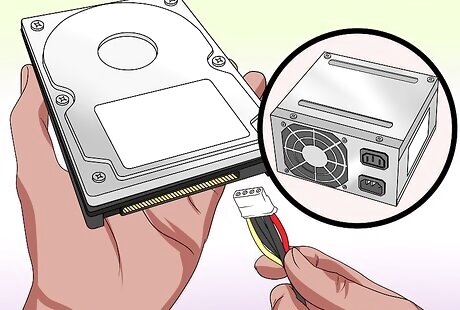
Attach the second hard drive to the power supply. Plug one end of the second hard drive's power cable into the power supply box, then plug the other end into your second hard drive. You'll usually find the power supply at the top of the computer case. The power supply cable resembles a wider SATA cable.

Make sure that all of the connections are tight. If your second hard drive isn't properly plugged in, your computer won't be able to recognize it later.
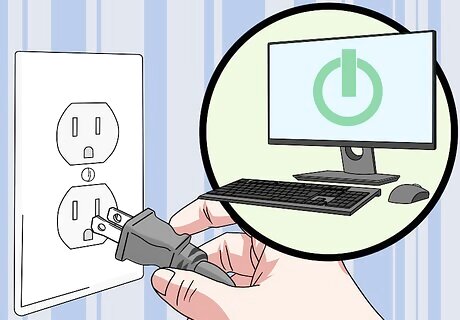
Plug in and turn back on the computer. Now that your second hard drive is physically installed, you'll need to allow Windows to recognize the hard drive.
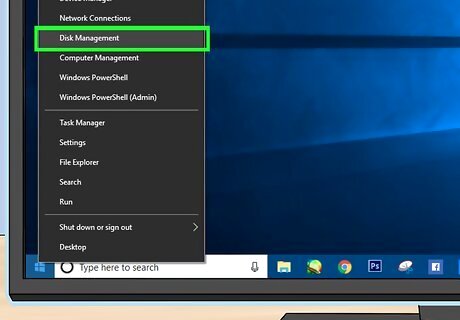
Open the Disk Management window. Right-click the Start menu Windows Start that's in the bottom-left corner of the screen, then click Disk Management in the resulting pop-up menu. You can also press ⊞ Win+X to open the pop-up menu.
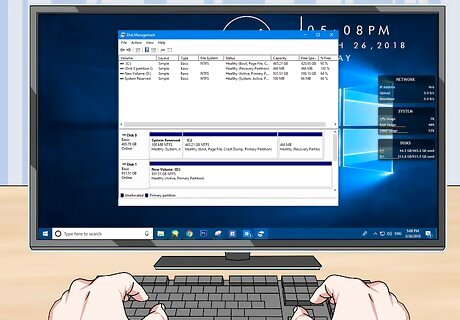
Wait for the "Initialize Disk" window to appear. This window will usually appear within a few seconds of opening Disk Management. If the "Initialize Disk" window doesn't appear, click the grey "Refresh" button that's above the Layout tab near the top of the window.
Click OK when prompted. This will allow Windows to initialize the second hard drive. Once this process completes, you can proceed.
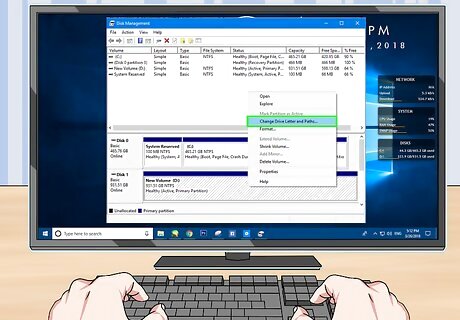
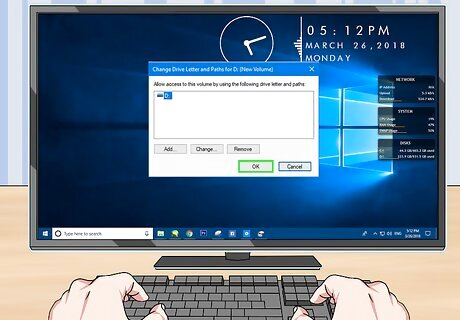
Make your second hard drive usable. Right-click the second hard drive's name, click New Simple Volume... in the resulting menu, and click Next on every page of the window that pops up. Your hard drive will be set up and made readable by Windows. Once this process completes, you'll be able to access your second hard drive from the This PC app.
Adding an External Hard Drive on Windows

Buy an external hard drive. You'll generally want to buy an external hard drive that both has enough space for you and comes from a reliable manufacturer such as Western Digital or Seagate. When buying an external hard drive, it's often not much more expensive to buy a terabyte (TB) hard drive rather than a 500 gigabyte (GB) one. A one-terabyte hard drive will usually run under $100.

Attach the external hard drive to your computer. Plug the hard drive's USB cable into one of your computer's USB ports.
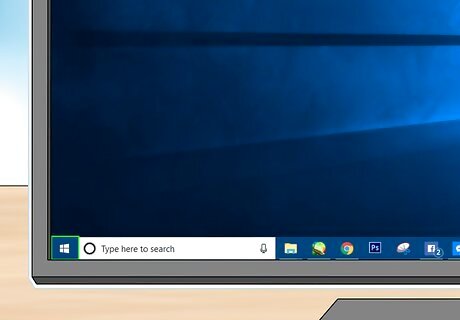
Open Start Windows Start. Click the Windows logo in the bottom-left corner of the screen. The Start menu will open.
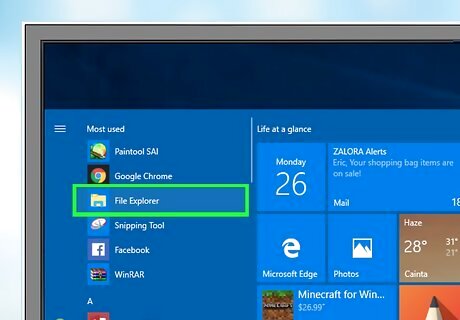
Open File Explorer Windows Start Explorer. Click the folder-shaped icon in the bottom-left section of the menu. Doing so opens the File Explorer window.
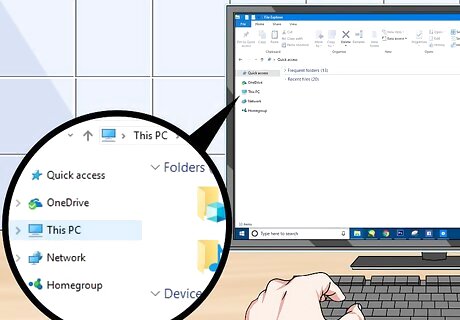
Click This PC. It's on the left side of the window.
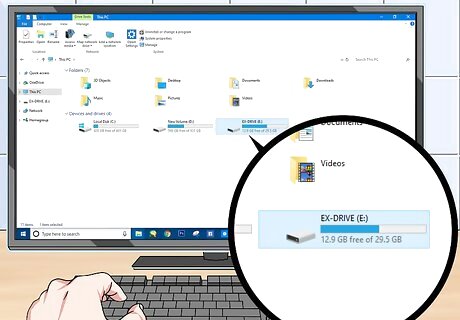
Select your external hard drive's name. Click your external hard drive's name below the "Devices and drives" heading in the middle of the This PC window. The external hard drive's name will usually contain the name of the manufacturer or the model of hard drive.
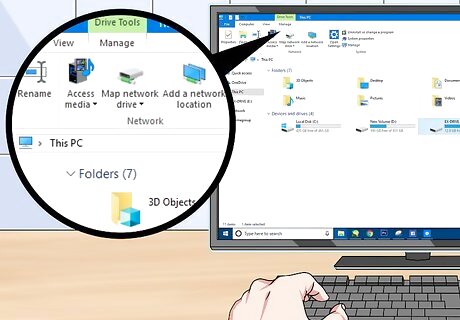
Click Manage. It's a tab in the upper-left corner of the window. A toolbar will appear below this tab.

Click Format. This option is on the left side of the Manage toolbar. Doing so prompts a pop-up window.
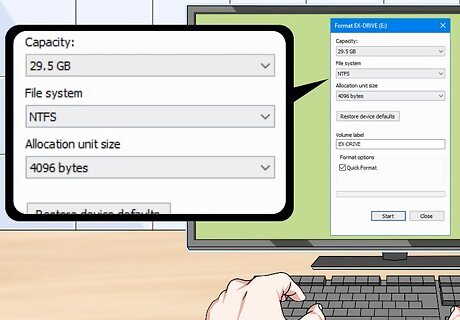
Select a format. Click the "File System" drop-down box, then click NTFS or exFAT in the resulting drop-down menu. NTFS is useful for Windows-only systems, while exFAT can be used on any computer (Macs included).
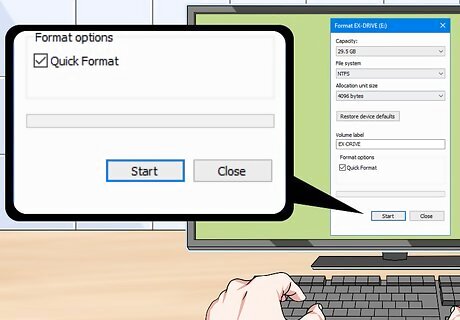
Click Start. It's at the bottom of the window.
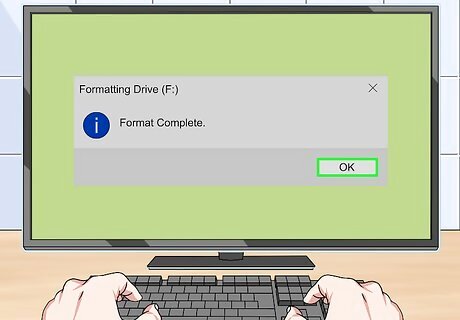
Click OK when prompted. Doing so confirms your decision and allows Windows to begin formatting the hard drive. Once the external hard drive has been formatted for your computer, you'll be prompted to click OK, at which point you can use the external hard drive as a second hard drive.
Adding an External Hard Drive on Mac
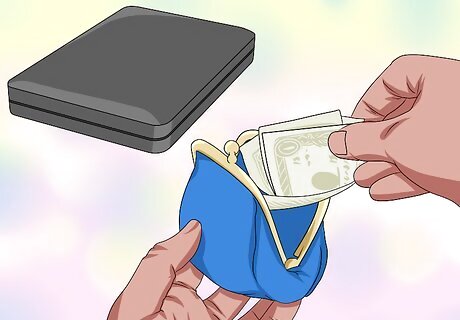
Buy an external hard drive. You'll generally want to buy an external hard drive that both has enough space for you and comes from a reliable manufacturer such as Western Digital or Seagate. Make sure that your selected hard drive has a Thunderbolt connector (also known as USB-C) since modern Macs don't support USB 3.0 connectors. When buying an external hard drive, it's often not much more expensive to buy a terabyte (TB) hard drive rather than a 500 gigabyte (GB) one. A one-terabyte hard drive will usually run under $100.
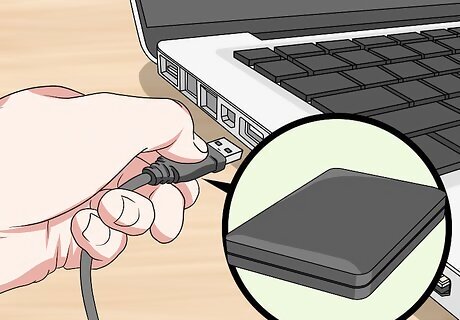
Attach the external hard drive to your computer. Plug the external hard drive's Thunderbolt cable into one of your Mac's USB-C ports. If you bought an external hard drive that has a USB 3.0 connector, you can buy a USB 3.0 to Thunderbolt 4 (or USB-C) adapter.

Click the Go menu item. It's in the menu bar at the top of your Mac's screen. A drop-down menu will appear. If you don't see Go here, click the desktop or open the Finder application to prompt it to appear.
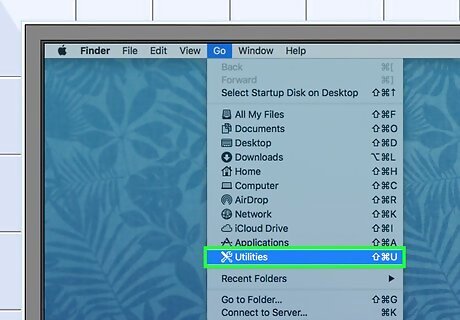
Click Utilities. It's in the Go drop-down menu. The Utilities folder will open.
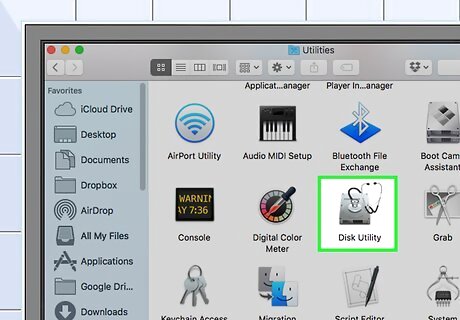
Open Disk Utility. Double-click the Disk Utility app icon, which resembles a hard drive with a stethoscope on it.
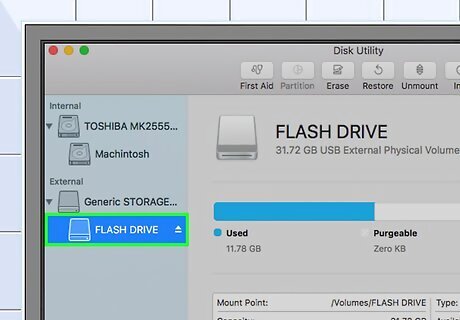
Select your external hard drive. Click the name of your external hard drive on the left side of the window. The external hard drive's name will usually contain the name of the manufacturer or the model of hard drive.
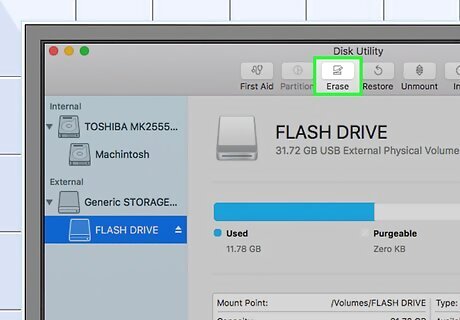
Click Erase. It's a tab near the top of the Disk Utility window. A pop-up window will appear.
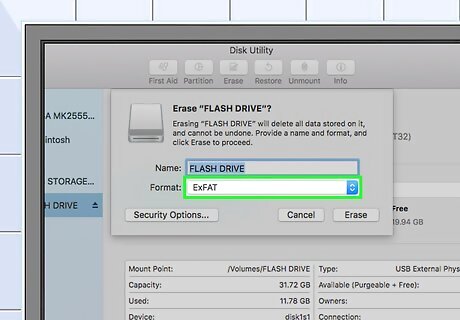
Select a format. Click the "Format" drop-down box near the top of the window, then click Mac OS Extended (Journaled) in the resulting drop-down menu. If you plan on using the external hard drive with other non-Mac computers, select ExFAT here instead.
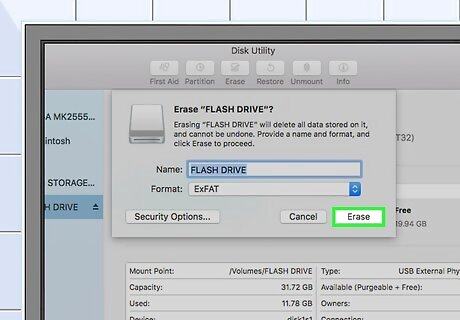
Click Erase. It's at the bottom of the window.
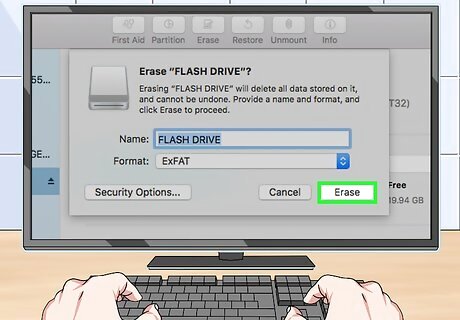
Click Erase when prompted. Doing so confirms your decision and prompts your Mac to begin formatting your hard drive. Once the formatting completes, you'll be able to use the external hard drive like any other storage space.


Comments
0 comment