
Using a Windows System Repair Disc
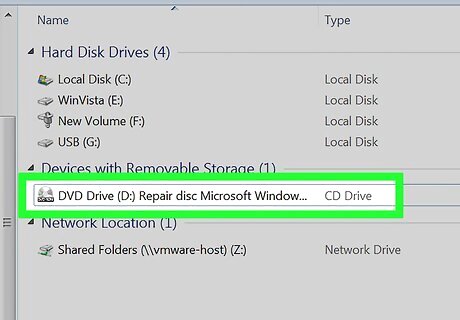
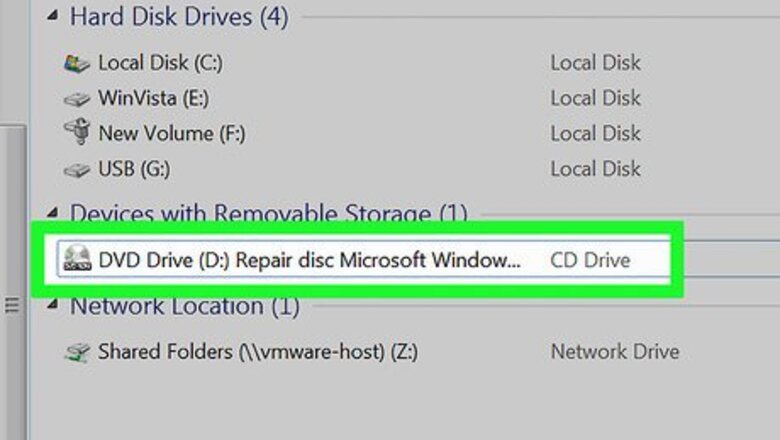
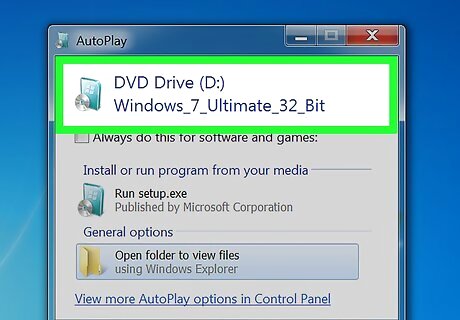
Insert a system repair disc into the DVD drive. Booting from a Windows 7 system repair disc will enable you to create temporary backdoor access to reset your password. If you don’t have a System Repair disc, you can create one on another Windows 7 computer.

Reboot your computer. When prompted, press any key on the keyboard to finish booting. If the computer boots back to the login screen instead, you’ll need to change the boot order in the BIOS before continuing with this method.

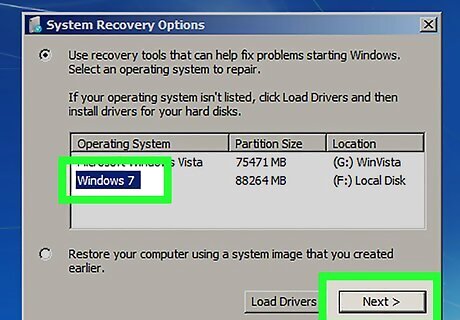
Select “Windows 7” under “Operating System.” When selected, the text will turn blue.
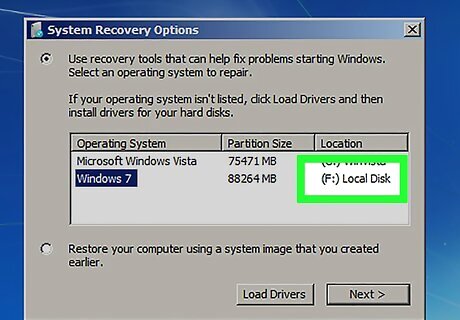
Make note of the drive letter under “Location.” For example, if you see (D:) Local Disk, the drive letter you should remember is “D:”
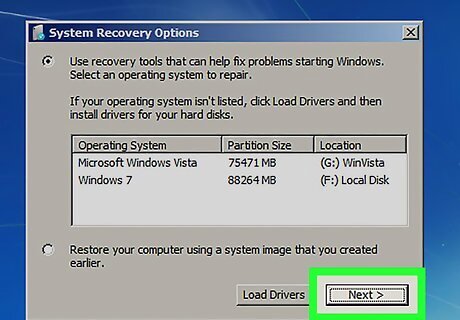
Click Next.

Click the “Command Prompt” link. A black screen with white text will appear.
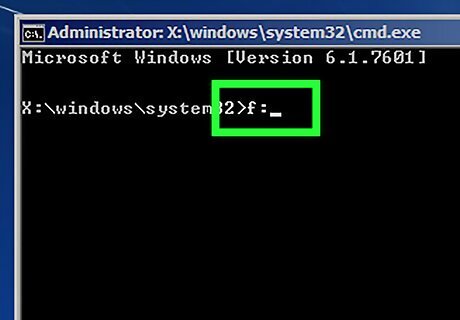
Type the drive letter at the command prompt. For example, if your drive letter was D:, type D:

Press ↵ Enter.

Create a backdoor to an elevated command prompt. Type the following commands, in order: Type cd windows\system32 and press ↵ Enter. Type ren utilman.exe utilhold.exe and press ↵ Enter. Type copy cmd.exe utilman.exe and press ↵ Enter. Type exit and press ↵ Enter.
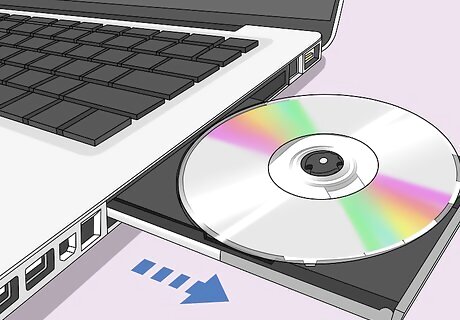
Eject the system repair disc.

Reboot the computer. The computer will boot back up to the login screen.

Click the “Ease of Access” icon. It’s at the left corner of the screen and is blue with a white compass. This will open the command prompt instead of the Ease of Access center, but don’t be alarmed!
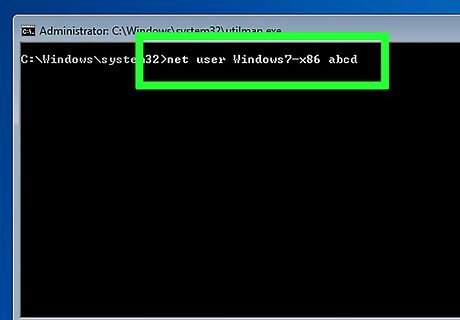
Type net user username newpassword. Replace “username” with the username of the account you need to access, and “newpassword” with a password you’ll remember.
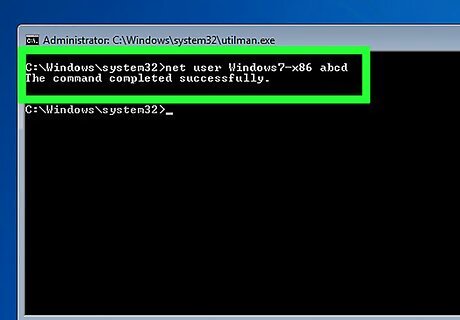
Press ↵ Enter.
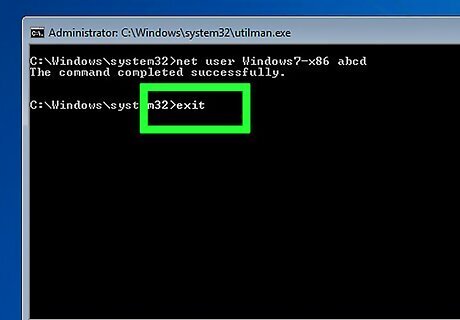
Close the command prompt.
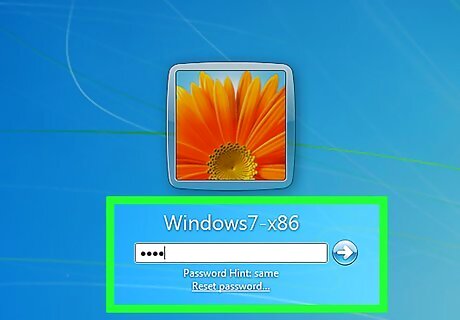
Log into Windows. You are now back into the computer with your regular account.
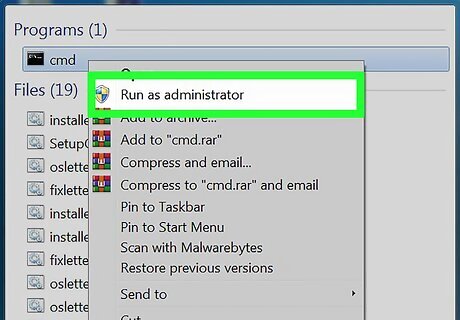
Open the command prompt as an administrator. Here’s how: Click the Start menu. Type cmd into the search box. Right-click “Command Prompt” in the search results and select “Run as administrator.” If prompted, confirm that you really want to run the program as an administrator. The command prompt will appear.
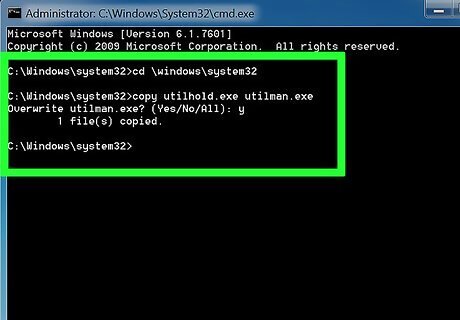
Remove the backdoor. Enter the following commands to remove the backdoor you created earlier: Type the drive letter you made note of earlier. For example, D:. Press ↵ Enter. Type cd \windows\system32\ and press ↵ Enter. Type copy utilhold.exe utilman.exe and press ↵ Enter.
Using the Windows Installation DVD
Put a Windows 7 installation DVD into the DVD drive. You can access an Administrator account by booting from DVD and making a few changes in the registry. It doesn’t have to be the same DVD you used to install Windows, so you can borrow one if necessary.

Reboot your computer. It should boot to a screen that asks you to choose a language. If the computer boots back to the login screen instead, you’ll need to change the boot order in the BIOS before continuing with this method.

Select your language and click Next.
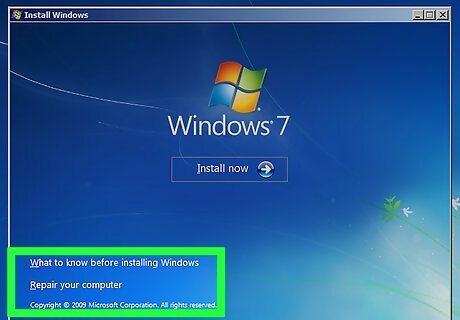
Click Repair your computer.
Select your Widows installation. Click the Windows 7 installation in the list. Unless you have other operating systems installed, it should be the only option. Click Next.

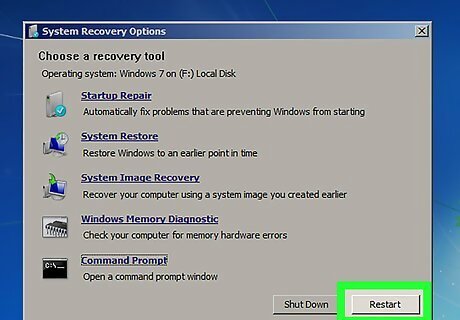
Click the “Command Prompt” link. It’s the last option at the bottom of the System Recovery Options screen. The command prompt will appear—it’s a black window with white text.

Type regedit and press ↵ Enter. The registry editor will appear.
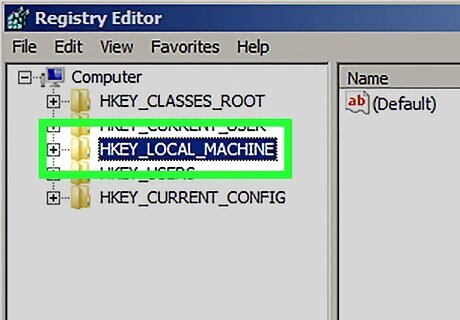
Click HKEY_LOCAL_MACHINE. It’s on the left side of the screen.
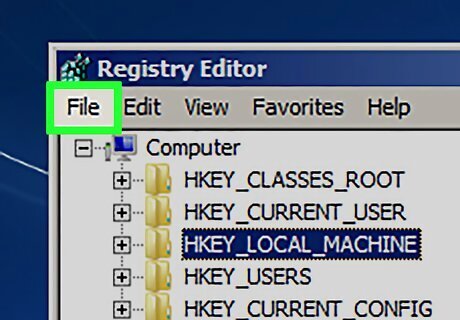
Click the “File” menu.
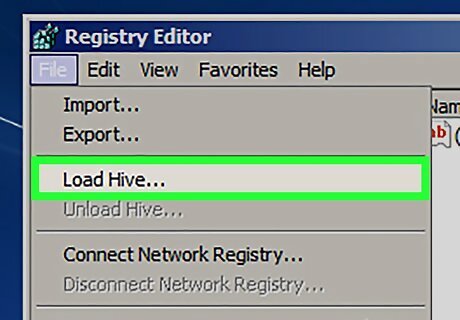
Select “Load Hive.”
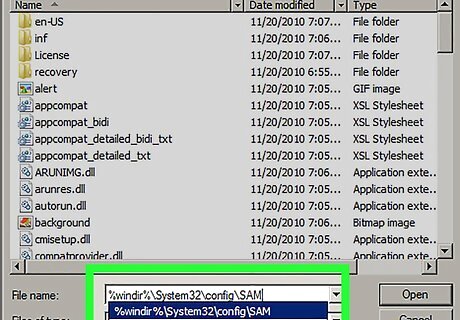
Type %windir%\system32\config\sam. You’ll be typing this into the “File name” field. Be sure to type it as shown.
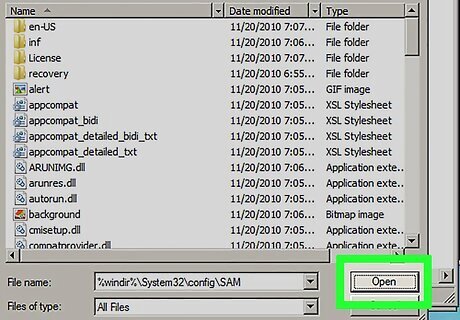
Click Open. Now you’ll see a screen asking you to enter a name for a “new hive.”
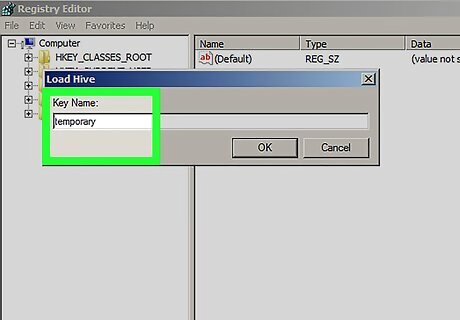
Type temporary. You can type anything, but this is a safe bet for the meantime.
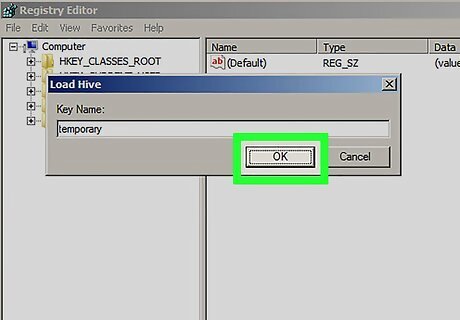
Click OK. Now you’ll return to the main registry editor.
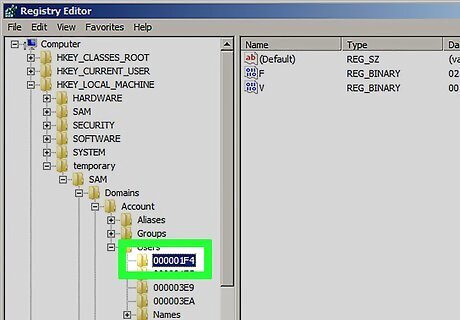
Navigate to the user registry key. Here are the steps to access “HKEY_LOCAL_MACHINE > temporary > SAM > Domains > Account > Users > 000001F4”: Click the + next to HKEY_LOCAL_MACHINE in the left pane. Click the + next to temporary. Click the + next to SAM. Click the + next to Domains. Click the + next to Account. Click the + next to Users. Click the + next to 000001F4. You should see an entry for F in the right panel.
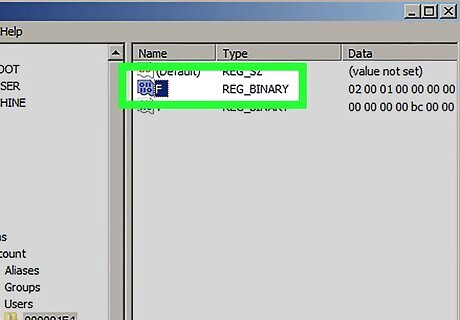
Double-click F in the right panel. A new window will appear containing many hexadecimal numbers.
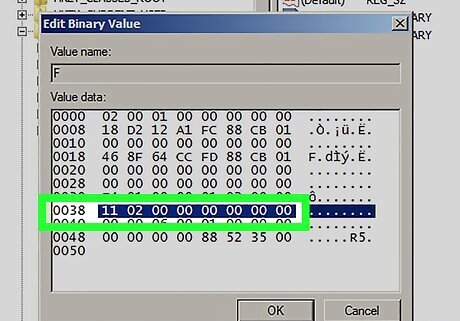
Find the line that starts with 0038. You will see 11 directly to the right of 0038.
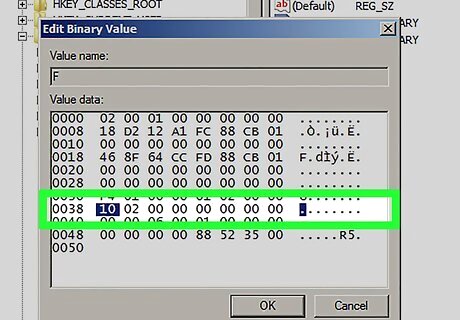
Change 11 to 10. Drag the mouse across the 11 so that only that number is highlighted (no spaces on either side) Type 10.

Click OK. The hard part is over!
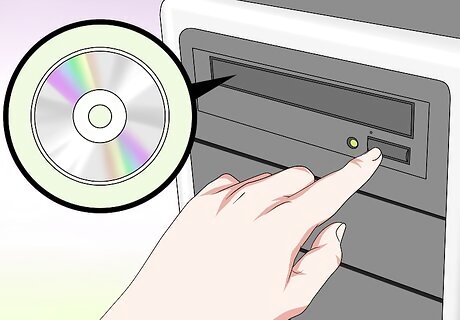
Eject the Windows DVD.
Restart the computer.
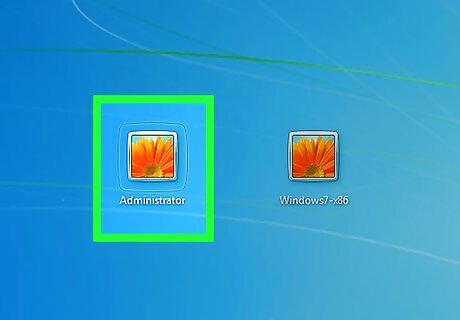
Click the Administrator account. This will give you full administrative access to Windows. Now you can reset the password for your regular admin account.
Using NTPassword
Access another computer. If you have access to another computer with internet access, you can download a utility called NTPassword that will help you reset your Windows 7 password. You’ll need to either burn a bootable copy of this utility or use it to create a bootable USB flash drive.
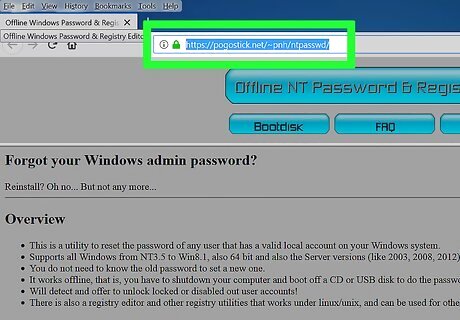
Navigate to NTPassword.
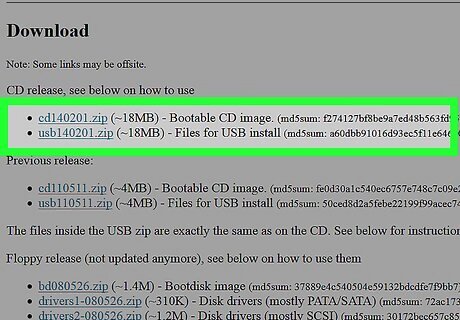
Select a version of NTPassword. Click one of the following buttons to download the NTPassword files: Click Download USB Version if you want to create a bootable USB flash drive. The drive you use should have nothing else on it. Click Download Disc Version to save the file (cd140201.iso) image to your computer. Once downloaded, you’ll be able to burn a bootable CD of this image.
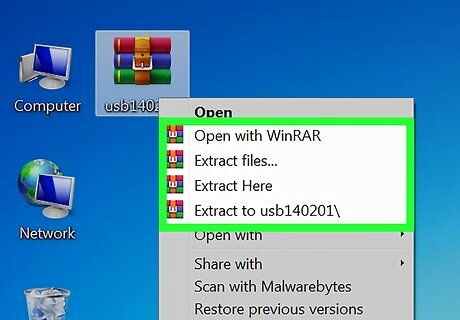
Create a bootable USB flash drive. If you choose Download USB Version: Unzip the downloaded file (usb140201.zip) to your USB flash drive. The files should be directly on the drive, not inside another directory. Click the Start menu and type cmd into the search box. Right-click “Command Prompt” in the search results and select “Run as Administrator.” Type cd x: (replace “x:” with the actual drive letter of your USB drive) and press ↵ Enter. Type X:syslinux.exe -ma X: (replace both X: with the actual drive letter) and press ↵ Enter. Remove the flash drive from the second computer.
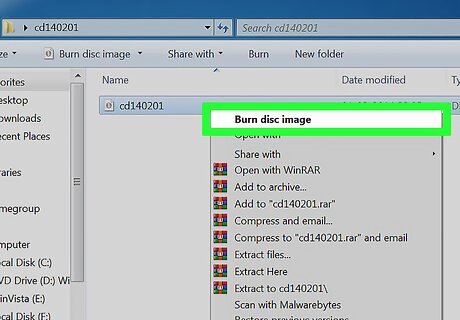
Create a bootable CD. If you choose Download Disc Version: Insert a recordable CD-R or DVD-R. Right-click the downloaded file (cd140201.iso) and select “Burn to disc.” Follow the prompts to create the disc. Eject the disc from the second computer once the burn is complete.
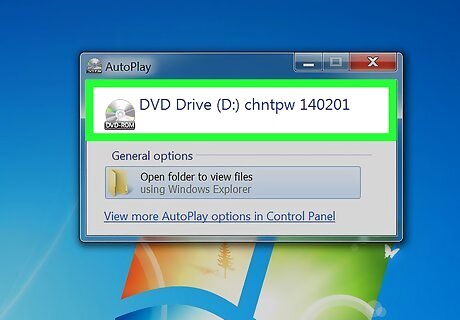
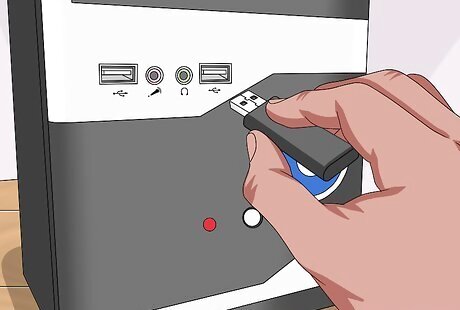
Insert the USB drive or CD into the problem computer.

Reboot the computer. The computer should boot to a black screen with white text that begins with “Windows Reset Password”. If the computer boots back to the login screen instead, you’ll need to change the boot order in the BIOS before continuing with this method.
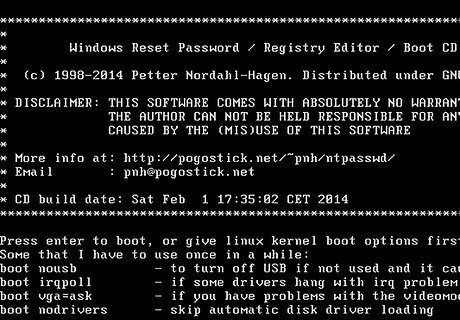
Press ↵ Enter.

Select the hard drive partition that contains Windows. Near the bottom of the screen you’ll see text that says “STEP ONE: Select disk where the Windows partition is.” Look at the partitions beneath “Candidate Windows partitions found.” Press the number (on the keyboard) next to the largest partition that does not say “Boot.” Press ↵ Enter.
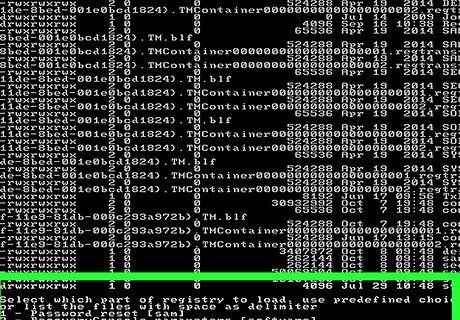
Press ↵ Enter to confirm the registry path. Now you’ll see “Select which part of registry to load, use predefined choices or list the files with space delimiter.”
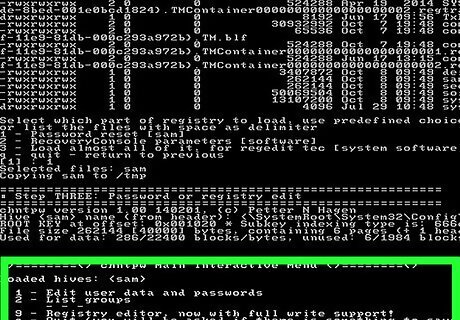
Press ↵ Enter. This accepts the default setting, “Edit user data and passwords.

Press ↵ Enter to accept the next default setting.
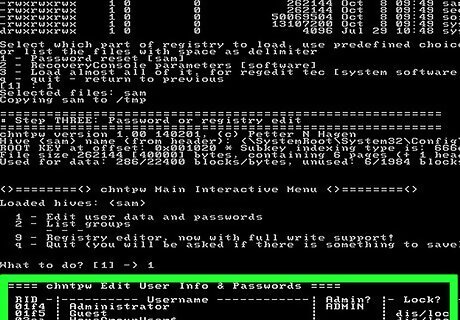
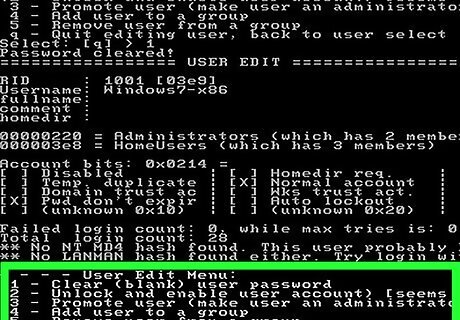
Select the user whose password you want to reset. Locate your account username under “Username” at the bottom of the screen. Find its corresponding “RID” number in the column to the left. Type the RID number and press ↵ Enter.
Press ↵ Enter.

Press 1 and then ↵ Enter. This clears the password for the specified user account.
Press q and then ↵ Enter. Now you’ll be prompted to save your changes.
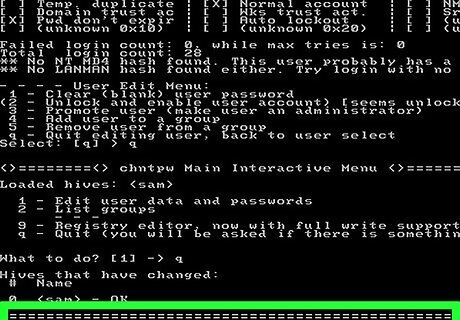
Press y and then ↵ Enter. This confirms you want to save the changes.
Eject the USB drive or CD.
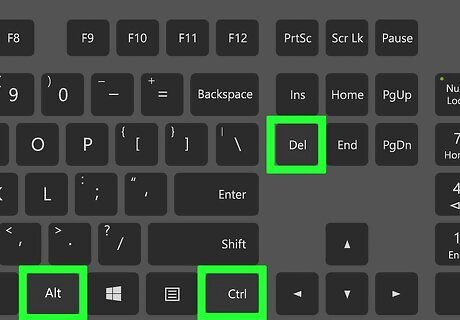
Press Ctrl+Alt+Del. Your computer will restart to the login screen, where you’ll be able to click your user name and set a new password
Using a Password Reset Disk
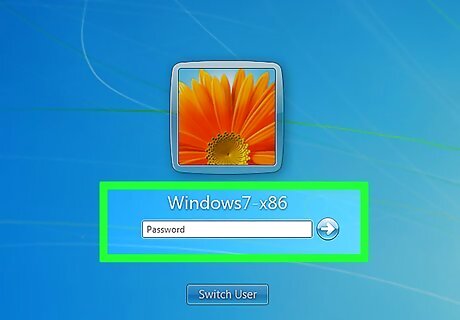
Try to log in to Windows. If you created a password reset disk at an earlier date, you can use it to get back into Windows. If you didn’t create a password reset disk, try another method.
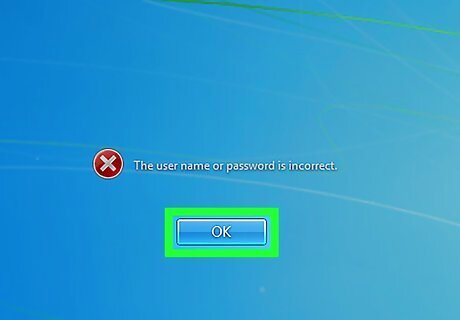
Click “OK” on the password error message.
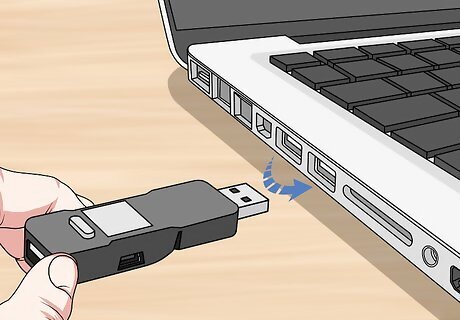
Connect your USB Password Recovery Disk to the computer.
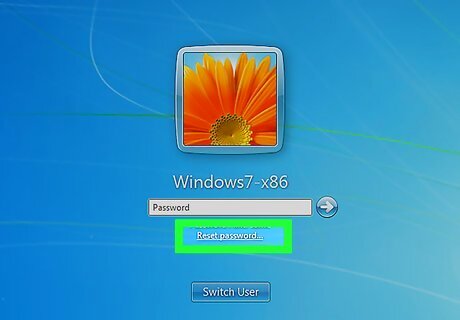
Click the “Reset password…” link. It’s just beneath the password blank. This will launch the Password Reset Wizard.
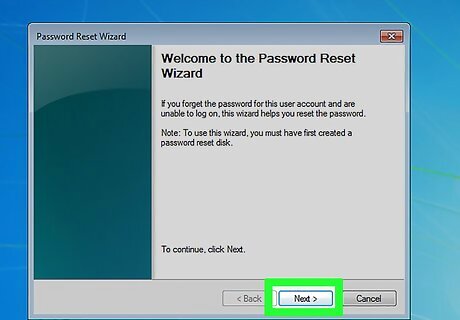
Click Next.
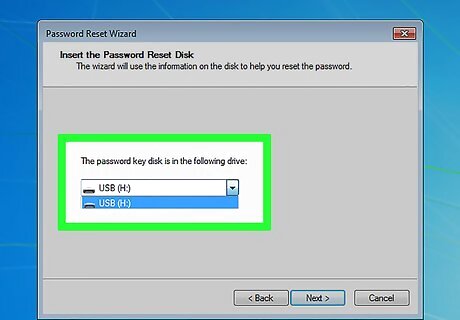
Select your USB drive from the drop-down menu. It’s usually called something like “Removable Disk.”
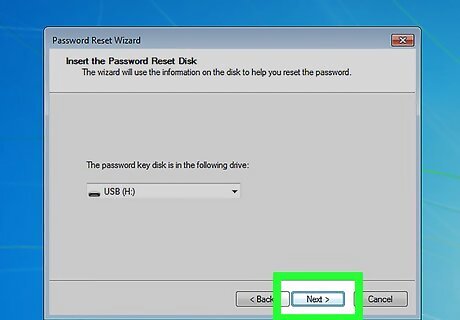
Click Next.
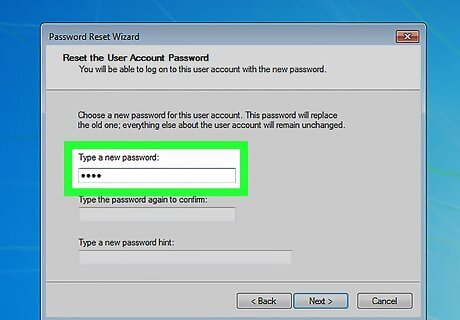
Type a new password. Enter it into the first blank, beneath the text “Type a new password.”
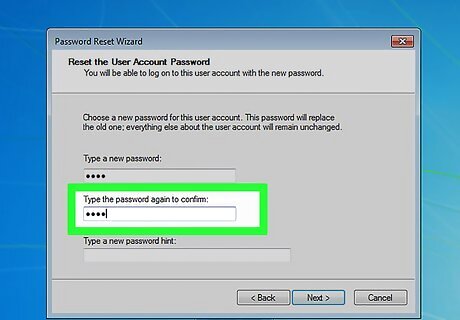
Type the password again. This time, type it into the second blank, under “Type the password again to confirm.”
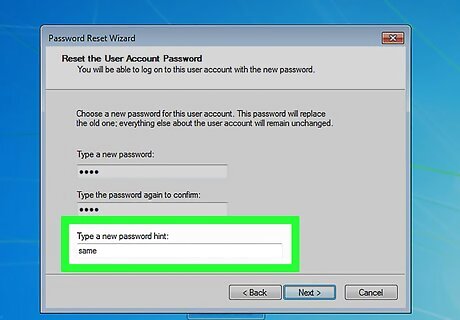
Enter a password hint. You’ll do this in the third, final box on the screen. Type something that’ll make you remember the new password in case you forget it.
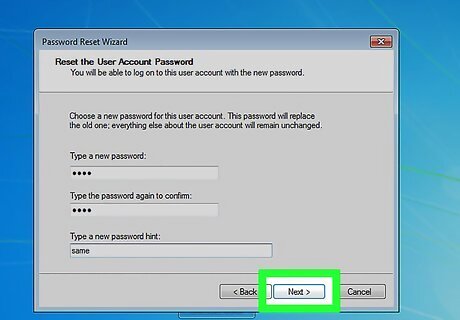
Click Next. If you see an error that says “An error occurred while the wizard was attempting to set the password,” you’re using the wrong password reset disk.
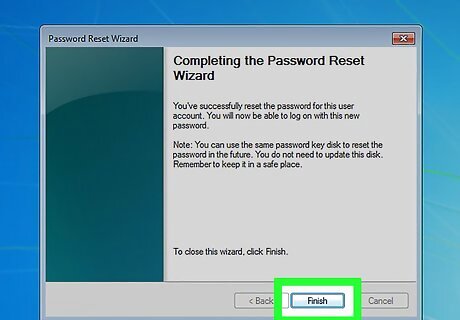
Click Finish. This will close the password reset wizard.

Log into Windows. You should now be able to log in to Windows using your new account password.


Comments
0 comment