views
Using the Color Picker
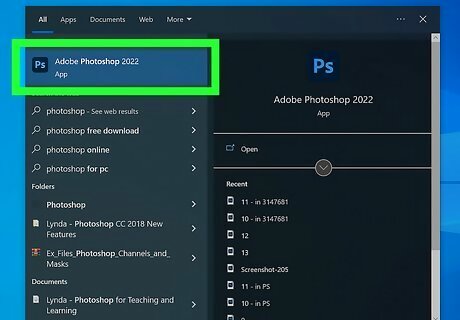
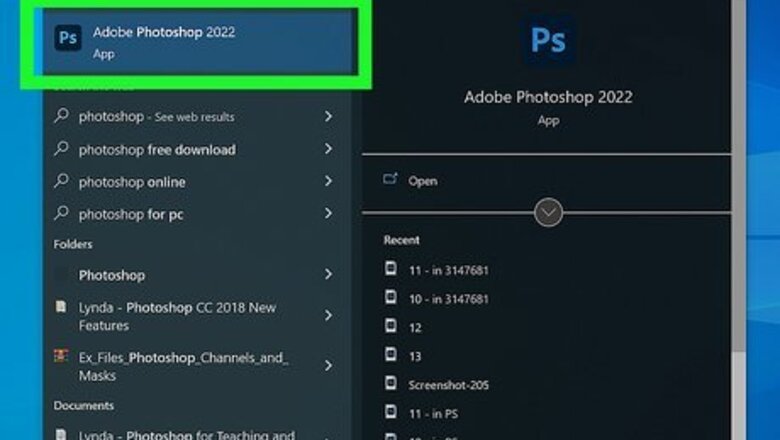
Open Photoshop. Photoshop has an icon that resembles a blue square with "Ps" in the middle. Click the Photoshop icon to open Photoshop. You must have a subscription to Photoshop or Adobe Creative Cloud in order to download and install Photoshop. You can also sign up for a free 7-day trial at https://www.adobe.com/products/photoshop/free-trial-download.html.
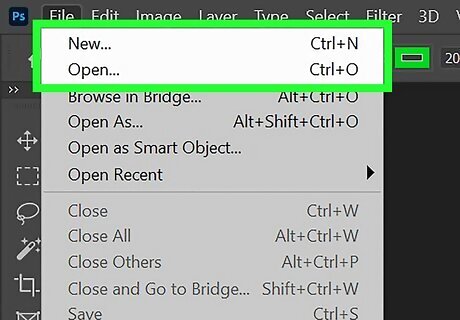
Open or create a new project. To open an existing Photoshop project, click Open on the title page and then select the project you want to open. To create a new Photoshop file, click New on the title page and then enter the height and width or your Photoshop file. Then click Create New. You can open or create a new file at any time in Photoshop. To do so, click File in the menu bar at the top and then click New or Open.

Click the current foreground color square. The two overlapping colored squares near the bottom of the toolbar on the left show you the current foreground and background colors. The foreground color is the square that's on top. Clicking this opens the Color Picker. The default foreground and background colors are black and white.
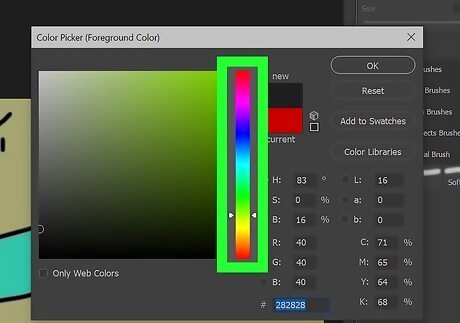
Drag the vertical slider bar to select a hue. It's the thin, rainbow-colored strip near the center of the Color Picker window. As you drag the slider, the color hue in the large box on the left changes. Alternatively, when you hover over your Photoshop project outside of the Color Picker window, your cursor will turn into an Eyedropper icon. This allows you to click the color you want to select in your Photoshop image to select a color.
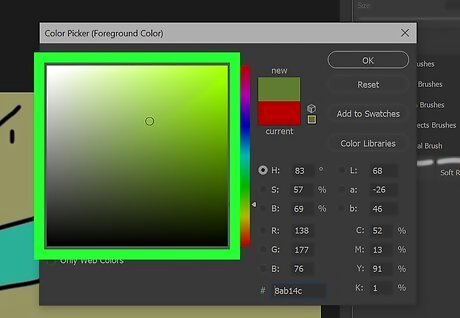
Click a shade in the color field box on the left. It's the biggest square displaying different shades of colors. When you click a color, the foreground color box will update to reflect the change. The "Current" and "New" boxes at the top of the Color Picker window allow you to compare the newly-selected color and the previous color you had selected. If you only want to see web-safe colors, check the "Only web colors" box at the bottom of the Color Picker window before selecting a color. You can also change the way color is displayed in the color field by clicking one of the radio options next to "H" (Hue), "S" (Saturation), "B" (Brightness), "R" (Red), "G" (Green), "B" (Blue), "L" (Luminance), "a" (red/green value), "b" (blue/yellow value).
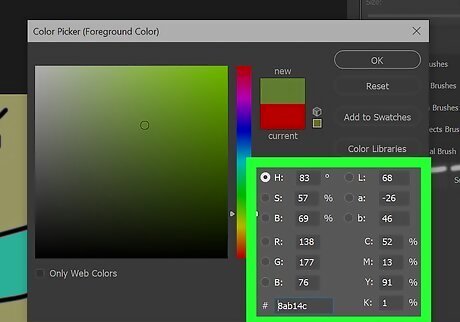
Select a color by entering its numerical value (optional). This step only applies if you need to select a color by specifying its RGB, CMYK, LAB, hexadecimal, or HSB values. All of the color value options are at the bottom-right corner of the Color Picker. Enter the numeric value next to the one of the lettered boxes to select a color value. The following is a description of each color value box. HSB values are percentages of Hue, Saturation, and Brightness that range from 0 to 360. They correspond to a location on the color wheel. Enter the exact number next to "H," "S," and "B," to select a color using HSB percentages. The RGB scale lets you enter the values of Red, Green, and Blue separately. RGB values are used to display color on a display screen, such as a computer monitor, television, or mobile device. 0 is no color, while 255 is pure color. Enter a number next to "R," "G," and "B" to select a color using RGB values. The LAB model is lets you specify the Luminance (it ranges from 0 to 100), A (which is how red or green the color is), and B (how blue or yellow the color is). A and B values can range from -128 to 127. CMYK is used in colored print material and lets you specify the percentage of Cyan, Magenta, Yellow, and Black ink in the color. Percentages range from 0 to 100. Enter the amount of ink you want to use in a color next to "C," "M," "Y," or "K" to select a color using CMYK values. The hexadecimal field at the bottom next to a "#" lets you enter a color's hexadecimal code. Hexadecimal color codes are used in web design to determine the exact color a web browser displays. This is a 6-digit code that uses three sets of numbers, each ranging from 00 (minimum luminance) to ff (maximum luminance).
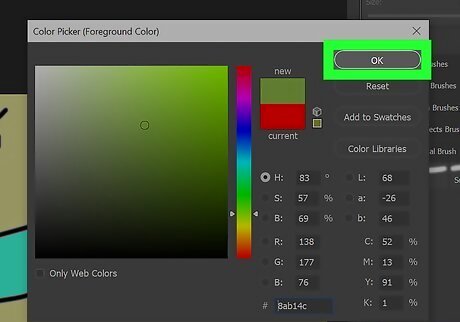
Click OK. It's at the top-right corner of the Color Picker. You can now draw, paint, and create objects in the new foreground color.
Using the Eyedropper Tool
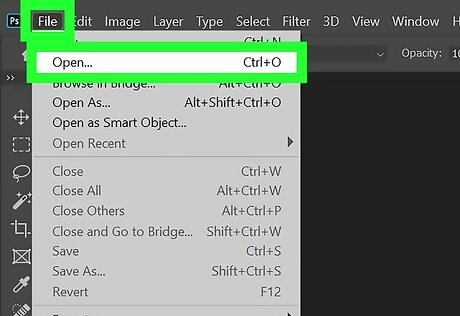
Open an image in Photoshop. The eyedropper tool allows you to select an exact color from an existing image. To use the eyedropper tool, you need to have an image you are working on open in Photoshop. There are a couple ways to open a photo in Photoshop. Use one of the following steps to open to do so: Right-click an image you want to open in Photoshop and select Open with. Then select Photoshop. Open Photoshop and click Open on the title page. Navigate to and select the image file you want to open. Then click Open. From within Photoshop, click File in the menu bar at the top. Then click Open. Navigate to and select the image file you want to open. Then click Open.

Click the Eyedropper tool. It has an icon that resembles an eyedropper. It's in the toolbar that runs along the left side of Photoshop. Alternatively, you can press i on your keyboard to select the eyedropper tool.

Adjust the eyedropper tool options (optional). You can find options to adjust how the Eyedropper tool functions in the menu bar at the top of Photoshop. The options are as follows: Sample Size: Use the "Sample Size" drop-down menu at the top to select a sample size. "Point Sample" will select the color of the exact pixel you click on. You can also use this drop-down menu to select a square pixel area that Photoshop will use to select an average color. The square pixel area you can select is between 3 by 3, up to 101 by 101. Sample: Use the "Sample" drop-down menu at the top to select which layer you want the eyedropper to sample from. You can select "Current Layer," "Current & Below", "All Layers," "All Layers no Adjustments," or "Current & below no Adjustments." Show Sampling Ring: Click the checkbox next to "Show Sampling Ring" at the top to display a sampling ring around the eyedropper tool when you select a new color. The top half of the sampling ring shows the color you are selecting. The bottom half of the sampling ring shows the old foreground color.
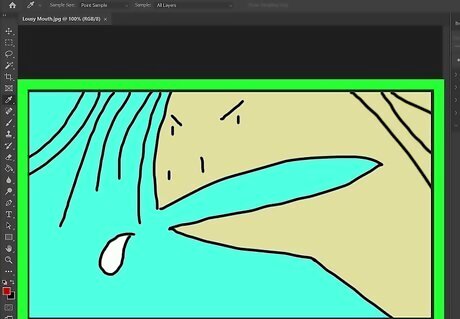
Click the color you want to set as the foreground color. This automatically replaces the previous foreground color with the color you selected. Alternatively, you can click and drag the eyedropper tool until you find the color you want. The color in the foreground square in the toolbar updates as you drag. To use the eyedropper tool to select a background color, hold Alt or Control while clicking the color you want to select for your background color.
Using the HUD Color Picker
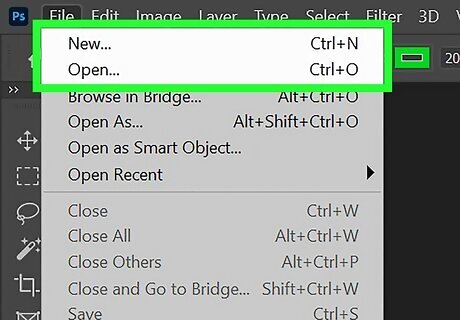
Open or create a new project. To open an existing Photoshop project, click Open on the title page and then select the project you want to open. To create a new Photoshop file, click New on the title page and then enter the height and width or your Photoshop file. Then click Create New. You can open or create a new file at any time in Photoshop. To do so, click File in the menu bar at the top and then click New or Open.
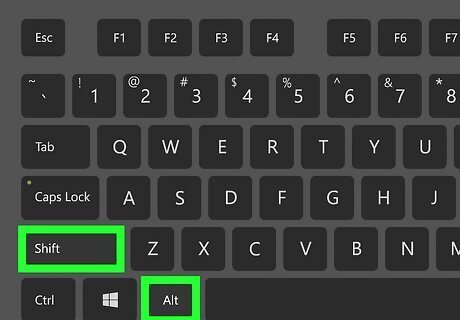
Press and hold Control+⌥ Option+⌘ Command on Mac or ⇧ Shift+Alt on Windows. This is the keyboard shortcut to display the HUD color picker.
Right-click and hold while pressing the keyboard shortcut. This displays the HUD color picker where you right-click. The HUD color picker will remain on screen for as long as you hold down the right mouse button.
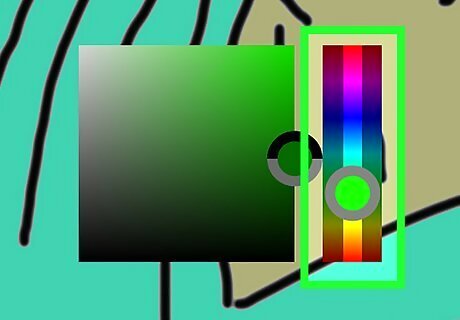
Use the rainbow colored slider to pick a color hue. While holding down the right mouse button, hover over the thin slider on the right to select a color hue. While using the HUD color picker, you will see an icon that resembles an eyedropper with a ring around it. The top half of the ring is the color you are currently selecting. The bottom half of the ring is the old color.
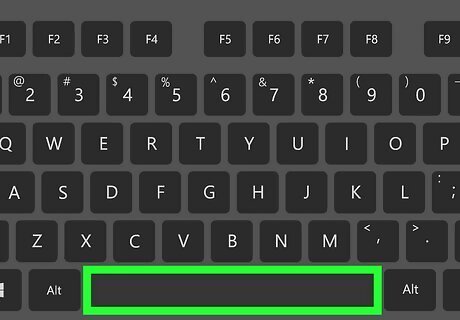
Press and hold Space to hold a color. While using the HUD color picker, it will automatically select whichever color you are hovering over in the slider or the color field box. To hold a color and prevent it from changing, press and hold the Space bar.
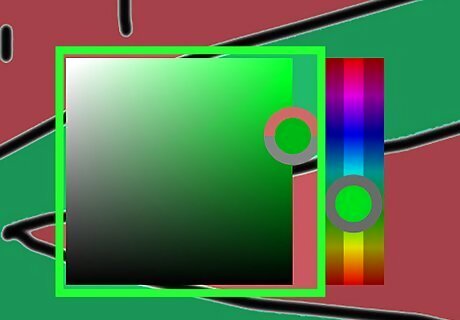
Use the color field square to select a color shade. While holding the right mouse button, hover over the large color field on the left to select the shade of the color.
Release mouse button. When you release the mouse button, the new color you select will be the last color you hovered over in the HUD color picker.
Using the Color Panel
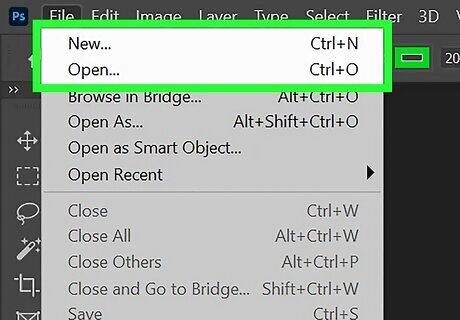
Open or create a new project. To open an existing Photoshop project, click Open on the title page and then select the project you want to open. To create a new Photoshop file, click New on the title page and then enter the height and width or your Photoshop file. Then click Create New. You can open or create a new file at any time in Photoshop. To do so, click File in the menu bar at the top and then click New or Open.
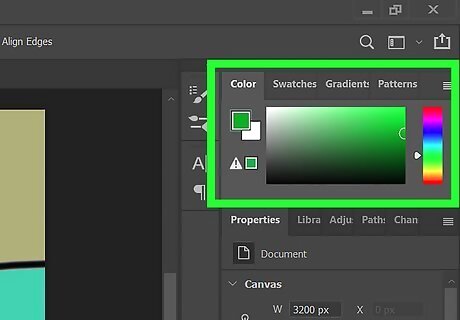
Locate the color panel. By default, the color panel is in the upper-right corner of the screen. It will have a color slider and color field square, similar to the color picker, or slider bars you can use to adjust the color. If it is closed, it will appear as an icon that resembles a painters pallette in the menu to the right. If you do not see the color panel, click Window in the menu bar at the top. Then click Color to display the color panel.
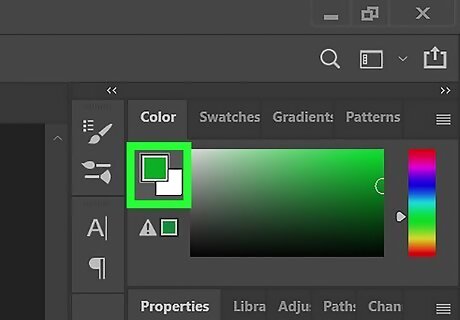
Select the foreground color. You should see two overlapping colored squares in the color panel. The one on top left is the foreground color. Click this square to select the foreground color.
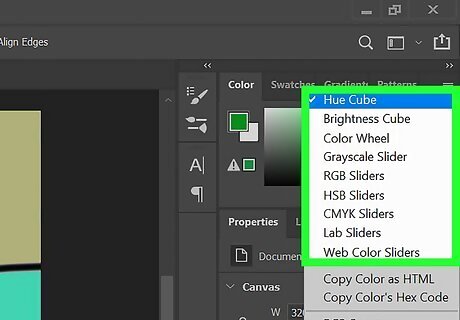
Select a color panel mode (optional). To do so, click the icon with four horizontal lines in the upper-right corner of the color panel. Then select a mode. The modes you can select are as follows: Hue Cube: This mode is similar to the color picker. It has thin, rainbow colored slider you can use to select a hue. It also has a large color field square that allows you to pick the shade of the hue. Brightness Cube: The brightness cube is like the reverse of the hue cube. The large square displays a variety of hues. The small, thin strip on the side is brightness slider. It allows you to adjust the shade of the hues in the large square. Greyscale Slider: This mode doesn't allow you to select color. It only allows you to select shades of grey. It uses a single slider bar that allows you to select a value from 0 (pure white) to 100 (pure black). Everything in between is a shade of grey. RGB Sliders: RGB colors are used in digital displays, like computer monitors, television screens, or mobile devices. This mode uses three slider bars for R (Red), G (Green), B (Blue). Each slider allows you to select a value between 0 and 255. By mixing various values of these three colors, you can select virtually any color. HSB Sliders: HSB stands for Hue, Saturation, and Brightness. This mode displays three slider bars. The H slider bar is rainbow colored and allows you to select a hue. The S slider bar allows you to adjust the saturation of the hue from pure white to a very rich hue. The B slider bar allows you to adjust the brightness from pure black to pure color. CMYK Sliders: CMYK colors are used in print. This displays four slider bars that represent the four primary color inks used in print. They are C (Cyan), M (Magenta), Y (Yellow), K (Black). Each slider allows you to select a value between 0 and 100. By combining these four colors, you can select virtually any color. Lab Sliders: This displays three slider bars for Lab colors. The L slider allows you to adjust the luminosity. You an select a value between 0 (black) and 100 (white). The A slider bars allows you to select a value between -128 (green) and 128 (red). The b slider bars allows you to select a value between -128 (blue) and 128 (yellow). Web Color Sliders: Web color sliders work exactly like RGB sliders, but they only allow you to select colors that are safe for the internet.
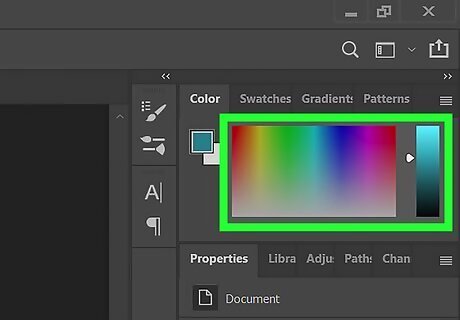
Select a color. If you are using the Hue Cube, use the thin, rainbow slider to pick a color hue. Then use the large color field square to pick a shade for the color. If you are using the Brightness Cube, use the large square to select a color hue, then use the thin slider to select a color shade. For all other modes, use the slider bars to adjust the color hue and brightness.
Using Swatches
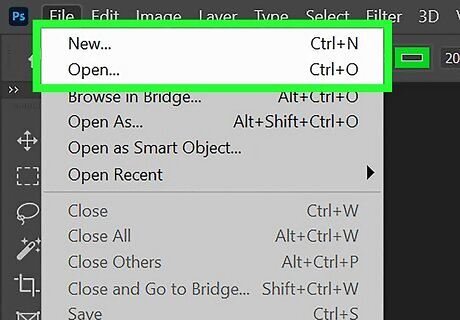
Open or create a new project. To open an existing Photoshop project, click Open on the title page and then select the project you want to open. To create a new Photoshop file, click New on the title page and then enter the height and width or your Photoshop file. Then click Create New. You can open or create a new file at any time in Photoshop. To do so, click File in the menu bar at the top and then click New or Open.
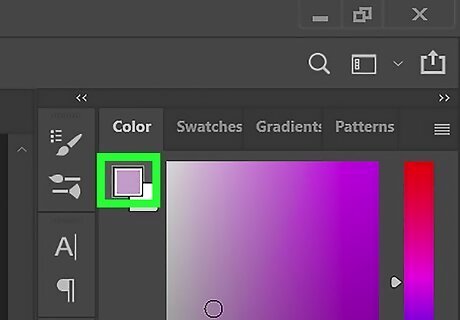
Select the foreground color square. You should see two overlapping squares at the bottom of the toolbar to the left and in the Colors panel. The one on top is the foreground color. Click it to select the foreground color.
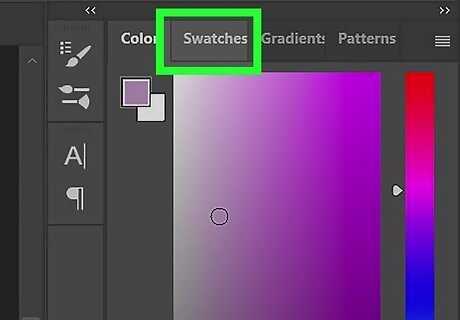
Open the Swatches panel. To do so, click the tab that says Swatches to the left. It may also appear as an icon that resembles a patchwork of squares of different shades of grey. If you do not see the Swatches panel, click Window in the menu bar at the top and then click Swatches.
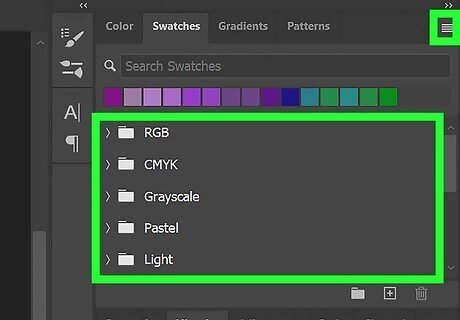
Select a swatch library (optional). The default swatch library has a variety of basic colors you can select from. You can also load one of the pre-saved swatch libraries. To do so, click the icon that resembles four horizontal lines. Then click the swatch library you want to load. If you want to return to the default swatch library, click the icon with four horizontal lines and click Reset Swatches. You can also add swatches, as well as, save and load your own swatch libraries.
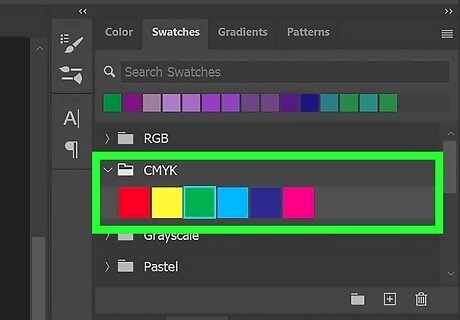
Click one of the colored swatches. This selects that color as your foreground color.
Using Libraries
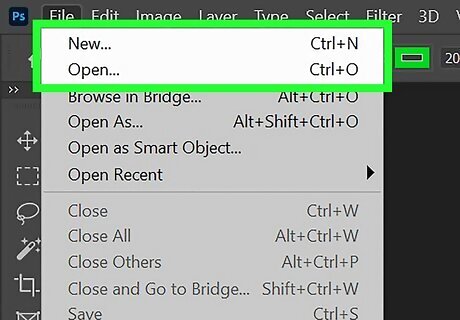
Open or create a new project. To open an existing Photoshop project, click Open on the title page and then select the project you want to open. To create a new Photoshop file, click New on the title page and then enter the height and width or your Photoshop file. Then click Create New. You can open or create a new file at any time in Photoshop. To do so, click File in the menu bar at the top and then click New or Open.
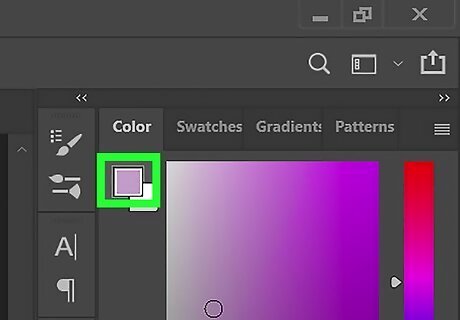
Select a foreground color. Use any method you wish to select a foreground color.
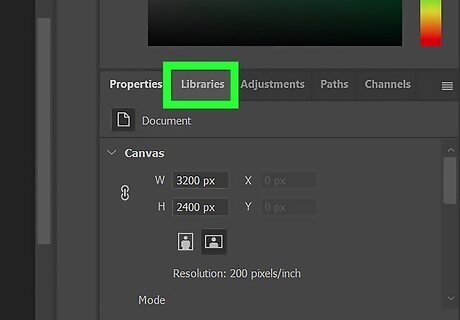
Open the Libraries panel. To do so, click the Libraries tab at the top of the panel on the left. If you do not see the Libraries panel, click Window in the menu bar at the top. Then click Libraries. Libraries are not available in older versions of Photoshop.
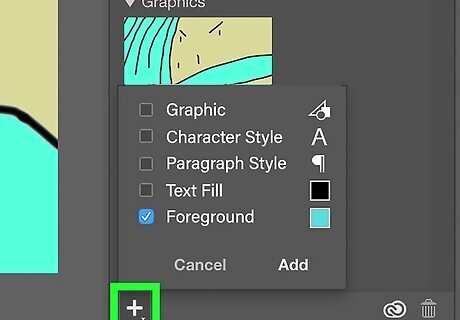
Click + at the bottom of the Libraries panel. It's in the lower-left corner. This displays a pop-up menu.
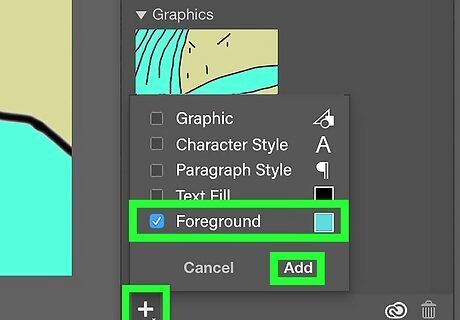
Ensure "Foreground Color" is checked and click Add. This adds the foreground color to your Color library so you can access it later. You can access any of the colors saved to your Library on any Photoshop installation as long as you are logged in with your Adobe ID.
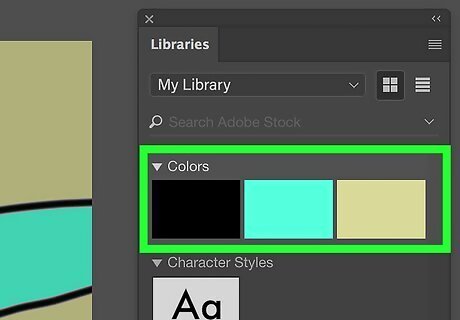
Click a color in your library. Colors are listed below "Colors" in the Libraries panel. This selects the color as your foreground color.





Comments
0 comment