views
Drawing a Cartoon Fox
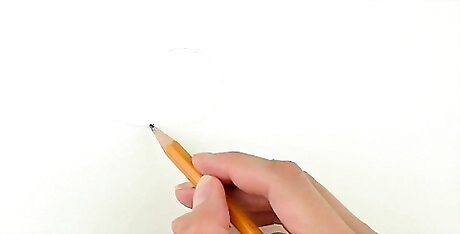
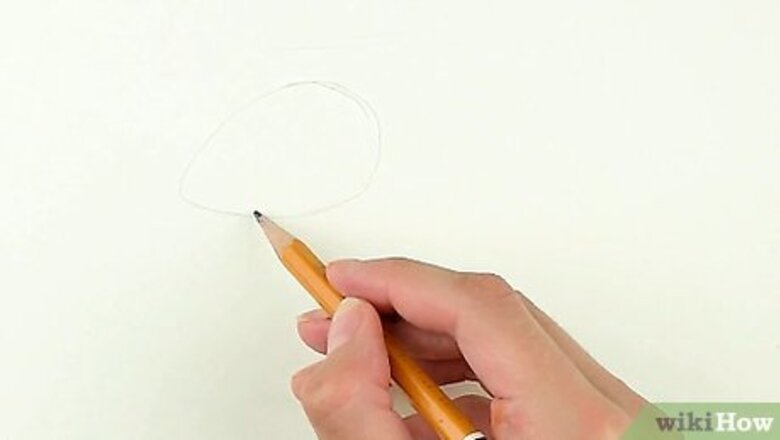
Sketch in the head as a large egg-like shape centered on the page. Tilt the egg on its side—for instance, so the narrower part of the egg’s oval is pointed to the left. Since this is a cartoon fox, feel free to make the head big! Sketch lightly with a pencil so that you can erase any mistakes or extra lines at the end.
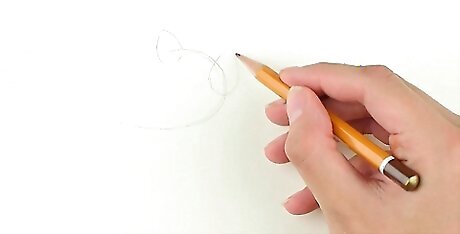
Draw the ears with 2 smaller egg-like shapes on top of the head. Imagine the head as a clock face and place the ears at about the 12 and 3 o’clock positions. Make the far-side ear “egg” point straight up, and the near-side ear lean towards the fox’s (soon to be drawn) tail at about a 30-degree angle.
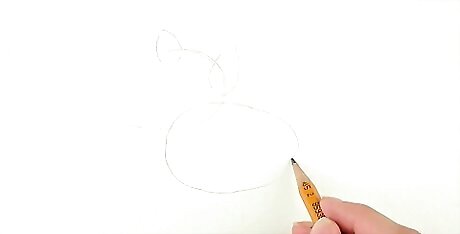
Make an oval for the body that’s about the same size as the head. Center this oval beneath the near-side ear and overlap it slightly over the lower section of the head. Since this is a cartoon fox, you can adjust the proportions to your liking. If you want the head to be larger than the body, go for it!
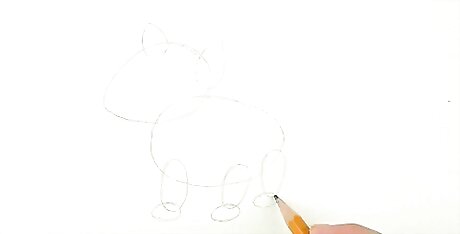
Sketch in 3 pairs of ovals for 2 front legs and a rear leg. For the legs, space out 3 upright ovals fairly evenly across the bottom of the body oval. Roughly the top half of each leg oval should overlap the body oval. Add 3 smaller horizontal ovals at the bottoms of the legs to represent the feet. These should overlap the lower legs by about half. There are only 3 legs visible due to the viewing angle for this cartoon fox In other words, the far-side rear leg is hidden behind the near-side rear leg.
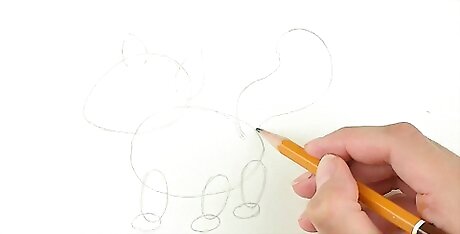
Add a cloud-, thought bubble-, or bean-shaped tail. It’s a bit hard to describe the shape the tail should have—perhaps it’s a question mark-shaped balloon filled with too much air! Anyway, extend this curvy tail off the rear-end side of the body oval, overlapping it only slightly. Make the tail nearly the same size as the head and at about the same level.
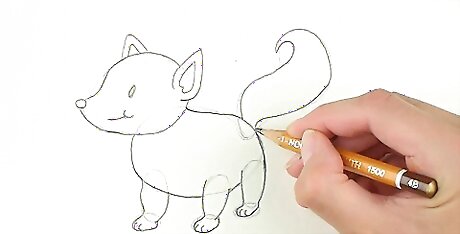
Define the features of the fox within your rough outline. For instance, give the tail more of an upward curl within the outline you just made. Likewise, define the insides of the ears and the toes on the paws. Add a curved “dent” to the top front of the head oval to help define the muzzle, then sketch in a smiling mouth and a rounded nose and eyes. Since this is a cartoon fox, there’s lots of room for individuality here. You can make your fox look a bit more human, a little more realistic, or any other way you like!
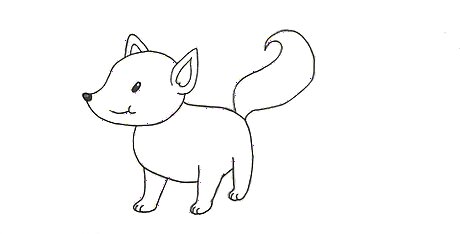
Darken the finishing lines and erase your original sketching lines. Go over the features you just created with a pen or marker to make them permanent. After that, use an eraser to get rid of any excess pencil lines from your original sketching.
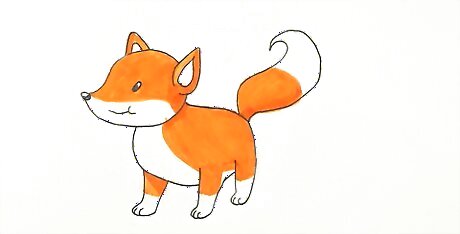
Color your cartoon fox to finish it off. “Burnt orange” is a good color choice for a fox, but you might want to give a cartoon fox more of a reddish color. Add in some off-white areas on the chest, muzzle, lower legs, paws, and tail. You can use the layering technique to blend colored pencils. For example, you can color the area red. Then color yellow on top of it to create orange. If you like to see the texture of the pencil marks, just add one color on top of the other. Otherwise, rub those colors with your finger to blend them.
Making a Lifelike Standing Fox
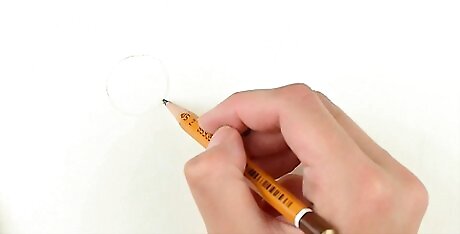
Sketch a circle in the middle of the page for the fox’s head. Rather than trying to draw a perfect circle, make it a bit flattened on the lower right side—if that’s the side where you want the fox’s neck and body to attach to its head. Sketch the circle lightly with a pencil. Do all of the preliminary sketching in pencil and use a light touch. This way, you can easily erase any unnecessary pencil lines as you flesh out the details of the drawing.
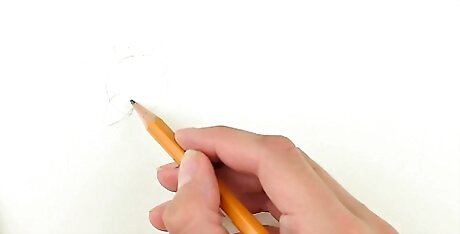
Add 3 egg-shaped ovals to the head for the ears and muzzle. If you imagine the head as a clock face, place the ears at roughly 10 and 1 o’clock. Make the muzzle a bit larger than the ears and place it at about 7 o’clock. The narrower “tops” of the egg shapes should protrude beyond the circular outline of the head. About two-thirds of the left ear, one-third of the right ear, and half of the muzzle should extend beyond the head.
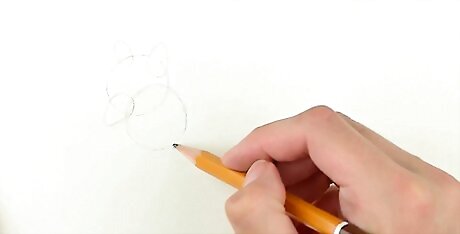
Overlap the bottom right of the head with a slightly larger circle for the neck. Make this circle about one-third larger than the head, and give it a bit of an oval shape. About one-third of it should overlap the lower right side of the circle for the head.
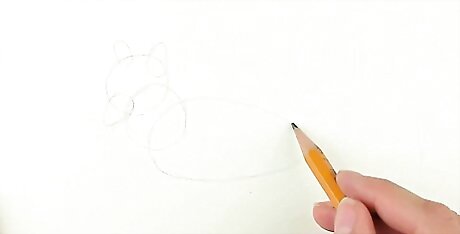
Sketch out a much larger oval to represent the fox’s body. This oval should extend to the right of and slightly below the circle for the neck. It should also overlap the neck circle and just touch the circle that represents the head. The body oval should be about 1.5 times taller than the neck circle and about 3 times wider.
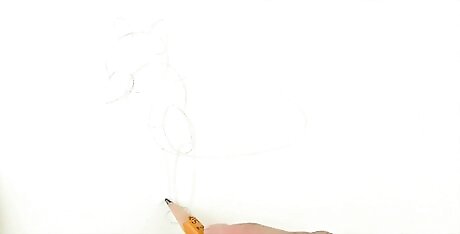
Connect a set of elongated ovals to represent the front legs and feet. Elongate the shoulder oval vertically, make it overlap the neck oval slightly and run to just below the body oval, and tilt it about 30 degrees towards the front of the fox. Make the leg oval about twice as long and half as wide, and extend it straight down from the shoulder. Create the foot oval at a right angle to the leg. After finishing the outline for the near-side front leg, sketch in the front portion of the leg and foot ovals of the far-side front leg. Make them extend just a bit in front of the near-side leg.
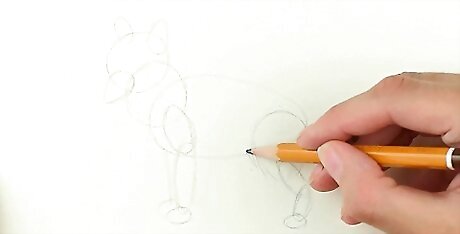
Follow a similar process with 4 ovals for the rear legs and feet. Make the rear shoulder about 1.5 times as long and twice as wide as the front shoulder. Instead of a single leg oval, draw 2 ovals that meet at 30-degree angles to represent the knee joint. Make the back foot oval the same size as the front foot. A fox’s back knees bend towards its tail, not towards its head. As with the far-side front leg, create overlapping elements of the far-side rear leg in similar proportion to the near-side rear leg.
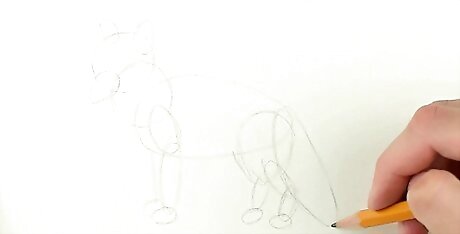
Draw the tail out of a long, nearly banana-shaped oval. Connect it to the back of the body oval and run it down to the ground level where the fox’s feet are. Make the oval wide enough to partially overlap the near-side rear shoulder and knee. Sketch the tail at roughly the same angle as the upper rear leg. Make the tail about the same length as the body oval, but more narrow by about half.
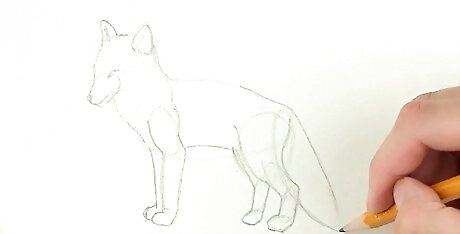
Refine the fox's body shape and add facial features. After you’ve finished outlining the fox using various oval shapes, add definition to its various features. Make the body leaner in the abdomen, and contour the legs to give a more muscular look. Make the tail a bit wavy, and use small curved lines to add indications of fur on the tail and at the front of the chest. Foxes have narrow, somewhat football-shaped eyes, lean muzzles with slightly-rounded noses, and angular but slightly-rounded ears. Refining the facial features may be the toughest part, so refer to images of foxes for guidance.
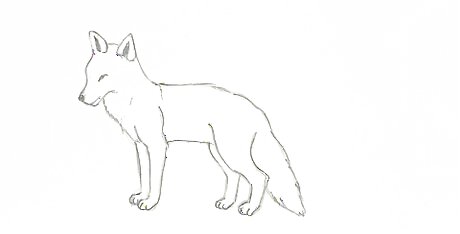
Darken your refinements with pen and erase the pencil outlines. In other words, trace over the more defined body, legs, tail, head, and face that you just created. Then, erase the original ovals you used to shape the outline of the fox. If you sketched lightly in pencil, the lines should vanish without any trouble.
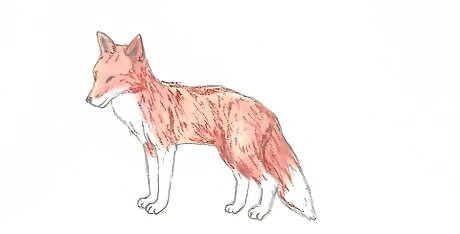
Color the drawing, if desired, to finish it off. Make the lower halves of the legs, the lower third of the tail, the front of the chest, and the bottom half of the muzzle an off-white color. Fox fur can carry shades of red, orange, and brown, but a “burnt orange” shade may give you a fairly typical fox color.
Creating a Realistic Sitting Fox
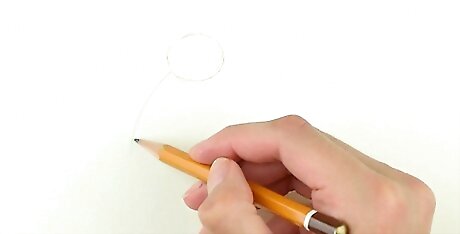
Start with a circle and a curved line extending from its bottom left. It should look like a balloon on a string that’s caught in a light breeze, or perhaps a lollipop with an arched stick. The circle represents the fox’s head, and the curve traces the path of its spine. Make the curved line about 3 times as long as the diameter of the circle.
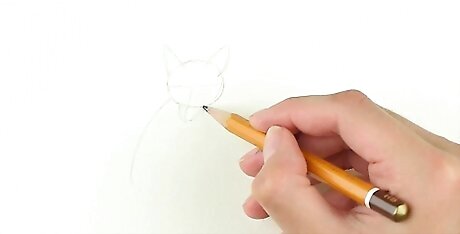
Sketch in the pointed ears and rounded snout on the circular head. Create a “T” shape that covers the bottom half of the circle. Double the length of the T’s vertical stem by extending it below the circle, then sketch in a “U” shape for the muzzle that surrounds the lower half of the T’s stem. Draw 2 tall, pointed arcs—roughly the shape of wishbones—for the ears. Imagine the circle as a clock face and place them at about the 10 and 2 o’clock positions.
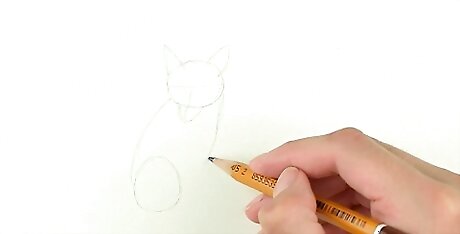
Add another circle and curved line to outline the fox’s body and rear thigh. In basic terms, draw a reverse image of the circle and curve that you started with so that the 2 curved lines connect the 2 circles. The lines should curve a bit like a pair of parentheses— ( ) —while the lower circle should have a bit more of an oval shape. Don’t center the rear thigh straight below the head. Rather, off-set it so it’s roughly centered under the left ear.
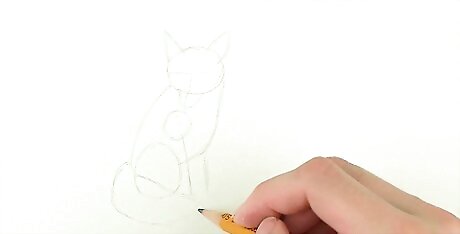
Use more ovals and lines to outline the tail and legs. For the tail, make an irregular oval that narrows towards the fox’s front side and appears a bit squashed flat on top. Make it overlap and extend beyond the bottom half of the oval representing the fox’s thigh. For the near-side front shoulder, draw a circle that’s slightly smaller than the head and place it right between the 2 curves that outline the body. Extend a line down from the circle at about a 30 degree forward angle, then draw a parallel line that extends from the curved line that represents the abdomen. The two parallel lines establish the positioning of the fox’s front legs.
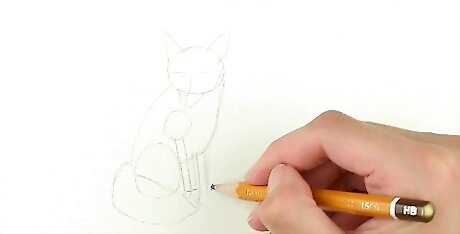
Thicken the legs and add triangles for the front paws. Sketch in a pair of parallel lines on either side of each of the lines you just drew for the legs. Each leg should be about two-thirds as thick as the diameter of the upper shoulder circle. Sketch in a triangle at the bottom of each leg to outline the front feet.
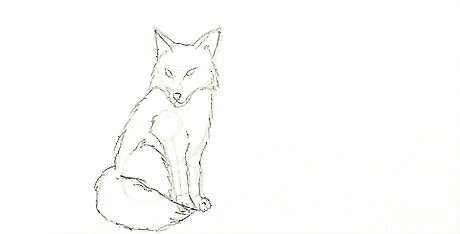
Sketch in the face and create a jagged outline to represent fur. Go around the smooth outline of your fox and add in jagged lines where fur would likely be tufted—for instance, along the chest and spine, inside the ears, around the tail, on top of the thigh, on the underside of the shoulder, and on the paws. Then, use the T shape on the face to guide your placement of the eyes, nose, and mouth. Draw in 2 football-shaped eyes that are attached to the underside of the horizontal line of the T shape. Center the circular nose inside the U-shaped muzzle. Make the mouth a simple horizontal line across the bottom quarter of the muzzle.
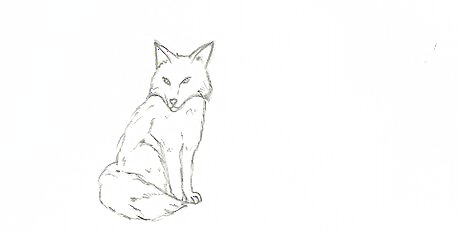
Darken your detailed lines with pen and erase your penciled-in sketch lines. Go back over the jagged lines you made for the fur, and darken and add further detail to the facial features, the paws, and any other areas that need further refinement. Once you're done penning in the features, erase all unnecessary pencil lines.
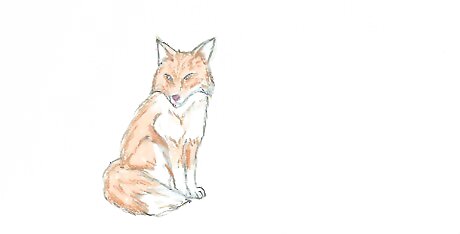
Add some color to your fox drawing if you wish. Foxes are often a “burnt orange” color, but they can also be more red, orange, or brown. Choose the fur color that you prefer. Foxes have off-white areas of fur as well, such as the insides of the ears, the bottom half of the muzzle, the underside of the neck and front of the chest, the rear third of the tail, and (sometimes) the paws and the bottom halves of the legs.


Comments
0 comment