
Making Cut-Out Antlers
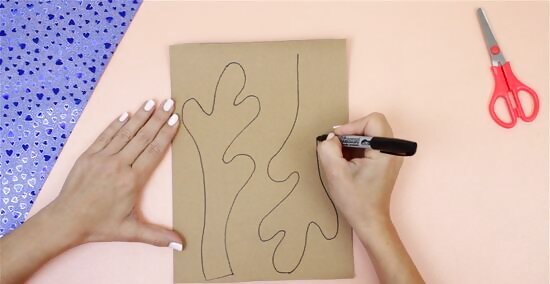
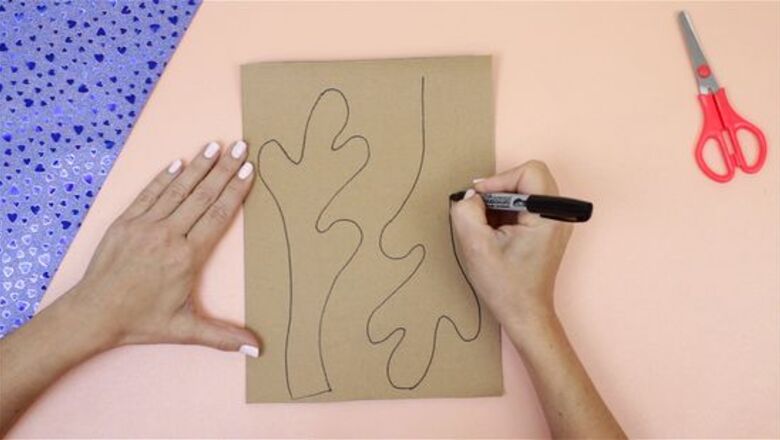
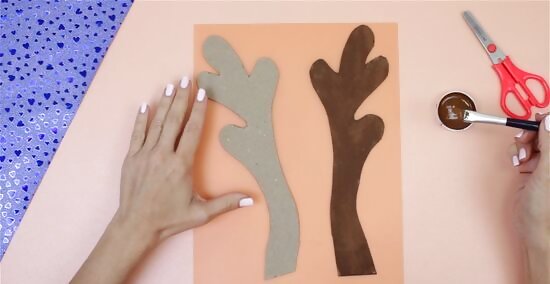
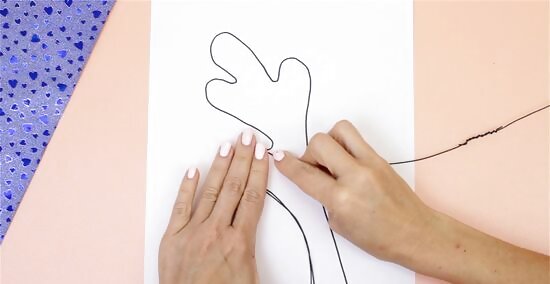
Draw out your antler shape in pencil on paper or cardboard. You'll want to use a strong paper, like cardstock, or a lightweight cardboard. If you don't want to go out and buy paper or cardboard, you can use a deconstructed cereal box or the cover of an old composition notebook, as these are an ideal weight. If you're uncomfortable drawing antlers freehand, find a free template online to print out and use as a stencil. Make sure the sections of your design are wide enough that they will be easy to cut. Your design just needs to represent an antler shape. It doesn't have to be completely accurate to nature. You want the antlers to be tall enough that they sit high above the head, but you don't want them to be so large that they flop over. About 12” high is ideal, but feel free to customize and experiment. You can use identical antler shapes for both antlers. You'll just make sure that you glue on onto your headband facing the opposite direction of the other. Only draw one of the antlers.
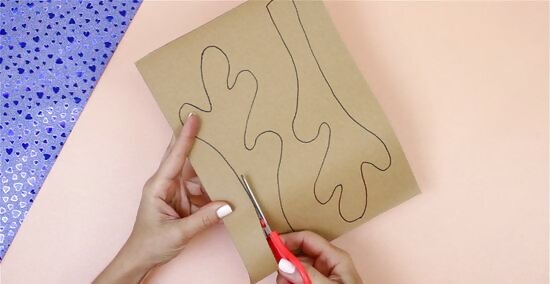
Cut out your antlers. Make sure to stay close to your lines. Cut slowly and carefully. After you cut your first antler, use it as a template for the second. Place it on your paper or cardboard and trace around the edges. Cut out the second antler.
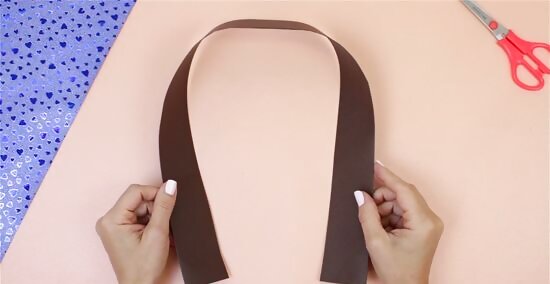
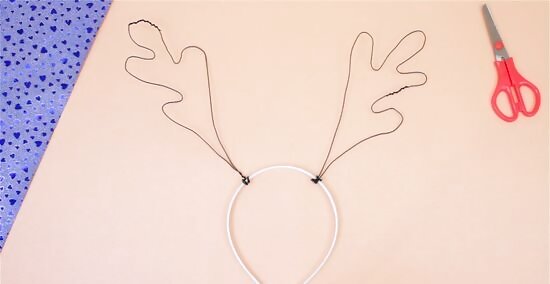
Create your headband. You'll need more paper or cardboard to create this band. It doesn't have to be exactly the same as the material you used for your antlers. Wrap the edge of your paper or cardboard around the middle of your forehead until it reaches all the way around. Hold with your finger the place where the edges meet, and then mark this with a pencil on the paper. Mark again about another inch out from your first mark because you'll want some overlap to attach the band. With this measurement, cut a band from your material. It should be about 2 inches wide, but you can make it wider if you want more space to decorate.
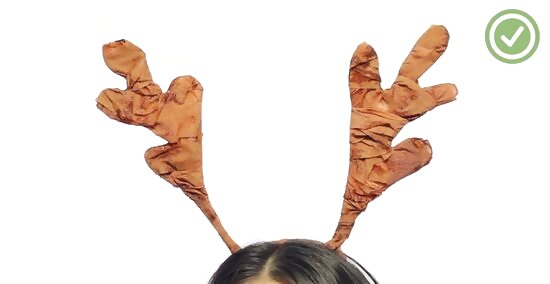
Paint the cardboard antlers and headband. Brown is a typical color for antlers, but you can choose other colors you like more. Use acrylic or craft paint. This gives a solid color and dries fairly quickly. When you paint your headband, only paint to the line you drew marking where the end should attach based on your head size. You want to leave a little unpainted space at the end of the band so you know where to attach it. After the paint dries, you can add fancy touches to your creation with accessories like glitter glue, sequins, stickers, or pom-poms.
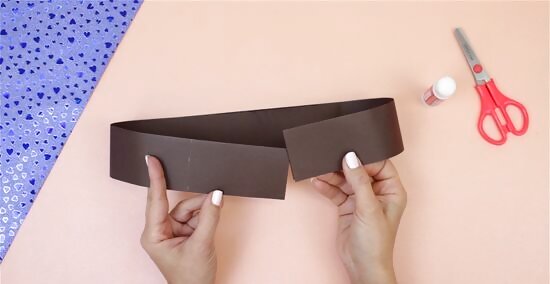
Connect your headband. After the paint dries, you'll want to create your headband from the strip of paper or cardboard you cut out for it. Use staples, glue, or tape, to fasten it together. Use your line as a guide for where to fasten it together. If you use glue, let the glue dry before you move on. Use a clothespin to hold the pieces together while the glue dries. Try it on. Put on your headband to make sure it fits comfortably and slides far enough onto your head but isn't too loose.
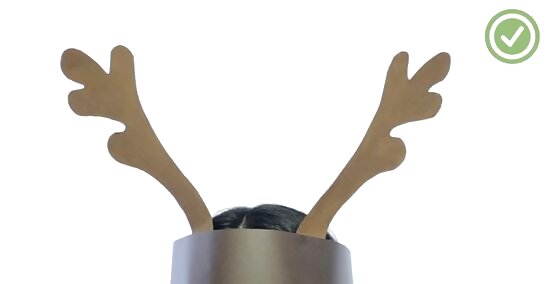
Attach your antlers to the headband. You should connect the bottom of your antler pieces just slightly above the bottom of your headband. Again, you can use staples, glue, or tape. If you use staples, place a small piece of duct tape across the staple on the inside of the headband so it doesn't scrape the wearer. If you use glue, let it dry before wearing. Try placing the headband antler side down on a table and put small heavy objects, like paperweights, on top of the ends of the antlers to help them adhere as they dry.
Creating Wire-based Antlers
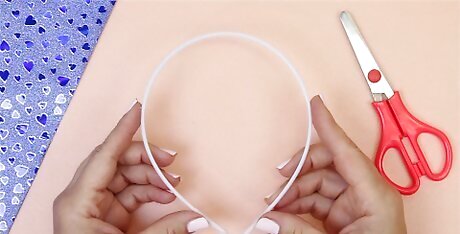
Pick a headband. For these antlers, you'll want to use a cheap plastic or metal headband. You can find these at most large departments stores or the dollar store. The thinner your headband is, the easier it will be to attach your wire antlers, and you'll use less wire. Choose a headband around one-half of an inch wide.
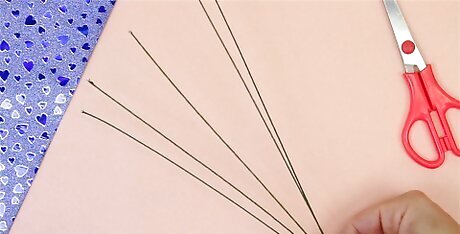
Choose the wire for your antlers. You can find wire in craft stores in the jewelry making section and in hardware stores. For this project, you'll want a fine gauge wire. The larger the number of a wire's gauge, the smaller the wire is. For this project, you can use 18-24 gauge wire. If you want to utilize what you have on hand, you can use wire coat hangers. These are harder to bend than thinner wire, but with pliers, you can shape them.
Decide how thick you want your antlers. If you want a thicker base, use more wires when you begin to form your antler shape. If you want a thinner antler, only use two to four wires wrapped around each other. A good number is about 6 wires per antler. If you're using coat hangers, consider only using around 3, as they are more work to bend.
Cut your wire. Once you decide how many wires you want to include in each antler, enough pieces from your wire for both of your antlers. Each piece should be about 1.5 feet in length. This will help you end up with a proportionate set of antlers.
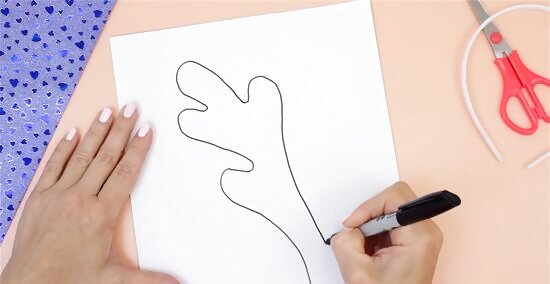
Sketch a shape. Before you begin to work with your wire, it can help to freehand sketch the shape and number of branches you want in your antlers. You can also find a premade template online or use a picture as your guide.
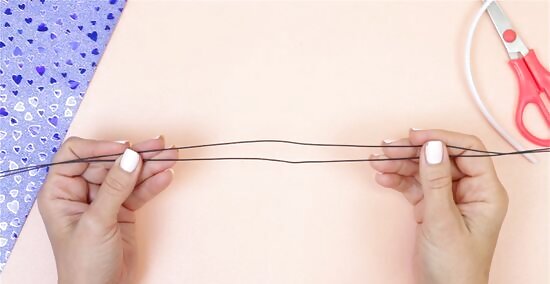
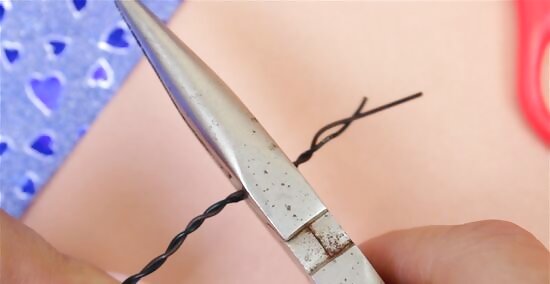
Form the shape of the antlers. Remember to consult your guide. Depending on the gauge of your wire, you may be able to use a combination of pliers and your hands to bend and shape. Wrap the wires around each other, twisting upward. Periodically, pull one or two of the wires off to the side to form a branch. Play around with them until you get shapes that you like.
Twist the base of the wire antlers around your headband. Position the antlers so that they look natural and even. Hold the headband up to your head in a mirror so you can see if you like the placement. Wrap all the wires completely around the headband at least twice, and then make sure that the antlers are sitting firmly in place.
Cover the headband and antlers with brown yarn, tissue paper, or brown tape. This will make your antlers look more realistic. You can use hot glue or a paper mâché technique. If you want to use yarn, do a small section at a time so the hot glue doesn't dry before you get to it. Put a small amount of hot glue onto the wire, and begin to wrap the yarn around the glue and press down. Be careful not to burn your hands. You can also use super glue. If you want to use paper mâché, first make a glue solution. Use white craft glue, and add just enough water to make it slightly runny. Rip up strips of thin brown paper. Dip them in your glue solution and then shape them around your antlers. Layer them until you achieve desired thickness. Let your antlers dry. As a simpler alternative, you can use brown washi tape or duct tape, and simply wrap it around your antler shapes until you make it as thick as you want. You can even use plain masking tape and paint it afterwards.
Fashioning Pipe Cleaner Antlers
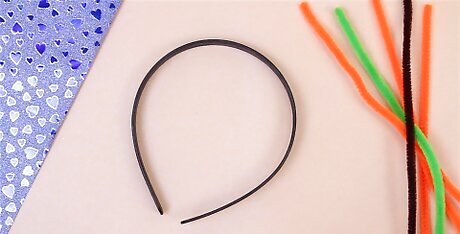
Gather your materials. You'll need two pipe cleaners per antler and a cheap plain plastic or metal headband. For this project, larger pipe cleaners work best. Brown is a typical color for your antlers, but you can use any color you would like.
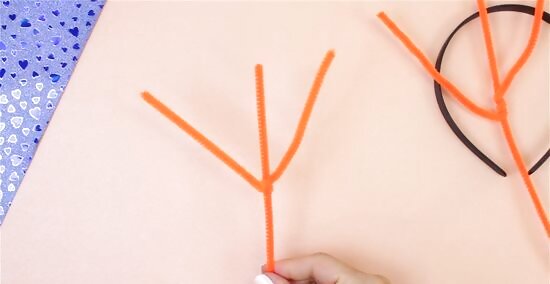
Begin to form your antlers. One of your antlers will stay straight, and you won't bend it at all. This will be the middle “stalk” of your antler. Lay this stalk pipe cleaner vertically in front of you. Lay the other pipe cleaner perpendicular to the stalk pipe cleaner about a quarter of the way down from the top of the stalk piece. Attach this pipe cleaner by twisting it around the stalk twice to keep it firmly in place. Pull up the two ends of the pipe cleaner toward the top of the stalk piece to make a fork-like “V” shape. Cut off any excess ends to make the “V” pipe cleaner look proportional to the stalk pipe cleaner.
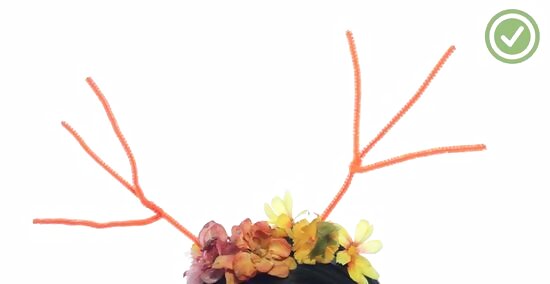
Wrap the ends of this headband around a plastic or metal headband. Wrap tightly to make sure your antlers stay in place. Because the pipe cleaners easily slide around a headband, it is best to add a dot of hot glue or super glue where you've connected the pipe cleaner to the headband to keep it in place. When you wear your head band, feel free to bend your antlers and adjust them to improve the look.
Whipping Up Edible Antlers
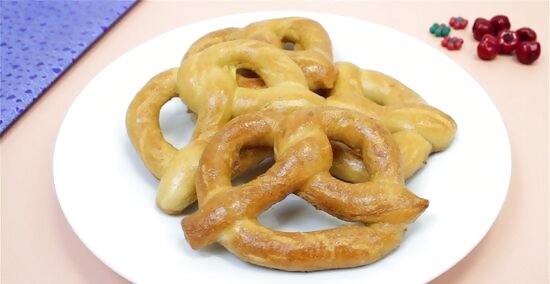
Pick something tasty for your antlers. Though you won't actually be eating them, you want them to look good enough to eat and festive. Use three candy canes turned outward in the opposite direction from each other for each antler. These work well because you can leave on the plastic wrappers, and they won't get sticky. Try breaking up pieces of large pretzels to form the branches of your antlers. Pretzels are a more realistic looking way to make whimsical edible antlers.
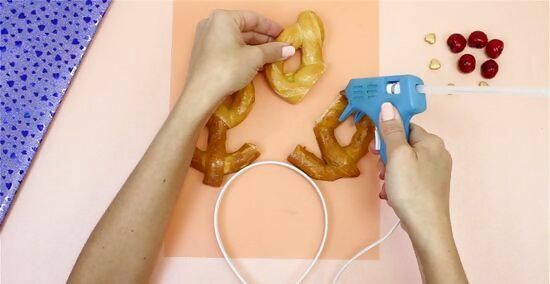
Connect the antlers. Hot glue works best for this. Simply lay out your antler design on a plate and dot hot glue where you want to connect your pieces. After you glue your antlers together, glue them to a plastic headband. A thicker headband works best. Be generous with the hot glue as this will be the only support.
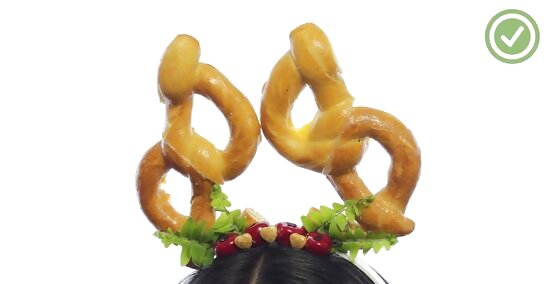
Decorate your headband. For more embellishment, you can use hot glue or super glue to add other edible decorations to your headband. Line the headband with round peppermints. Gumdrops also hold up well as decorations.


Comments
0 comment