
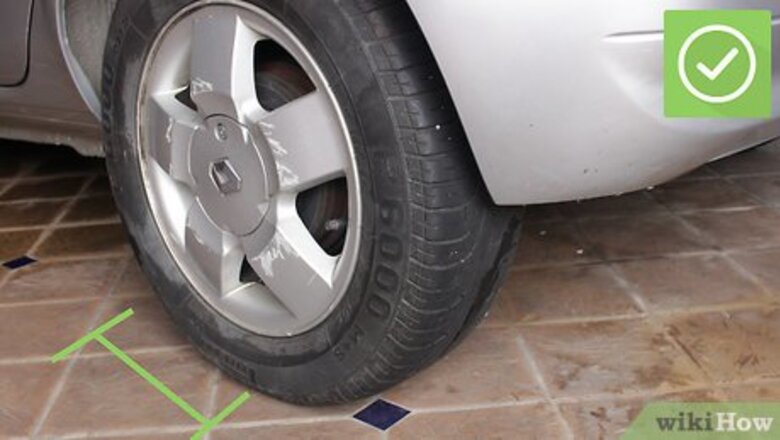
- Park in a safe, flat area. Put your hazards and parking brakes on.
- Loosen the lug nuts with the tire iron in your trunk then raise the vehicle in the air with the jack.
- Once the vehicle is in the air, remove the nuts entirely and put the spare on.
- Tighten the nuts by hand before lowering the vehicle and tightening them fully.
Pull over and put your hazards on.
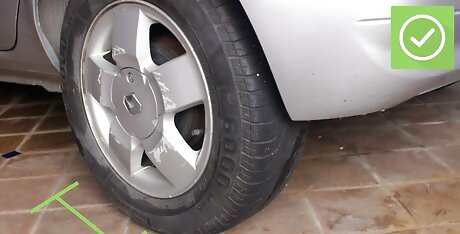
Find a safe area where traffic won’t be a risk. If you are near a road, park as far from traffic as possible and turn on your emergency hazard lights. Don’t park on an incline to keep your vehicle from rolling away, and stay off of soft soil or grass. If you have to drive slowly for a block or two to get to a safe, flat area, then so be it.Examples of safe areas are as follows: The shoulder of the highway, a public parking lot, or a large space with no pedestrian activity. Apply the parking brake once you’re parked to ensure the vehicle doesn’t move. For added peace of mind, place heavy rocks or blocks around each tire you aren’t changing to keep the vehicle from rolling.
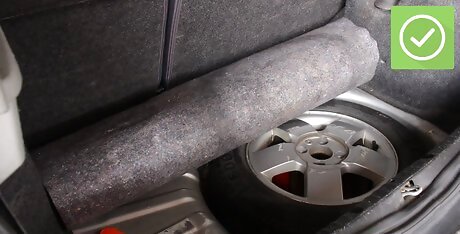
Remove your spare tire and the jack.
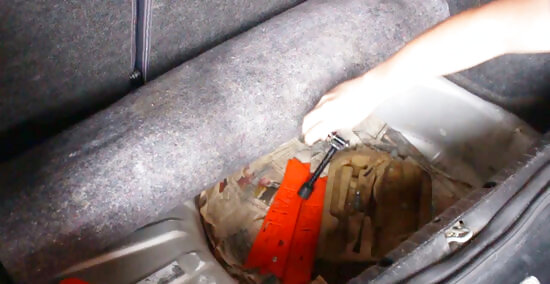
The spare will likely be underneath a cover in the trunk. Every make and model will be a little bit different, but your spare should be under the cloth or plastic cover at the bottom of your trunk. Retrieve the wheel from the trunk. Also, remove the jack and the tire iron you need to remove the lug nuts. The tools for completing the change - including the jack, and lug wrench - will be located near the spare tire. On most vehicles, the tire iron is part of the jack. You’ll use it to turn the bolt on the end of the jack to raise or lower it, and also to remove the lug nuts on the tire. If you drive a Jeep or a large SUV, the spare tire may be on the outside or underneath the vehicle. If you don’t have a spare, your vehicle may have a sealant kit to temporarily patch your flat tire. If you don’t have that either, call a tow truck.
Assess the issue with your vehicle.
Move around your vehicle and check for any damaged components or wheels. This article focuses on replacing damaged tires - be sure to contact roadside services in the event you are experiencing any issues you cannot safely handle yourself either due to lack of experience, tools, replacement parts, or severity of the damage.
Elevate your vehicle with a jack.
Provided you have the tools necessary, find a solid point on the frame of your vehicle to elevate the portion of the car near the wheel you need to replace. Remember to place the jack in a position that won't be hit by yourself or others, risking the vehicle being dropped from the jack. Elevate the vehicle until the tire is no longer touching the ground (recommended 1-2 inches) Place the jack on a part of the frame that will not damage or warp components of your vehicle, causing more damage. Begin to lift the vehicle by pressing down on the floor jack or by turning the floor jack handle slowly. You will begin to see the tires lift from the ground. To have enough room to dismount the tire, you want to make sure that the tire is at least lifted 3-6 inches from off the ground. Grab your jack stands. These are used as a safety precaution so that the vehicle doesn't fall to the ground in case your floor jacks break or slip. The owner's manual will show you where to place them. To engage the jack stands, use the lever that is attached to them and line it up with the jack stand point (Usually indicated by an arrow engraved into the car) but only raise the stand to about an inch or two away from the jack stand point which is usually the frame of the car. CAREFULLY release the pressure from your floor jack so that the vehicle falls into place with the jack stands
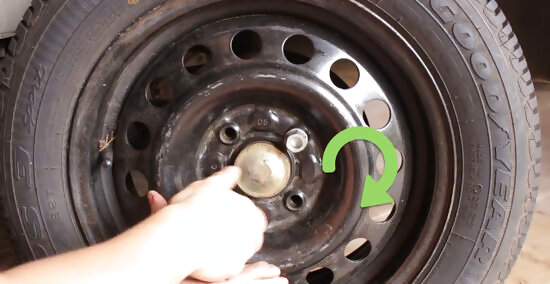
Loosen the lug nuts.
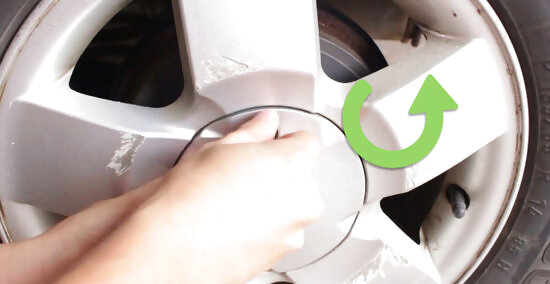
Remove the hubcap and loosen the nuts part-way. Start with the lowest bolt and avoid causing damage to the undamaged bolts/lug nuts. Pry the hubcap off using the flat end of your tire iron or a flathead screwdriver. Do not remove the lug nuts entirely. Just use the end of the tire iron to loosen the nuts by turning them counterclockwise so that there’s no longer any resistance. You should be able to spin the nuts by hand, but they shouldn’t be so loose that they spin freely. By keeping the wheel on the ground when you first loosen the nuts, you'll make sure that you're turning the nuts instead of the wheel. Your tire iron may have different sizes of openings on each end. The correct end for the nut will slip easily onto it, but it won’t be so loose that it rattles. If your vehicle doesn’t have a hub cap, don’t worry about that part. If it does, your hub cap may have a center cap that needs to be unscrewed first. On some newer vehicles you need a special “key” to unlock one of the lug nuts as a theft prevention strategy. Look in your glove box and trunk for a special tool that’ll remove that unique lug nut. These lug nuts will have a unique groove inside of them. Use the key to remove the locking lug nut. Keep all bolts as you will be using them to connect your spare tire to your car.
Slide the jack under the frame.
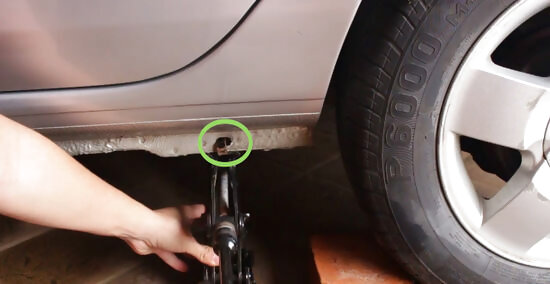
Place the divot in the jack directly under the metal rim of the frame. Get on the ground and use the flashlight on your phone to take a closer look. Touch the area directly behind the metal body of your exterior to feel and look for a thin, metal length. This is your frame. Set the jack underneath the frame right next to the tire you’re replacing. Many cars have molded plastic along the bottom. If you don't place the jack in the right spot, it will crack the plastic when you start lifting. If you're not sure about the right place to put the jack, read your owner's manual. There may be a small notch or mark just behind the front wheel wells, or in front of the rear wheel wells where the jack is intended to be placed.
Raise the vehicle off the ground.
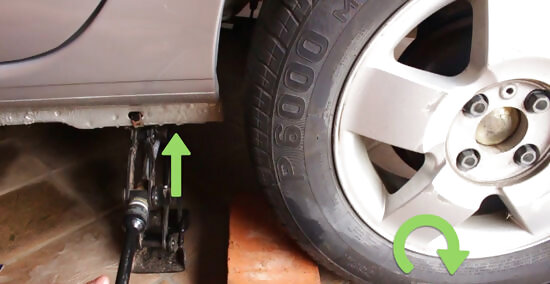
Use the jack to raise your tire 4–6 inches (10–15 cm) off of the ground. Turn the handle of the jack clockwise to begin raising the platform up. Once the platform on the jack makes contact with the vehicle, take a look at the point where the jack meets the frame to confirm it’s on your frame. If it isn’t, loosen the jack and reposition it. If it is, continue to lift your vehicle off the ground. The vast majority of jacks are scissor jacks. You use the tire iron or a rod to twist the nut on the side and hoist the vehicle. You might have a pump-assisted jack, though. With a pump jack, you repeatedly move the handle up and down to raise the vehicle hydraulically. This can be kind of freaky the first time you do it. You might think your jack is going to snap or your car is going to tilt over. Don’t worry! Your jack and vehicle are designed to handle this. It can take a few minutes and a lot of elbow grease to get that vehicle up, so feel free to take breaks if you need to. It’s worth double-checking to make sure the jack is on the frame. You really don’t want to damage your vehicle with the jack. Make sure the vehicle is secure in the air by pressing down on the side of the vehicle that is jacked up in the air. Next, you need to add some wheel chalks to the opposite side wheels of the vehicle. If you have the car jacked from the front left side of the vehicle, then you would want to place two wheel-chocks under the rear tires to prevent the vehicle from rolling.
Remove the lug nuts and tire.
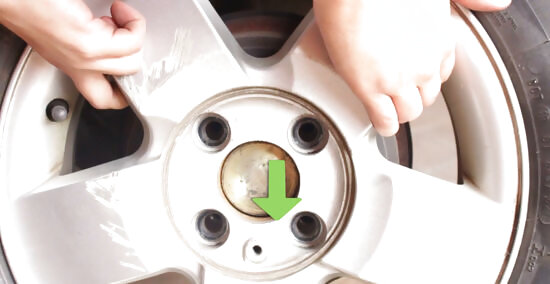
Pop the nuts off by hand and pull the tire off. You already loosened the nuts, so removing them should be fairly easy. Use the tire iron and brace the tire with your non-dominant hand if you need to. With all of the lug nuts removed, slide your busted wheel off of the axle and set it aside. Flip your hubcap upside down to turn it into a small bowl and set your lug nuts inside so that you don’t lose them. Use the proper body mechanics when dismounting a tire. Mounting and dismounting a tire is very tiresome and heavy on your back so you always want to make sure you squat using your legs with your back straight. Never place your legs under the vehicle while it's lifted up because that's a safety hazard. If you can, grab a small mechanics chair as this will help secure your back.
Place the spare on the vehicle.
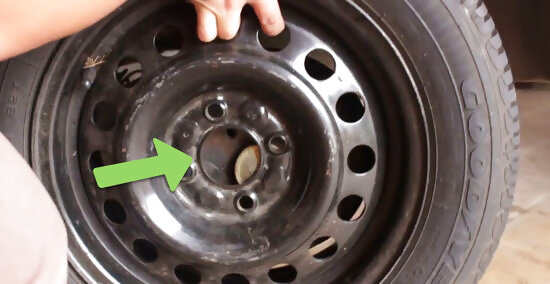
The side of the spare with the valve stem on it faces out. Line the lug nut bolts up with the openings on the spare and slide the spare on to the axle - holding the tires at the positions of 4 and 8, lifting the tire slightly and pulling the tire out. The valve stem is the little rubber pipe that sticks out where you add air to the tire. If it’s pointed inward towards the body of the vehicle, the tire is backwards. Fun fact, the spare tire is also known as a “donut.” Take one of the bolts you removed from the old tire, take your spare tire, and align the sockets on the tire rim with the sockets on the tire mount, then place the tire on the mount. Insert the bolt into the topmost socket and rotate the bolt into its socket enough to ensure the tire will not fall off the mount, but not too tightly as to fully insert the bolt into the socket. Grab the tire using proper body mechanics (this is important for your physical health) by getting down on one knee and rolling the tire onto your foot. Carefully lift with your arms and foot to align the tire with the hub. Align the tire with the wheel hub. Press the tire and wheel against the hub so that it sits completely flushed and symmetrical with the hub bearing (this is important for tightening reasons). Keep your foot pressed onto the tire to secure it. Begin screwing the lug nuts back on. First, you want to make sure that you're hub cap is securely placed back on. Start with one lug nut and thread it all the way down on the wheel stud to help hold the tire on the hub.
Replace the lug nuts by hand.
Don’t tighten the nuts using the tire iron just yet. Gently slide each over the bolt and tighten it by hand to partially lock them in place. You will tighten the lug nuts again once the car is down and there is no risk of it falling. Just to clarify, use the same lug nuts that were previously on your wheel. You don’t need special lug nuts for the spare.
Lower your vehicle.
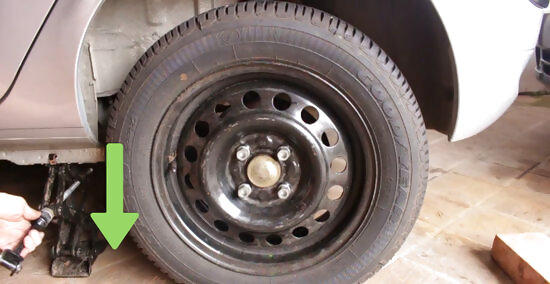
With the wheel on the axle, lower the jack and remove it. Turn the handle or bolt on the jack counterclockwise to begin lowering the vehicle. Continue lowering the vehicle until the tire is comfortably back on the ground. Then, carefully remove the jack from underneath and set it back in your trunk. Keep your entire body out from underneath the vehicle. If the jack slips your vehicle gets closer to the ground, you don’t want your body underneath it.
Tighten the lug nuts.
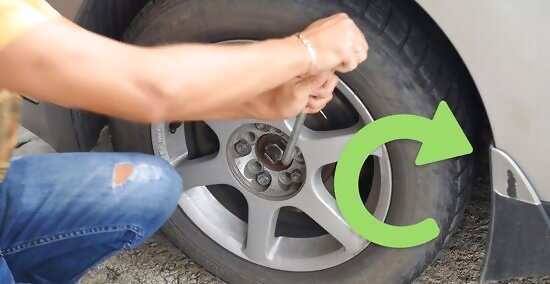
Completely tighten the nuts until they won’t turn any further. Using the tire iron, tighten each nuts 3-4 times and then move on to the lug nut on the opposite side. Work in a star pattern to ensure the nuts are secured in an even pattern. Continue tightening the nuts in a cycle until all of the lug nuts are completely secure. After you’ve tightened each nut, try to tighten each nut one more time to ensure they’re as tight as they can possibly get. Put your busted tire in the trunk alongside the jack and tire iron.
Remove the jacks.
Remove and release all of the jacks from the car. Start off by lifting the vehicle up from the jack stands by using the floor jacks. Do this to make sure you are able to remove the jack stands. Remove the jack stands from under the vehicle. Remove the old tire and wheel assembly. Release the pressure from the floor jack by slowly turning the lever to the left and you will start to see the vehicle slowly fall to the ground. Once the vehicle is fully on the ground. Remove the floor jack. Remove wheel chocks.
Get your tire fixed ASAP.
Keep your speed under 50 miles per hour (80 km/h) and don't go further than 50 miles (80 km). If your spare is a full-size tire (rather than a donut), you can drive the same way you normally would. Check your tire pressure and fill your spare with air as needed. This is especially important if the spare has been in your trunk for a while, since it may have leaked a little in storage. Head to an auto shop as soon as you can. Small punctures can usually be repaired for $15-100. If the tire is not repairable, you may need to buy a replacement tire.


Comments
0 comment