
Half Windsor Knot #1

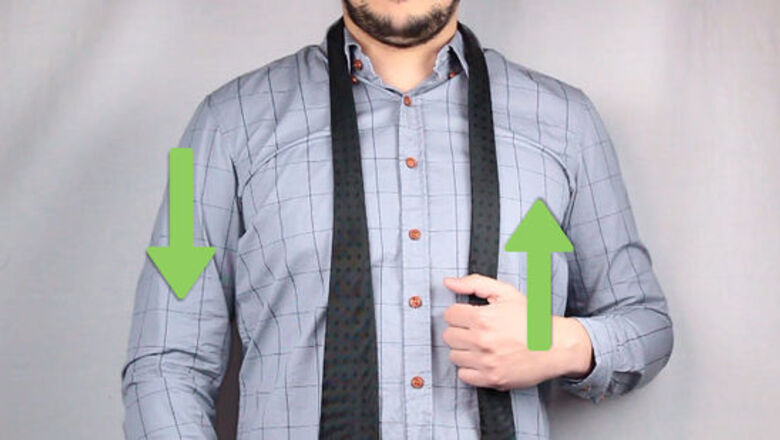
Face a mirror and place the tie around your neck. If you’re going for a classic look with a collared shirt, unfold the collar and drape the tie around its base. The wide end of the tie should drape down about 12 in (30 cm) below the thin end to begin with. The “show” side of the tie should be facing out, and the side with the center seam should be against your chest. The wide side of the tie should be on the same side as your dominant hand. So, if you’re right-handed, the wide side should be on the right side of your chest.

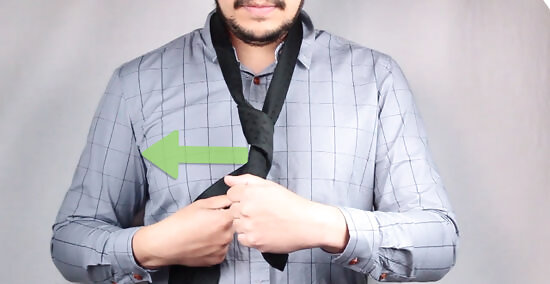
Loop the wide end over and around the narrow end. Hold the wide side of the tie with your dominant hand and the thin side with your off hand. Lift the wide end away from your chest, then carry it across the front of the narrow end. Then, bring the wide end around and behind the narrow end. When you’re done, the wide end should once again be on your dominant side, but the seam should be facing outward. This maneuver will create what’s called a “neck loop”—a V-shaped opening created by the tie just below the base of your neck.

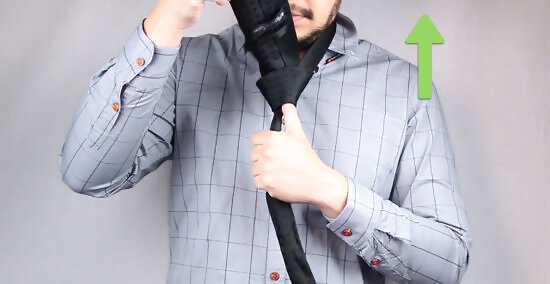
Tuck the wide end of the tie into the neck loop. Start by lifting the wide end away from your chest again, then flip the tip of the wide end up towards your chin and insert it into the neck loop. Feed the rest of the wide side into the neck loop and apply gentle pressure to tighten the knot you just created at the bottom of the neck loop. After feeding the wide side through the neck loop, you’ll once again end up with its seam facing outward on the dominant-hand side of your chest.
Cross the wide end over and around the narrow end once again. As before, lift the wide side away from your chest, cross it over the thin side of the tie, then continue under and around the thin side. Yet again, you should end up with the wide side of the tie on the dominant-hand side of your chest with the seam facing out.
Feed the wide end up through the neck loop from behind. Bring the tip of the wide end straight up behind the narrow end and through the neck loop. Once you’ve pulled the entire wide end through the neck loop, let it drape down over the center of your chest. The “show” side of the wide end of the tie should now be facing outward. To help form the pocket inside the knot for the next step of the process, you can extend the thumb of your off hand (which is holding the thin side of the tie) up into the knot at the base of the neck loop.
Feed the wide end of the tie into and through the knot. Stick the tip of the wide side of the tie into the pocket that’s beneath the outer layer of the knot at the base of the neck loop. Once the tip emerges from the bottom of the pocket, tug on it until the entire wide side of the tie is through and below the knot.

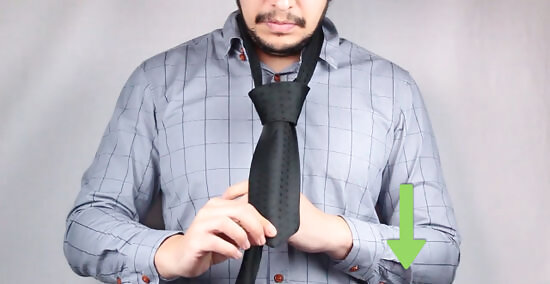
Tighten the tie around your collar and make final adjustments. To tighten the tie, pull down on the narrow side with your off hand while pushing upward on the knot with your dominant hand. When the tie is as tight as you prefer, the wide side should completely conceal the narrow side of the tie. There’s a good chance that you’ll get the length wrong the first time—or even the first few times!—you try this knot. If the wide side of the tie is too short, undo the entire knot and start over, this time starting with the wide side longer and the thin side shorter. If the wide side ends up too long, start again and do the opposite. If your tie has a carrier loop on the seam side of its wide end, you can slide the narrow side through that loop to prevent it from "peeking" out from behind the wide side of the tie.
Half Windsor Knot #2

Fold up your collar and drape the tie around your neck. The wide end of the tie should be on your dominant hand side of your chest—for example, your right side if you’re right handed. Drape the tie unevenly, so that the tip of the wide end is hanging down about 1 ft (30 cm) lower than the tip of the narrow end. The seam side (underside) of both the wide and narrow ends of the tie should be facing your chest. Stand in front of a mirror while tying this knot. You can tie a Windsor knot into a tie (or a scarf) without tucking it under a collar, of course—just drape it over your collar-less neck to start.

Cross the wide end of the tie in front of and over the narrow end. Use your dominant hand to lift the wide end of the tie away from your chest, then cross it over the front of the narrow end (which you should hold in your off hand). Make the crossover within 3–4 in (7.6–10.2 cm) of the base of your neck, so that you create a fairly small “neck loop” above the crossover point and under your neck.
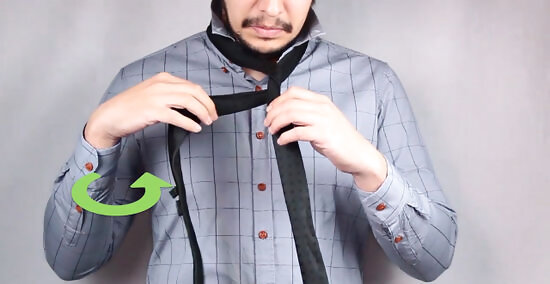
Bring the wide end behind and around the narrow end. Basically, you want the wide end of the tie to go all the way around the narrow end once. When you’re finished, the wide end should once again be on the dominant hand side of your chest. However, the seam side should now be facing outward on the wide end (but not the narrow end).

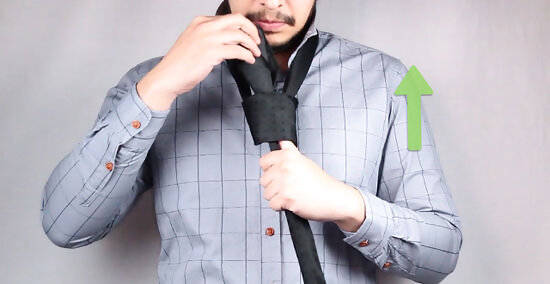
Lift the wide end and feed it through the neck loop from the front. Lift the tip of the wide side towards your chin, then stick it through the neck loop so that it goes behind the narrow side of the tie. Tug down gently on the wide side to pull it all the way through the neck loop. When you’re done, use your dominant hand to hold the wide end off to the dominant hand side of your chest. The seam should still be facing outward on the wide side, and inward on the narrow side.

Bring the wide end all the way around the knot at the base of the neck loop. Cross it right over the front of the knot, then continue right around behind the knot. When you’re done, the wide end will be essentially in the same position as when you started—it will just be a little shorter! Continue to hold the narrow side of the tie securely in your off hand. You may want to slide your off hand right up to the base of the knot at the bottom of the neck loop.
Feed the wide end behind the knot, through the neck loop, and over the knot. Grab the tip of the wide end of the tie and bring it up behind the knot at the base of the neck loop. Continue bringing the entire wide end up and through the neck loop, then let it drape down in front to the knot at the base of the neck loop.

Stick the wide end into and through the knot, then pull it tight. Lift the tip of the wide end and feed it into the pocket that’s just beneath the outer layer of the knot at the base of the neck loop. Stick it down through the bottom of this pocket, then pull on the tip until the entire wide end of the tie has passed through the pocket. Now, it’s time to make your final adjustments! Cinch up the tie by pulling down on the narrow end while pushing up on the knot. For the classic look, cinch it up tight (but not too tight!) around your neck, then fold your collar down over it. Don’t feel bad if you didn’t get the length quite right this time! It takes some practice, so undo the entire knot and try again. If the wide side of the tie ended up being too short at the end, try starting with it being even longer in the beginning.


Comments
0 comment