views
- Most errors can be fixed using the Printer troubleshooter or resetting the spooler.
- You can stop, restart, or modify your Print Spooler settings by opening Services.msc and double-clicking "Print Spooler."
- If you continue having problems, uninstall your printer, run the manufacturer's software installer, and re-add the printer.
Clearing & Resetting the Print Spooler
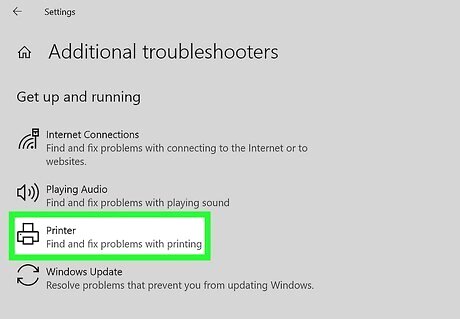
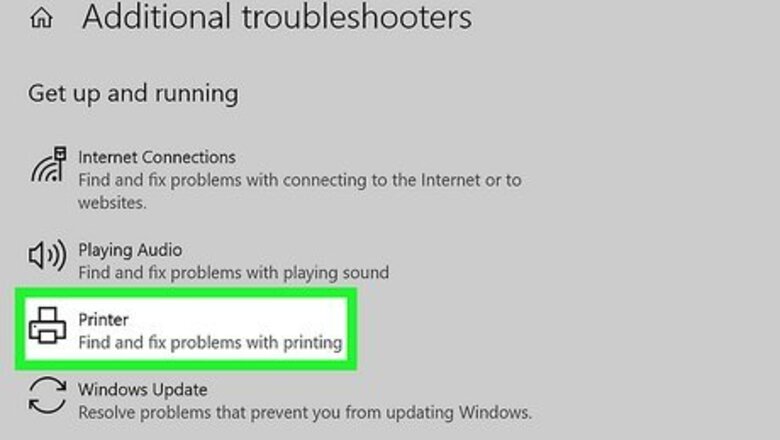
Run the printer troubleshooter. The troubleshooter is a simple way to detect and fix printer spooler errors on Windows. If the troubleshooter can fix your problem, you won't need to do additional troubleshooting. Windows 11: Go to Start > Settings > System > Troubleshoot > Other troubleshooters and click Run next to "Printer." Follow the on-screen instructions. Windows 10: Go to Start > Settings > Update & Security > Troubleshoot, select Printer, and follow the on-screen instructions.
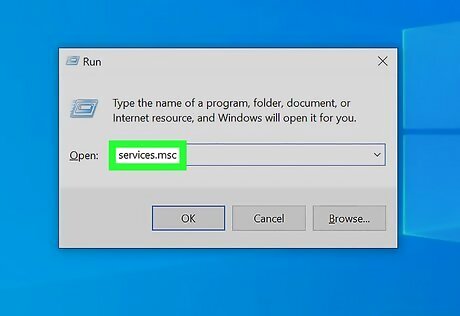
Open the Services window. If the troubleshooter didn't fix your print spooling problems, press Windows key + R, type services.msc, and then press Enter.
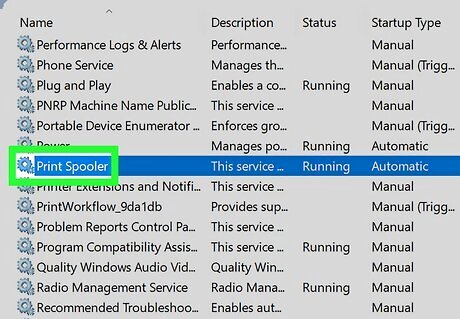
Double-click the Print Spooler service. The services are listed alphabetically, so it should be easy to find. If you don't see Print Spooler in services.msc, see this troubleshooting method.
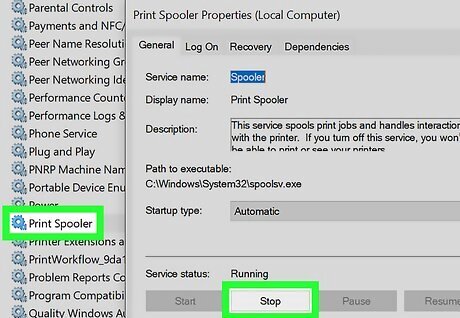
Click Stop to stop the print spooler. If prompted, click OK to confirm. This stops the print spooling process. If the service was already stopped, click Start to see if that fixes your problem. Don't close this window since you'll need to start this service later.
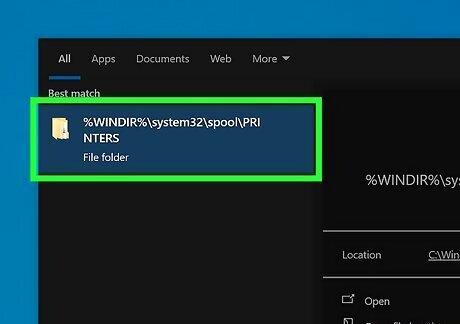
Open the printer spool folder. Follow these steps to do so: Press Windows key + S to activate search. Type or paste %WINDIR%\system32\spool\printers into the search bar. Click %WINDIR%\system32\spool\PRINTERS in the search results.
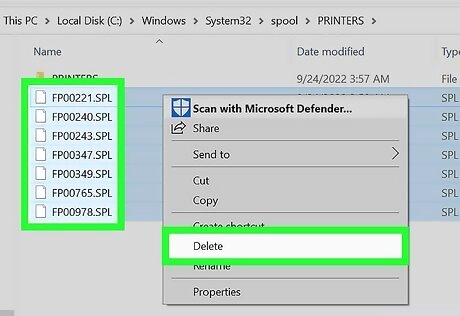
Delete all contents inside the folder. Do not delete the PRINTERS folder itself, just all of its contents. This will remove all current print jobs, so make sure no one on your network is using the printer.
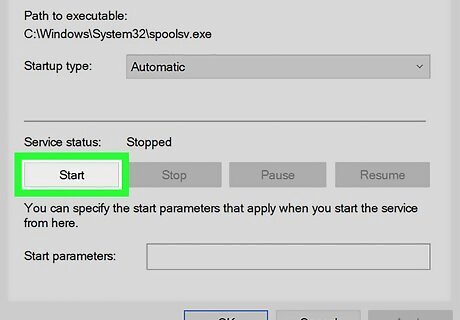
Return to the "Print Spooler Properties" window and click Start. This will turn the Print Spooler back on, and you should be able to print normally. If not, try the next method. Next to "Startup type," you should see "Automatic." If you see a different option, click the menu, select Automatic now, and save your changes. The print spooler will now launch automatically in the future.
Changing Print Spooler Properties
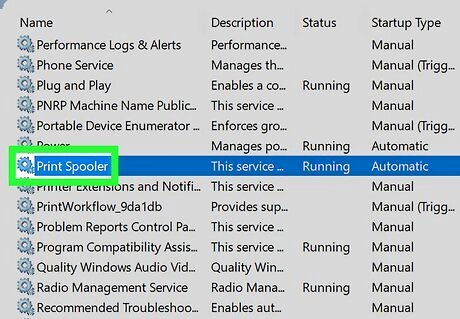
Open your printer spooler properties. These methods should work on any Windows version, including Windows 10 and Windows 11. To get there: Press Windows key + R to open the Run dialogue. Type services.msc and press Enter. Double-click "Print Spooler" in the Services window.
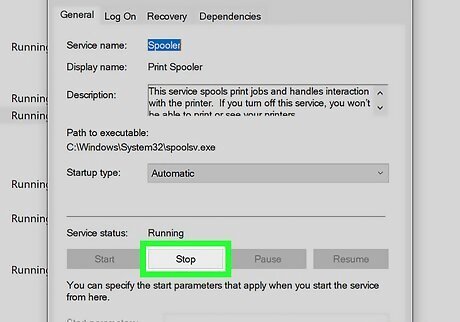
Stop and start the spooler. On the properties panel, click Stop to stop the print spooler, and then click Start to restart it. Some errors are fixed by stopping and then starting the print spooler again. Leave the window open, as we have a couple of other changes to make.
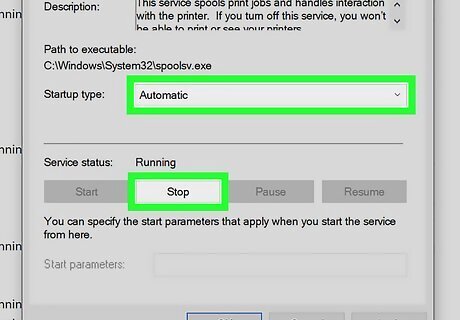
Set the Spooler to start automatically. Select the drop-down menu following "Startup type." Select Automatic to ensure the print spooler starts up each time your computer does, so it doesn't miss any incoming print jobs. Click Apply in the lower right to save your changes.
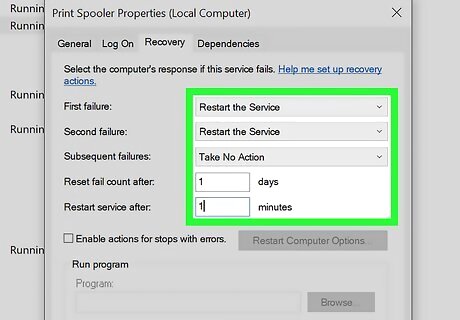
Click the Recovery tab to change your preferences. This tab controls how the print spooler responds to its own errors. A few adjustments will maximize the chance of the spooler solving its own issues and minimize the chance of it causing a crash. Change the settings to match the following: First failure: Restart the Service Second failure: Restart the Service Subsequent failures: Take No Action Reset fail count after: 1 days Restart service after: 1 minutes When you're finished, click Apply.
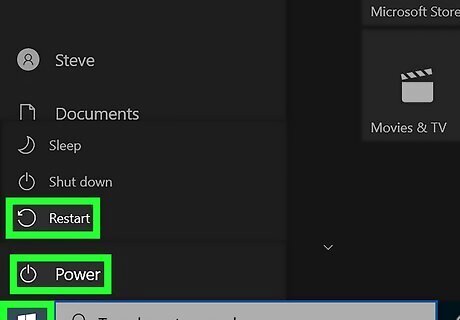
Click OK and restart your PC. Once Windows restarts, try printing again. If you still get print spooler errors, continue to the next step.
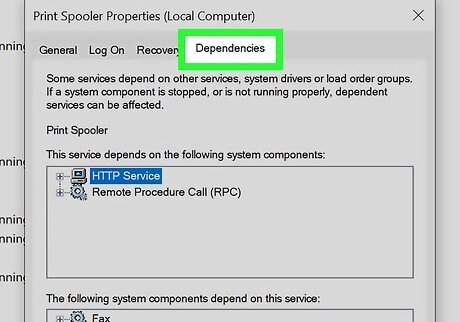
Check dependencies. Return to the Print Spooler Properties window if you closed it. Click the Dependencies tab and look at the top box labeled "This service depends on the following system components." Look up the status of each service listed in this panel: Return to the Services window. If you closed it, open it again as described in the first step of this method. Find the name of one of the services you saw in the upper Dependencies pane, listed under the Name column. Confirm that the word "Started" is in the Status column for that file. Confirm that the word "Automatic" is in the Startup Type column for that file. If one of the services you looked up does not have these values, Stop and Start that service. You can do this with the icons in the Services window or by double-clicking the service name and using the buttons in its Properties window. If the Stop and Start icons are greyed out, or if stopping and starting does not change the values to "Started" and "Automatic," try reinstalling the drivers as described.
Updating Printer Drivers and Software
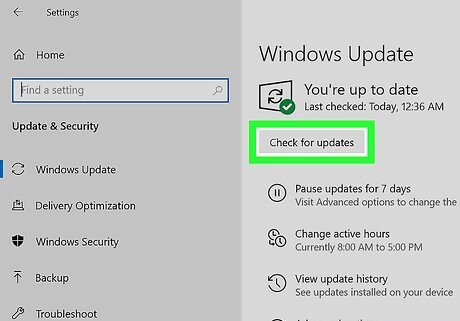
Run a Windows update. Before you get started, make sure your version of Windows is up to date. If a newer printer driver is available, Windows Update will usually be able to find and download it for you. To update, go to Settings > Windows Update (Windows 11) or Settings > Update & Security > Windows Update (Windows 10) and click Check for updates. If Windows Update couldn't update your printer driver automatically, View optional updates, click Driver updates, and look for your printer's drivers. If you see them, click Download and install.
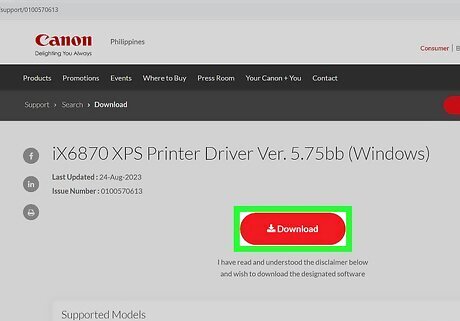
Download the latest drivers for your printer. If new drivers are unavailable, go to the printer manufacturer's website and search for your printer model. You should then see a "Download," "Drivers," or "Software" section where you can download the printer's official software to your PC.
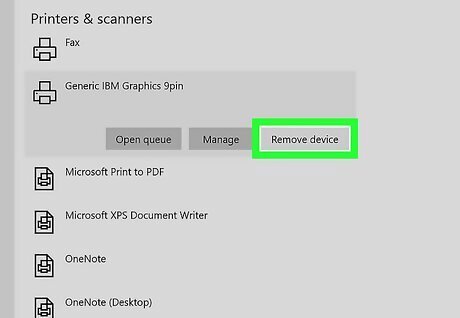
Delete your printer. Your printer software may be corrupted; this quick process will remove it so you can start again with a fresh installation: Press Windows key + S to activate search, then type printers. Click Printers & scanners. Select your printer and click Remove device. Leave this window open for now, as you'll need to return here soon.
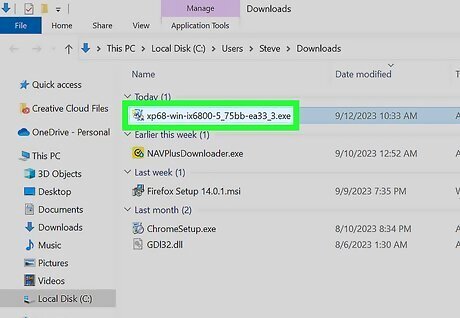
Run the manufacturer's software installer. Most manufacturers, including HP and Canon, allow you to simply double-click the downloaded file to install the printer drivers. After double-clicking the file, follow the on-screen instructions to install the printer software. If nothing happens when you double-click the file, follow these steps: Return to Printers & Scanners. Scroll down and click Print server properties. On the driver's tab, look for your printer. If you see it, you don't need to do anything more. If you don't see your printer, click Add, click Next, select your computer's architecture, and then choose your printer. Click Next, Finish, and then follow the on-screen instructions to install your printer.
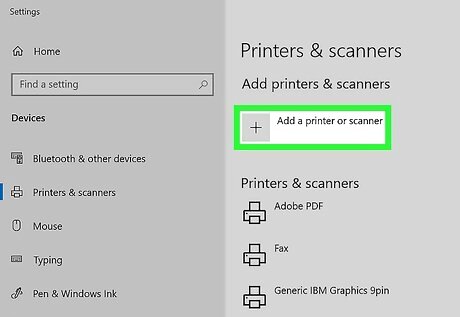
Re-add your printer. Return to your Printers & Scanners window, click Add a printer or scanner, and follow the on-screen instructions to add your printer back to Windows.
If Print Spooler is Missing
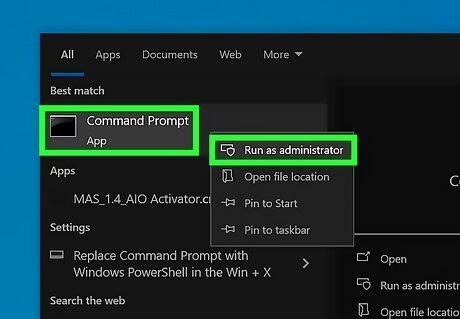
Open Command Prompt as an administrator. If you could not reset the print spooler service because you didn't see "Print Spooler" in services.msc, it's typically because the required files are corrupted. Fortunately, you may be able to fix the files with some simple commands. To open Command Prompt as an administrator, type cmd into the Windows Search bar, right-click "Command Prompt," and then select Run as administrator.
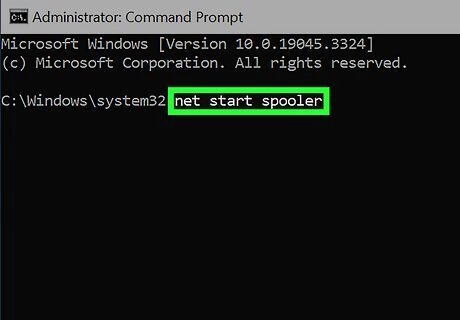
Type net start spooler and press ↵ Enter. If you see "The Print Spooler service was started successfully," you should now be able to use this method to fix your print spooler errors. If you get any errors, continue with this method.
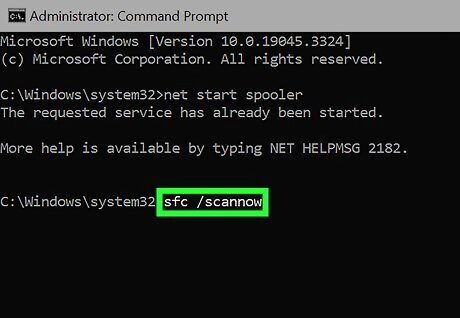
Type sfc /scannow and press ↵ Enter. This process will scan your PC for corrupt files and attempt to fix them. Once the process is complete, restart your PC and check again for the Printer Spooler process in services.msc.
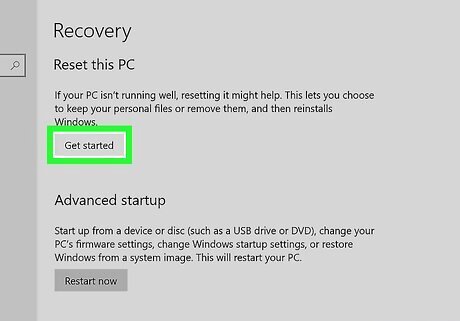
Reset your PC. If you still don't have the Print Spooler service, the only fix is to repair your Windows 10 or 11 installation. You can do this using the Reset PC feature in your settings, using a recovery drive, or a DVD. You won't lose your personal files by resetting Windows as long as you choose to keep your files on the PC, but any apps you've installed will be deleted. On Windows 10, go to Start > Settings > Update & Security > Recovery. On Windows 11, go to Start > Settings > System Recovery. Click Reset this PC (Windows 10) or Reset PC (Windows 11). Click Keep my files and follow the on-screen instructions. Once your PC is reset, the files that control the Print Spooler will be reinstalled, and you'll find Print Spooler in your services panel.


Comments
0 comment