
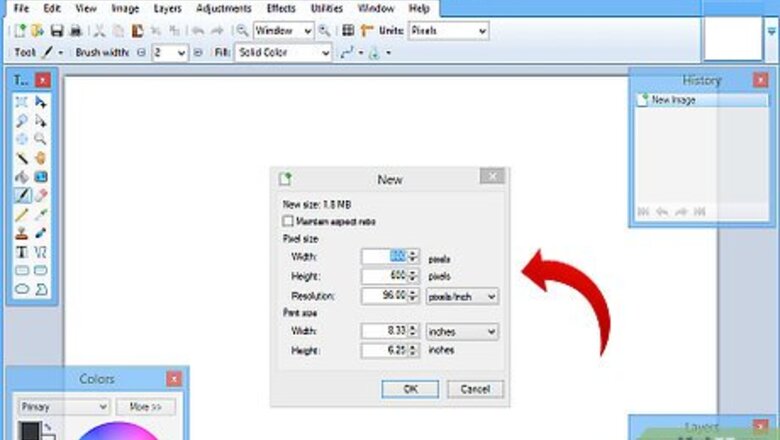
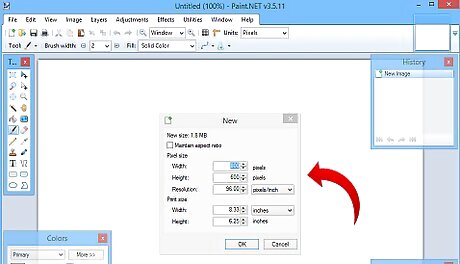
Open Paint.Net with an 800 * 600 image.
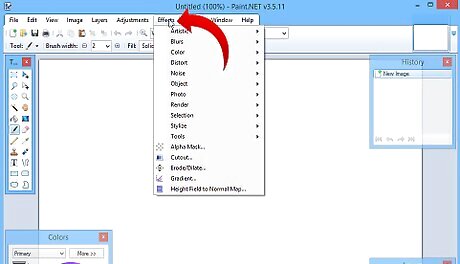
Be sure you have the following plugins: Crystallize Height Field to Normal Map Erode/Dilate
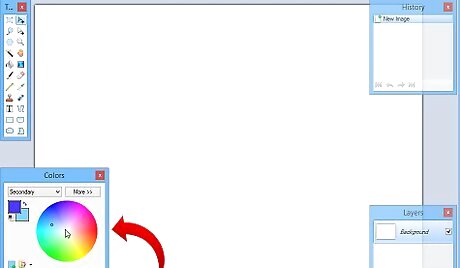
Select two contrasting (but not a lot) colors. If you have a hard time getting the colors you want, click on More. This will help you finesse your choice.

Select Effect >> Render >> Clouds. Use the following settings: Scale - 800 Roughness - 0.25 Blend Mask - Normal Be sure the Blend Mask is set to normal or the colors will be off!
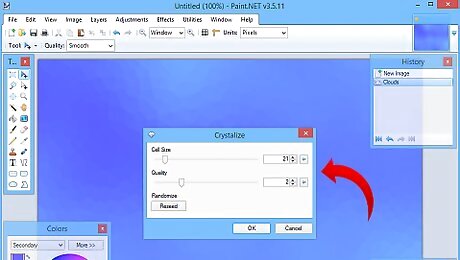
Select Effects >> Distort >> Crystallize. Use the following settings: Cell Size - Between 15 - 30 Quality - 2
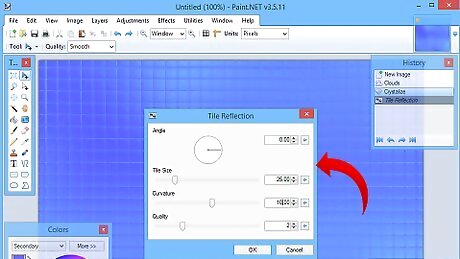
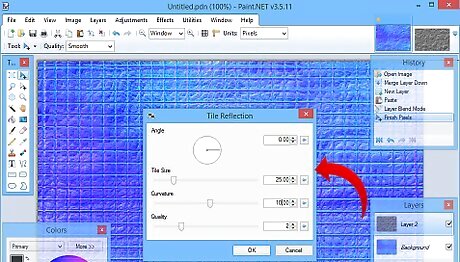
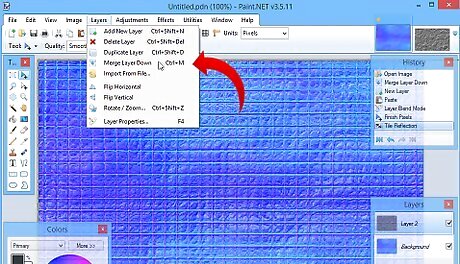
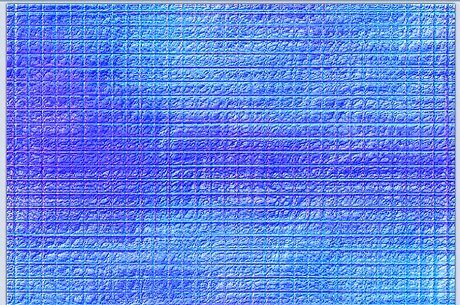
Select Effects >> Tile Reflection. Use the following settings: Angle - 0.00 Tile Size - 25 Curvature - 10
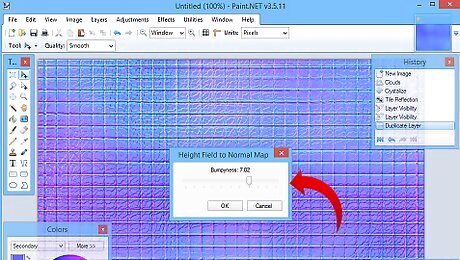
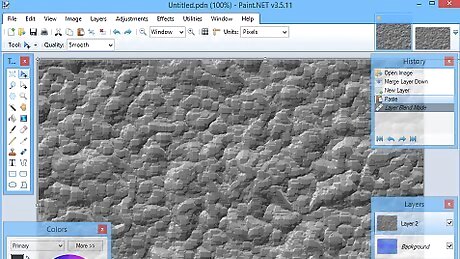
Duplicate the layer and run Height Field to Normal Map. Use the following settings: Bumpiness - 7.02 (Yes, it's spelled that way in the software).
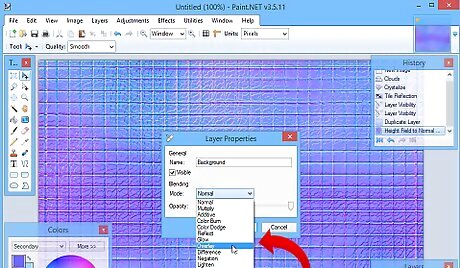
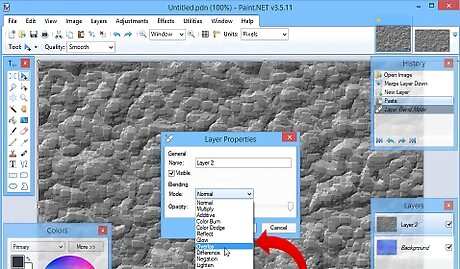
Click on Layer Properties and set the layer to Overlay.
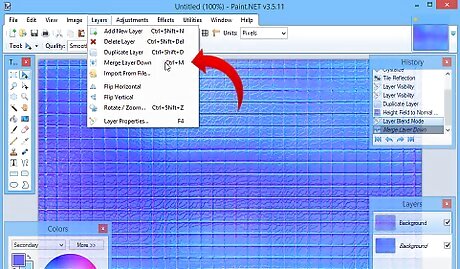
Merge the two layers.
Copy your cobblestone texture and add it as a layer. Do this by selecting Edit >> Paste Into New Layer (or CTRL+Shift V}.
Click on Layer Properties and set the blending mode for Overlay.
Select Effects >> Distort >> Tile Reflection, using the same settings as before.
Merge the layers as you did before.

Duplicate the merged layer and use the Height Field to Normal Plugin. Click on Effects >> Height Field to Normal Map. Use the same settings as before.
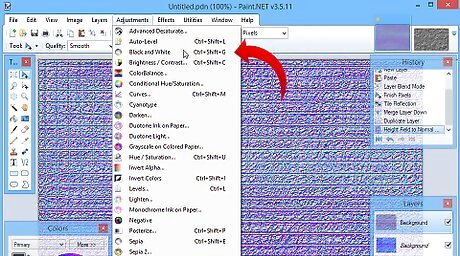
Click on Adjustments >> Black to White (or CTRL+Shift G).
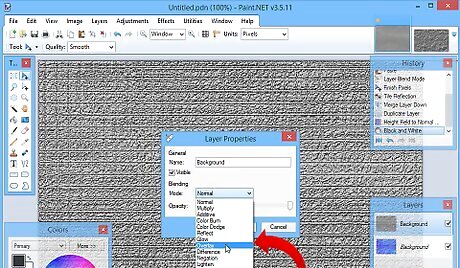
Change the layer properties to Overlay again.
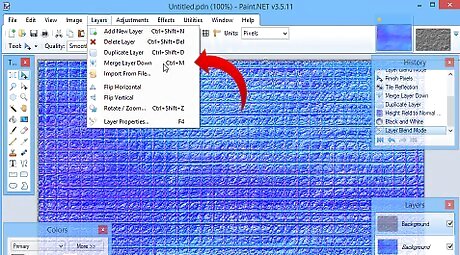
Merge the two layers...again.
Finished.


Comments
0 comment