views
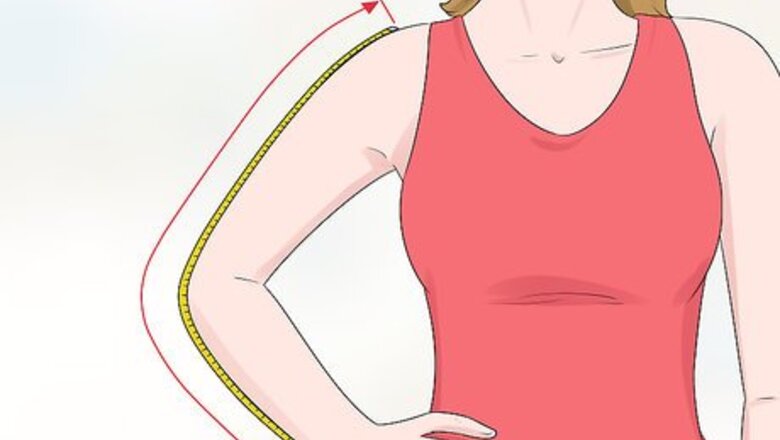
- Take sleeve measurements of your shoulder to your wrist and the circumference around your bicep, elbow, and wrist, adding 1-2 inches (2.5-5.1cm) to each.
- Draw a basic pattern by marking your length measurements, armhole depth, and bicep circumference.
- Use your bicep line to create the shoulder curve, then cut out the pattern you’ve traced.
Taking Sleeve Measurements
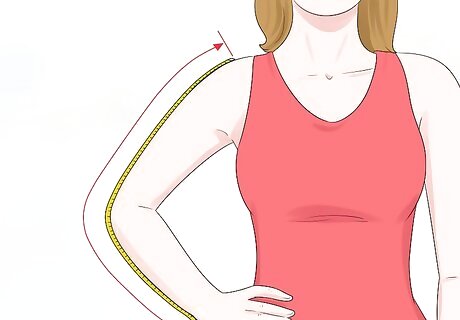
Measure from your shoulder to your wrist. Use a measuring tape to find the distance from the tip of your shoulder to your wrist. Bend your elbow slightly as you measure. Record this measurement.
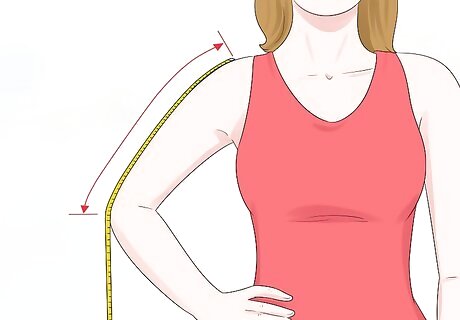
Identify the distance from your shoulder to your elbow. Next, measure the distance from the tip of your shoulder to the tip of your elbow. Bend your elbow slightly to locate the point. Record this measurement. You can also bend your arm at a 90° angle, then measure from your shoulder to your wrist.
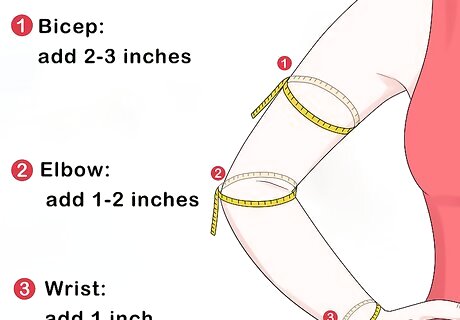
Find the circumference of your bicep, elbow, and wrist. The circumference is the area around a part of your body. Use your measuring tape to measure your bicep, elbow, and wrist. Record each of these measurements and then add to them to ensure that your sleeves will have enough fabric for seam allowance and give. You can add more or less to the measurements to ensure the desired fit. For each measurement, you will need to add: Bicep. Add about 2 inches (5.1 cm) to 3 inches (7.6 cm). Elbow. Add 1 inch (2.5 cm) to 2 inches (5.1 cm). Wrist. Add 1 inch (2.5 cm).
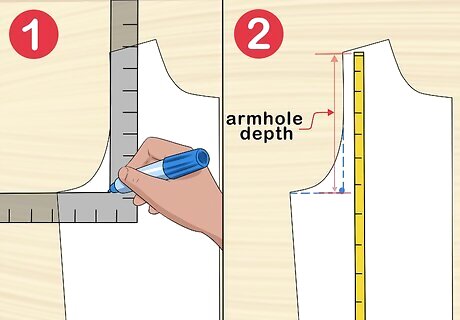
Calculate your armhole depth measurement. Finding the armhole depth measurement requires your bodice pattern. The armhole is the area where your sleeve will connect with your bodice. To find the sloper, place an L-shaped ruler so that its inner edges are lined up with the tip of the shoulder and the tip of the underarm. Then, mark the point at the inner edge of the L that falls on your bodice. The armhole depth measurement is the distance from the top of the shoulder to the point in the crook of the L-shape. Record this measurement.
Drawing the Basic Pattern
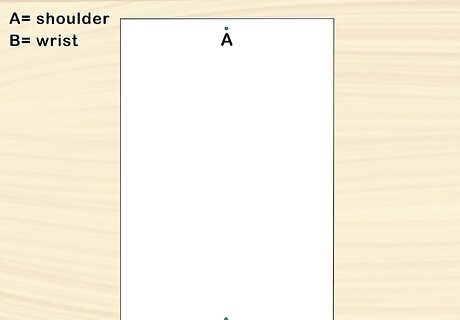
Mark the pattern paper with the length measurements. You should have a measurement for the shoulder to wrist and shoulder to elbow lengths. Mark the shoulder point with an A and the wrist (end of the sleeve) with a B. Place these marks in the center of the paper. If needed, you can crease the paper down the middle and then unfold it to help you find the center of the paper.
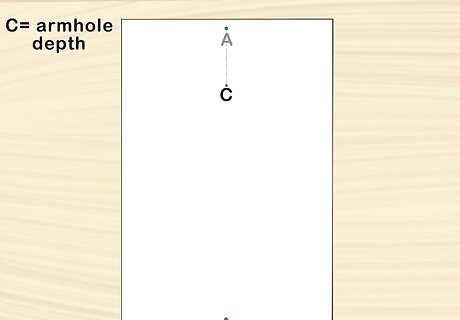
Mark your armhole depth. Measure from the folded edge parallel to point A to the end of the measurement for your armhole depth. Place a mark to indicate the measurement and label this as point C. For example, if your armhole depth measurement is 10 inches (25 cm), then you would measure 10 inches (25 cm) down from point A.
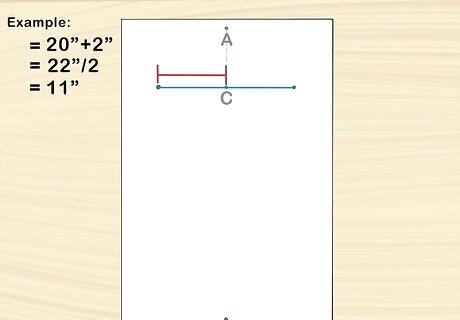
Draw a line through the armhole depth to mark your bicep circumference. Use your armhole depth measurement to find the point where your bicep circumference measurement should be. Measure from point C to half the bicep circumference you have recorded (including the amount that you added for slack) on either side of the line. Make sure that these points are even with each other. Connect the points to form a line that intersects point C at a 90 degree angle. For example, if your bicep circumference measurement was 20 inches (51 cm) and you added 2 inches (5.1 cm), then you would need to divide 22 inches (56 cm) by 2 to find half of your bicep circumference. In this case, half the measurement would be 11 inches (28 cm) and you would place marks 11 inches (28 cm) from either side point C.
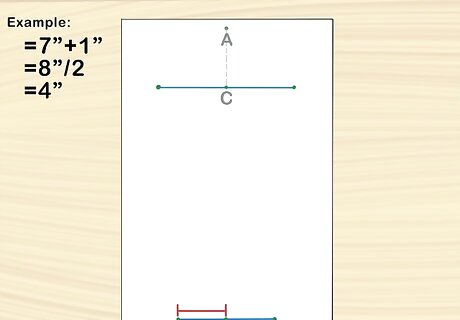
Draw a line from the wrist mark equal to half your wrist circumference. Next, use the same process to identify the wrist circumference. Draw 2 points parallel to point B to indicate half of the wrist circumference. The full length of this line will be the total wrist circumference. For example, if your wrist circumference measurement was 7 inches (18 cm) and you added 1 inch (2.5 cm), then you would need to divide 8 inches (20 cm) by 2 to find half of your wrist circumference. In this case, half the measurement would be 4 inches (10 cm) and you would place marks 4 inches (10 cm) from either side point B.
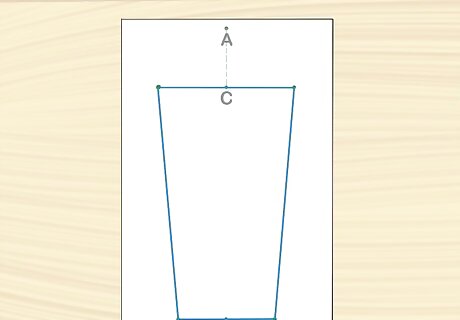
Connect the ends of your lines. Draw a line extending from the end points of the lines you just made through points C and B. These will be the outer edges of your sleeve pattern.
Creating the Shoulder Curve
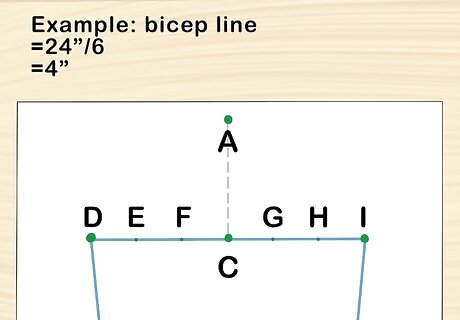
Divide the bicep line with 6 points and mark the points. Measure your bicep line and divide it into 6 equally spaced points. Place 3 points on each side of the C point which is the center of the line. Then, mark the points from left to right using the letters D through I. This will make it easier to differentiate them. To evenly space your line, divide the total bicep measurement by 6. For example, if the bicep line is 24 inches (61 cm), then your points on the line will need to be 4 inches (10 cm) apart.
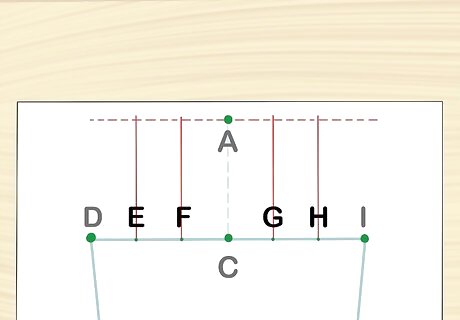
Create vertical lines going up from points E through H. Draw vertical lines extending upwards from points E and H to the level of point A. Use a ruler or straight edge to make the lines straight. These lines should be parallel to your central line that extends from points A to C.
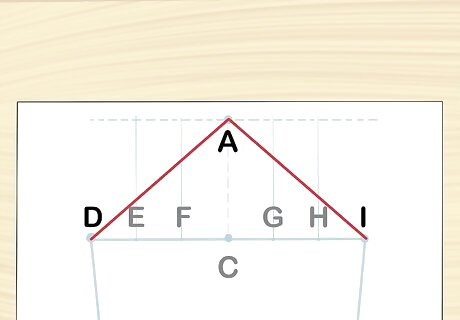
Draw a diagonal line from points D to A and I to A. Next, use your ruler or straight edge to draw a diagonal line that extends from point A to D and another that extends from point A to I. These lines should only connect the points, and not extend beyond them.
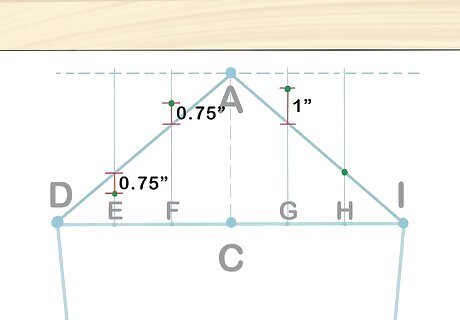
Mark your points for the armhole and shoulder curve. The shoulder curve will connect to the shoulder area of your bodice piece, and it requires some precise markings. Make a mark in the following places. Above point E 0.75 inches (1.9 cm) below the diagonal line. Above point F 0.75 inches (1.9 cm) above diagonal the line. Above point G 1 inch (2.5 cm) above diagonal the line. At point H where diagonal the line crosses it.
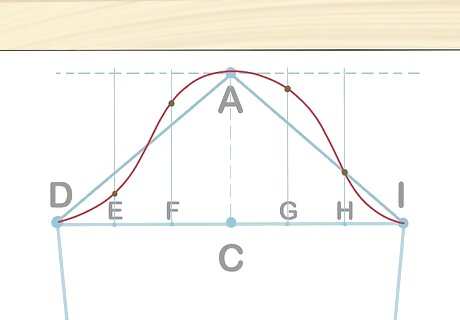
Draw curve that goes through all of the points starting at D and ending at I. After you have marked all of the points for your armhole and shoulder curve, draw a curved line that goes from point D through all of the points you just marked, and that ends at point I. A French curve tool is helpful for creating this curving line. However, you can use another curved object or try to draw the line freehand if you do not have a French curve.
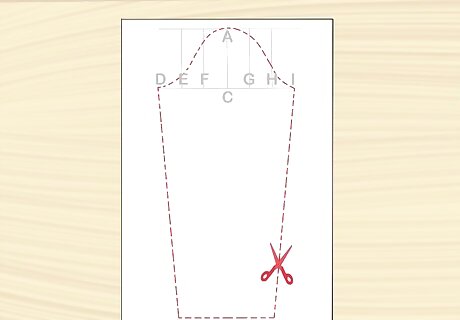
Cut out the pattern you have traced. Your sleeve pattern will be complete after you mark the curved line for the shoulder curve. Cut along the lines you traced onto the pattern paper, and then use your sleeve pattern to cut out sleeves for your project. After you have cut out the pattern piece for your sleeves, use it to trace the sleeve shape onto your fabric and cut out the shapes that you trace. Don't cut on the bias—cut on the straight thread to avoid the risk of twisting the sleeve while you sew.


Comments
0 comment