views
Finding the Problem for a Wired Doorbell
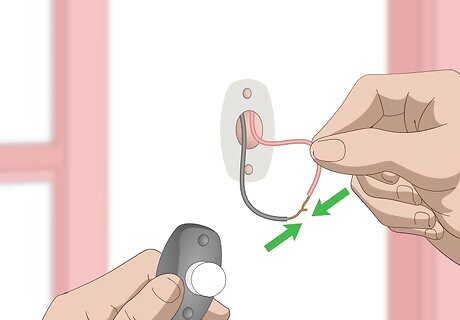
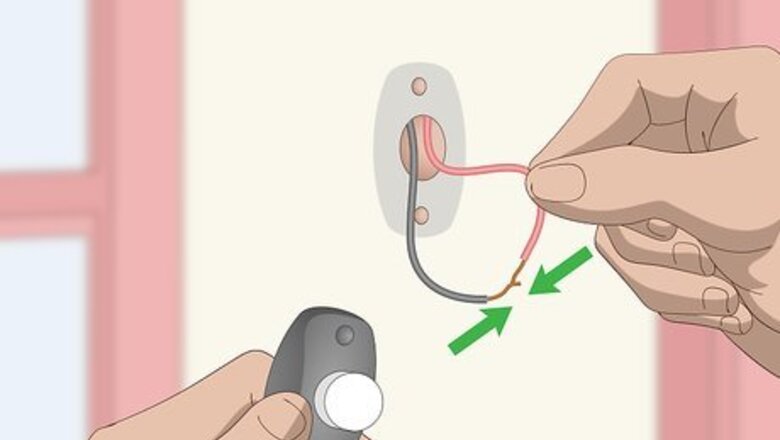
Disconnect the button from your home and touch the wires together first. Use a screwdriver to remove the button from the side of your home. Unscrew the terminals on the back of the button so the wires are loose. Carefully touch the tips of the wires together and listen for your doorbell to ring. If it went off, then you need to replace the button. If your doorbell still doesn’t work, the problem is somewhere else. The wires leading to your doorbell are low voltage so they may still give a small shock if you touch the exposed ends.
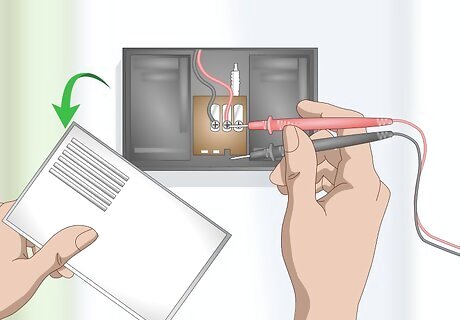
Check the wired connection inside the chime kit if the button works. Pop off the faceplate to the chime kit by pulling it forward. Make sure the connections leading to the terminals are solid and use a multimeter on the terminal screws to test for voltage. If there are about 20 volts when you use the meter, then replace the chime kit. If you have less or no voltage, then you need to keep looking for the problem. The chime kit is usually a box attached to your wall or ceiling near the door your doorbell is attached to.
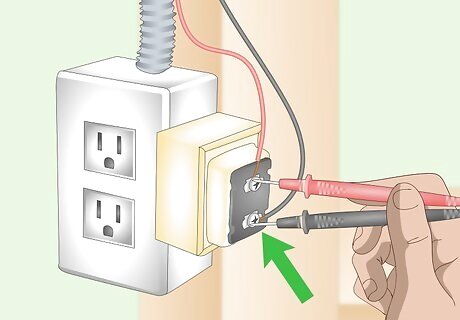
Test the voltage coming from the doorbell’s transformer last. Your doorbell’s transformer is usually attached to an outlet box in your basement or attic. Locate the 2 terminal screws on the front side of the transformer and hold the 2 ends of your multimeter to them. The reading should be around 20 volts. If the multimeter doesn’t have a reading, replace your transformer. If you can’t find your doorbell’s transformer, call an electrician to locate it for you.Tip: If your transformer is working, then you may need to contact an electrician to look at the wiring leading to the doorbell to make sure it’s broken.
Replacing a Faulty Doorbell Button for a Wired Doorbell
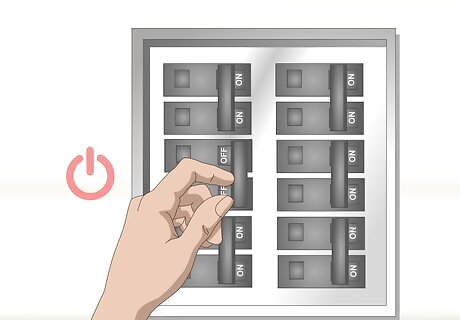
Turn off the circuit leading to your doorbell. Open the breaker box in your home and locate the circuit that controls your doorbell. Make sure the circuit is completely turned off so you don’t accidentally shock yourself while replacing the doorbell button. If the doorbell isn’t labeled on your breaker, try the circuits 1 at a time and have a helper test the voltage at the button.
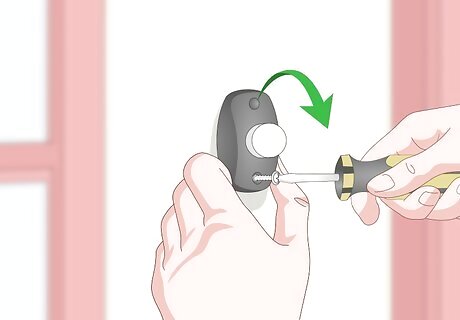
Unscrew the button from your home. Use a screwdriver to loosen the screws holding your button in place. Once the screws are out, pull the button out so you can see the wires behind it.Tip: Tape the wires to the outside of your home so they don’t fall back into the hole.
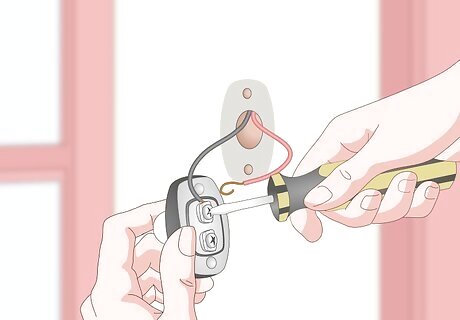
Disconnect the wires from the terminal screws. There should be 2 wires attached to the 2 screws on the back of your button. Unscrew the terminals and unwind the wires that are wrapped around them. Set your old button aside or throw it away immediately. You do not need to label what terminals the wires were attached to since it doesn’t matter.
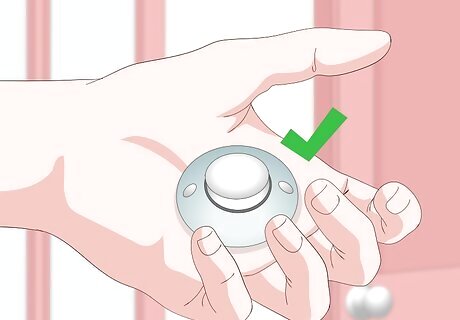
Get a replacement doorbell button. Any doorbell button that has 2 terminal screws on the back will work for your current doorbell. Pick a button that’s roughly the same size as your old button and matches the exterior of your home. You can purchase doorbell buttons from hardware and home improvement stores.
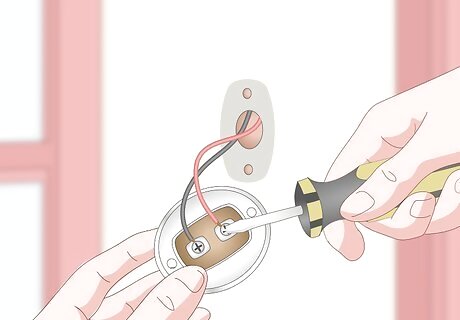
Screw the wires into the terminals on the new button. Bend small hooks at the ends of the wires with your fingers. Set the hooked wires underneath the terminal screws. It doesn’t matter which wire you attach to which screw. Tighten the screw with your screwdriver slowly so you don’t damage the wires. Don’t attach both wires to the same screw or the doorbell will not work.
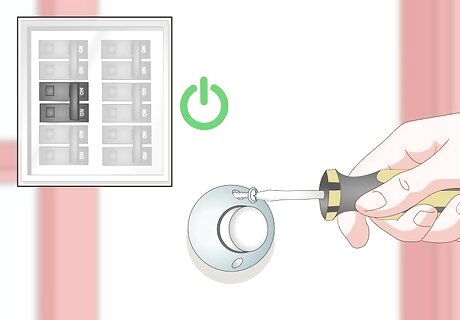
Reattach the doorbell and turn on the power. Mount your new button with screws in the same place as the old one. Turn on the circuit leading to your doorbell and try pressing the button. The doorbell should chime right when the button is pressed. If the doorbell doesn’t chime, then remove the button again and ensure the wire connections are tight.
Changing a Wired Chime Kit

Disconnect the power leading to your doorbell and chime. Find the circuit and breaker that controls your doorbell and switch it to the off position. This helps prevent any accidental shocks while you’re working.
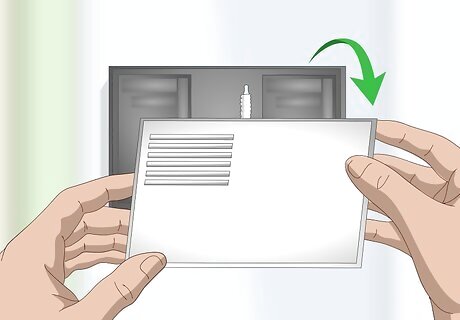
Remove the faceplate from the front of the chime. Grab the sides of the faceplate and gently pull on toward you. The faceplate covering the wires and chimes should easily pop off from the base. If not, check for screws or fasteners around the edge. The chime is usually found on the wall or ceiling near the door that it’s attached to. If you need to use a ladder to access it, be sure to maintain 3 points of contact while you’re climbing it.
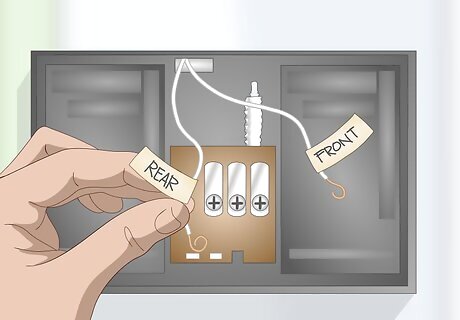
Disconnect and label the wires from the chime kit. Look for the 2 or 3 screws with wires attached to them inside your chime kit. Loosen the screws with a screwdriver so you can pull out the wires. As you pull out each wire, wrap a piece of masking tape around it and write down what terminal it was plugged into. The terminals inside your chime kit will be labeled either Front, Trans, or Rear. If your chime kit has 2 screws, there may be a white wire that’s capped inside. Unscrew the cap and disconnect the wires that are underneath it.
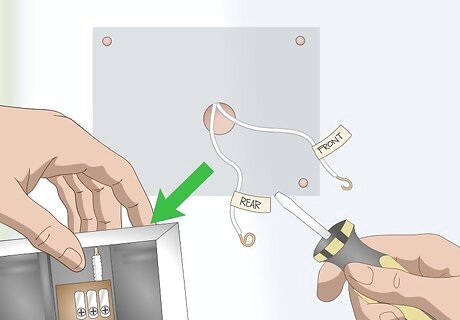
Unscrew the chime kit from the wall. Your chime kit should have 3 or 4 screws mounting it to your wall. Turn a screwdriver counterclockwise on each of the screws to loosen them. When you’re about to remove the last screw, support the chime with your other hand so it doesn’t fall. Avoid using a drill so you don’t strip your screws.
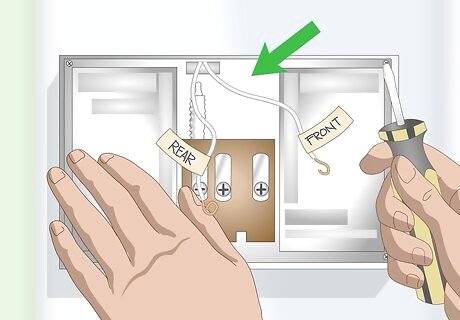
Attach the new chime kit to your wall. You can use any chime kit that connects to your home’s electrical system. Place the new chime kit on your wall where you had the old one. Feed the wires running from your wall through the holes in the back of the chime kit so you can easily attach them later. Use a screwdriver and screws to secure the back of the kit to the wall. Chime kits can be purchased online.
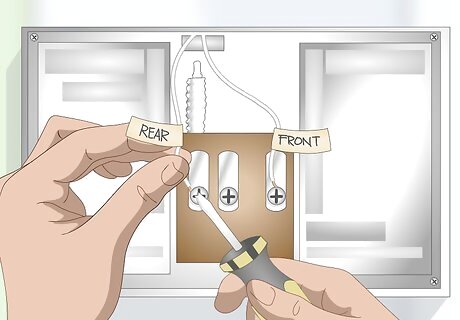
Reattach the wires to the matching screws. Bend a small hook at the end of each wire with your fingers. Hook the wire around the screw that matches the label on your wire. Use a screwdriver to slowly tighten the screws onto the wires. When you’re finished, pop the faceplate back on your chime. If you had an unused white wire in your old chime kit, find the white wire that was attached to your new chime kit. Twist the ends of the wire together and twist a cap onto the ends.
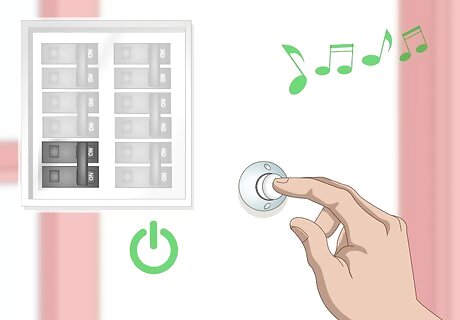
Reconnect power and test the doorbell. Turn on your circuits and press the doorbell button. The chimes should ring immediately after you press it. If the doorbell doesn’t work, take off the chime kit’s faceplate and make sure your screws are tight and your wires are in the correct terminals again. If everything is right in your chime, then you may need to change the transformer.
Installing a New Transformer for a Wired Doorbell
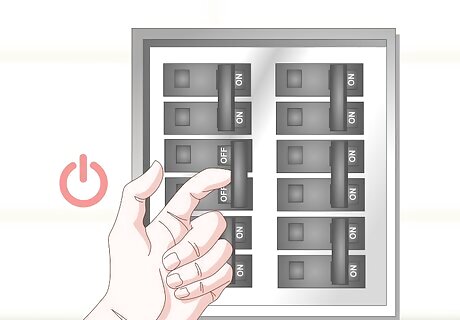
Turn off the power to your doorbell. Disconnect the circuit leading to your doorbell by turning off the switch in your breaker box. Never start work until you’ve ensured that there’s no power running through the wires.
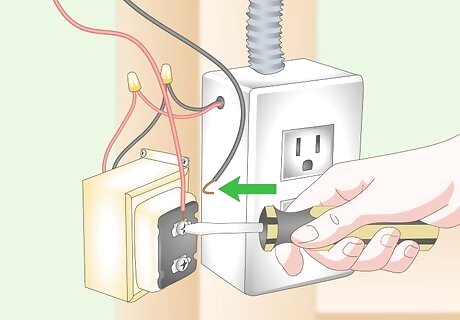
Disconnect the wires from the front terminal. The transformer is usually located in your basement or attic attached to a metal electrical box. The terminal is located on the front of the transformer and has 2 screws with wires leading to your doorbell. Use a screwdriver to loosen the screws attached to those wires. Unwrap the wires from the screws and set them aside. You don’t need to label the terminal wires since it doesn’t matter which screw they’re attached to.
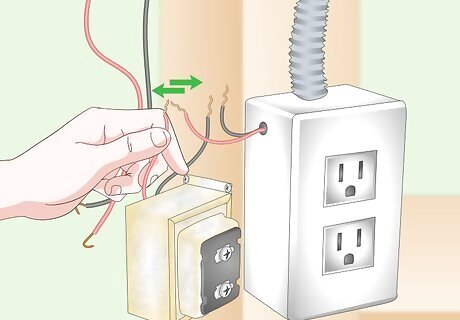
Undo the wires coming from the back of the transformer to remove it. The wires in the back of your transformer lead to your home’s power supply. Untwist the wire caps to separate the transformer’s wires from the power supply wires. Make sure your power is completely disconnected to your transformer since the back wires could shock you.
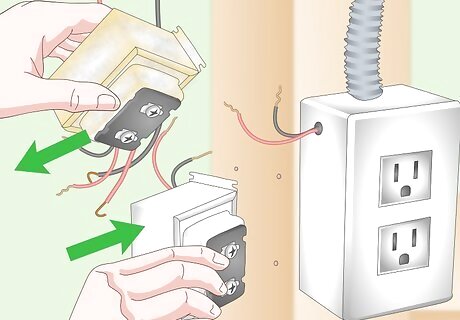
Unscrew the old transformer and put the new one in its place. Use a screwdriver to take out the screws holding the transformer to the box. Once you take the screws out, take your old transformer with you to a hardware store so you can buy one that matches it. Once you get your new transformer, screw it transformer into the box where the old one used to be.
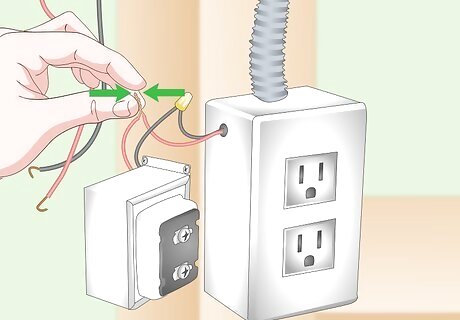
Connect the matching wires on the back of the new transformer. The back of your transformer will have 3 wires that connect to your power supply. The black wire provides power, the white wire is neutral, and the green wire is a ground. Twist a wire cap on the ends of the of the wires that match in color. Make sure the power running to your transformer is off while you’re wiring it.
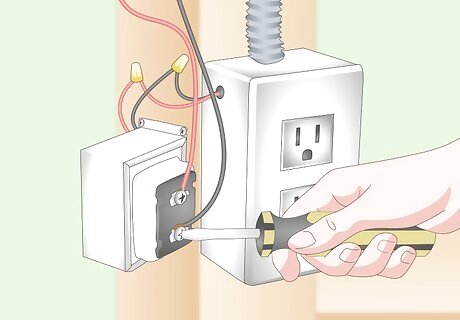
Attach the wires to the front terminal. It doesn’t matter which wire you attach to which screw. Bend a hook shape into the exposed end of each wire. Slide the hook underneath the terminal head and tighten the screw with your screwdriver. Make sure the screws fully contact the wires. Don’t attach both wires to a single screw.
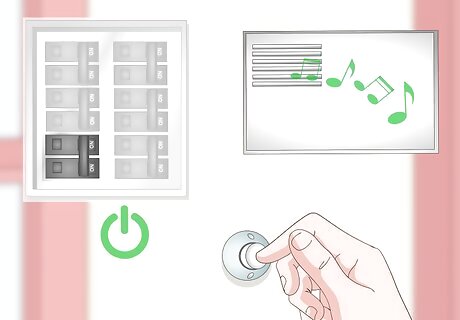
Turn on the power to test your doorbell. Turn on your breaker so your doorbell has power again. Try pressing the button and listening for the chime. If the doorbell doesn’t work, double check the terminal connections and wiring in the back of the transformer. If everything looks correct in your transformer, call an electrician to look at the wiring in your walls.
Troubleshooting a Wireless Doorbell

Check the batteries in the button and the receiver when the bell stops working. Most times when a wireless doorbell stops working, it’s because the batteries have died. Open the button and receiver to see what batteries they use. Put in new batteries and test the doorbell again to see if it works. The button and receiver may each take different styles of batteries. Use rechargeable batteries so you don’t have to throw them away every time.
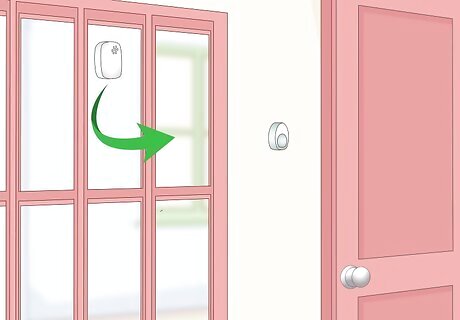
Try moving the receiver closer to the button if the bell doesn’t ring when it’s pressed. Sometimes, the receiver may have trouble because it’s out of range from the button. If your bell rings sometimes but not other times, try moving the receiver closer to the button if you can. Once the receiver is closer, try ringing the bell again. This will require you to remount your receiver on the wall.
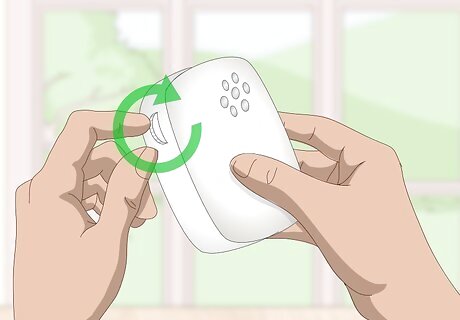
Switch the transmission frequency if your doorbell goes off randomly. Some wireless doorbell receivers may pick up random frequencies in the air or from nearby transmitters. This could cause the doorbell to go off at random times even when there’s no one at the door. Check the doorbell’s user manual to see if you can change the frequency of the receiver and button. Once the frequency is changed, try the doorbell again. Not all wireless doorbells will let you change the frequency.
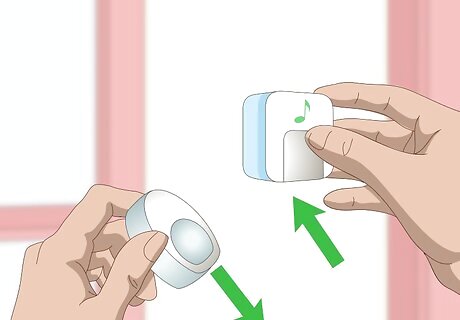
Replace the wireless doorbell if you can’t find a problem. If you can’t find a fix that works, the electronics inside the doorbell may be faulty. Remove the current doorbell that you have and look for another wireless doorbell system online or at home improvement stores. If your wireless doorbell didn’t work immediately after you installed it, check online to see if the manufacturer has a warranty so you can get a replacement.


Comments
0 comment