views
- If the flapper won’t close or it’s not opening all the way, change the length of the chain connecting the flapper to the rod.
- Replace the flapper if the chain isn’t to blame. Purchase an identical model and install it the same way your old flapper was installed.
- You do not need any tools or fancy gear to replace a flapper, but you do need an identical replacement.
Adjusting the Flapper Chain
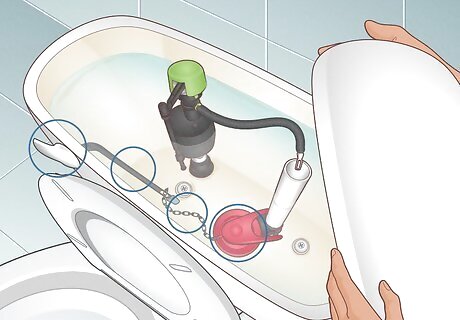
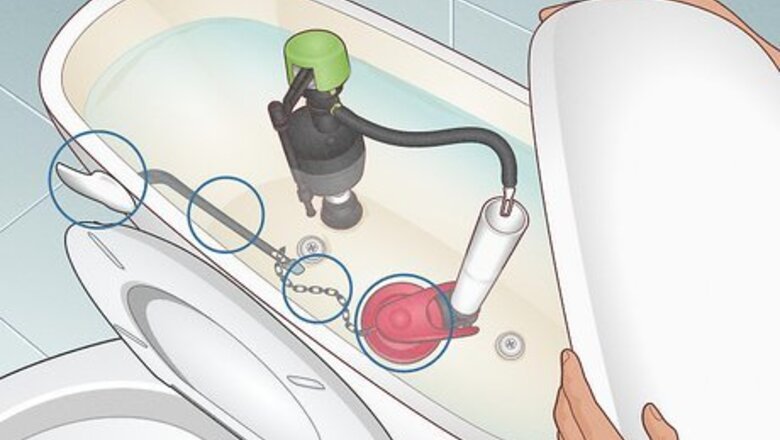
Remove the lid from your toilet tank and note the parts. Grab the lid from both sides and set it aside. Take a minute to study the components in your tank. The flushing handle should be connected to a long metal or plastic handle arm called a float arm. This connects to the flapper chain. In turn, the chain connects to the flapper, which is the piece that plugs the drain when you flush. The two vertical pipes are the overflow tube, which automatically drains excess water to prevent flooding, and the fill valve (to the left or right of the overflow tube), which fills the tank. You may have a float ball that automatically shuts the fill valve off when the water reaches a certain height. On newer toilets, you just bend the float arm to adjust the water level.
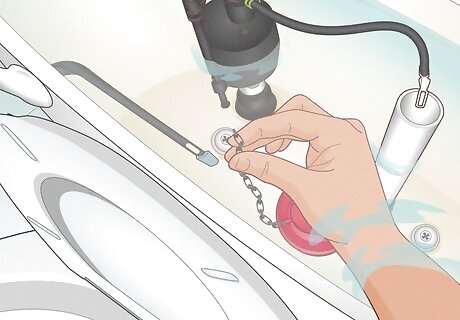
Unhook the chain from the float arm. Reach into the tank and remove the chain link that connects the handle arm to the flapper. Find the small opening in the link that lets you remove it, and slide it off. Don't worry about emptying your toilet tank to tighten the flapper. It’s actually easier to figure out where you need the chain to be if your tank is full, anyway. The water in the tank is clean, so don’t worry about your hands getting wet. You can wear gloves if it makes you feel better, though. If the chain is broken, you might as well just replace the flapper. They come with chains, and flappers are cheap enough that you might as well replace it. You can replace the chain if you want, but if the chain broke it’s a sign the flapper is old.
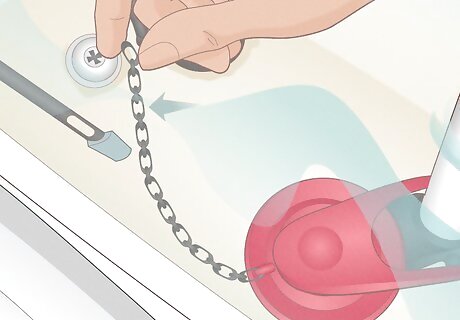
Select a link that allows the chain to sag slightly. Your goal here is to make the chain sag a little bit when the flapper is closed, but pulled taut when the handle is pressed so that the flapper opens up. Play with the chain and the handle to find that sweet spot. You normally need about ⁄2 in (1.3 cm) of slack in the chain. If the chain is too long, it won’t pull the flapper up to drain the toilet when you press the handle. If the chain is too short, the flapper won’t be able to close and water will constantly run in your tank.
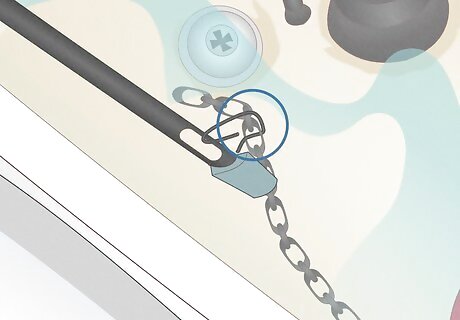
Rehook the chain on the new link. Slide that perfect link over the hook on the handle to attach it to the float arm. You can leave the extra chain dangling in the water, or clip the excess off using some wire cutters. If it is 100% impossible to re-hook the chain because it doesn’t have openings on the links, you can use a paperclip to hook the chain to the float arm.
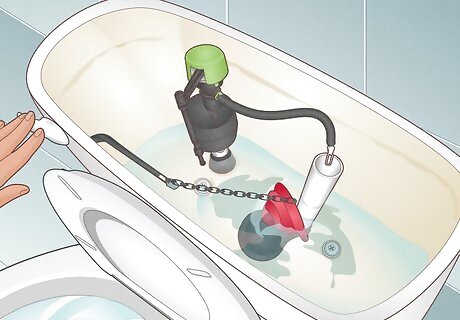
Flush the toilet to check your work and confirm the flapper works. Press down on the toilet handle and make sure that the chain is tight enough. The chain should bring the flapper high enough to stay open while the toilet flushes. If it doesn't, continue adjusting the paperclip location until the chain tightness is ideal. If the chain isn't tight enough and the flapper doesn't go all the way up, move to a chain link closer to the flapper valve. If the chain is too loose and the flapper doesn't completely seal the hole, move to a chain link closer to the toilet handle.
Replacing the Flapper
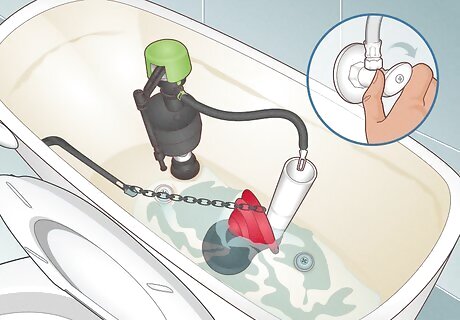
Shut the water supply off and drain the tank. Remove the tank lid and set it aside. Turn the shut-off valve clockwise as far as it will go to cut the water supply off. Then, flush the toilet to drain the water in the tank out. The shut-off valve is typically located behind and underneath the toilet. It’s usually on the same side as the handle. You may be tempted to replace the ring around the opening under the flapper. Don’t; the problem is almost positively the flapper itself. Flappers fail all the time—it’s the part that gets the most wear and tear—and replacing the flapper will almost positively solve the problem.
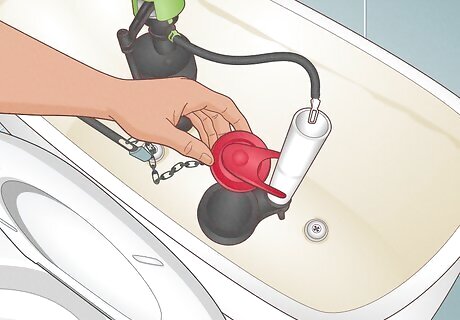
Remove the old flapper by hand. Start by removing the chain from the old flapper (keep it on the handle, though). Then, pull the flapper off of the overflow tube. If it’s wrapped around the overflow tube, slide the flapper up to remove it. If your chain is broken, just use the chain that came with your new flapper.
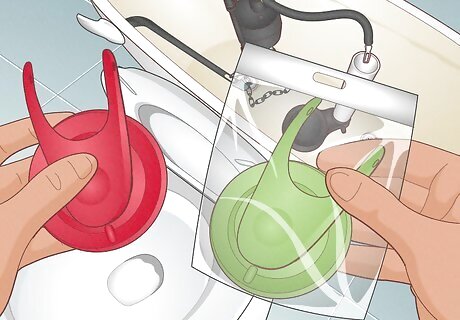
Purchase a new flapper that matches your old model. Take the old flapper with you to the hardware store and find a replacement. It doesn’t need to be the same brand, but it does need to be the same style. You may have: A traditional rubber flapper. These are the bulbous rubber flappers you find in 99% of toilets. An old school seat disk flapper. These are round discs of plastic or rubber that sit tightly over the valve. A tank ball flapper. These are relatively rare.
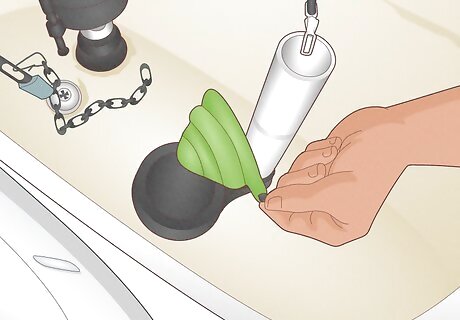
Connect the new flapper to the valve in the tank. Attach the new flapper to the flush valve the same way that you removed the old one but in reverse. It’s normally as simple as sliding it over the opening or inserting the arms into divots in the overflow tube. Afterward, connect the chain to the top of the flapper and connect the remaining end to the float arm. If you have to connect a ball for your ball flapper, attach it to the end of the fill valve. Some modern ball flappers just float in the tank, though.
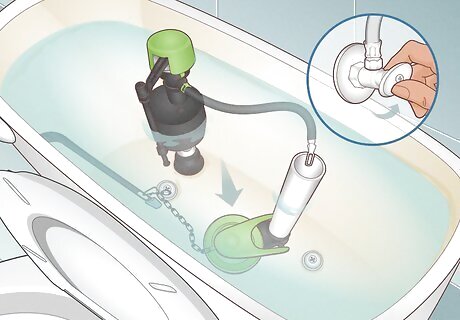
Turn the water back on and check your work. With the flapper installed, turn the water back on. Wait for the tank to fill and then test the handle by flushing the toilet. If the flapper works as intended, the tank will drain and refill. Once the flapper closes, it shouldn’t let any more water through. If the flapper won’t open when you press the handle, the chain is too long. Attach the arm to a lower link on the chain. If the flapper won’t lower, the chain is too tight. Use a link slightly higher up on the chain. If the flapper won’t close all the way, wipe the rough edges around the lip of the flapper valve—located underneath the flapper—with an emery cloth. This will help it create a watertight seal.





Comments
0 comment