

Chrome Remote Desktop
Install Chrome Remote Desktop on both computers. This is a free tool from Google that lets you remotely control one computer with another. The tool requires using Google Chrome as your web browser, so if you don't have Chrome installed, you'll need to get it from https://www.google.com/chrome. Complete the following steps on both computers: Open Google Chrome. Go to https://remotedesktop.google.com/access Click the blue-and-white arrow icon. This opens a new window to the Chrome Remote Desktop page on the Chrome web store. Click Add to Chrome on the Chrome web store, and then Add extension to confirm. Close the Chrome web store window so the original page is once again visible. Click the blue-and-white ACCEPT & INSTALL button, and then give all requested permissions to continue. Enter a name for your computer and click NEXT. Enter and confirm a 6-digit PIN. Once confirmed, Remote Desktop will start.
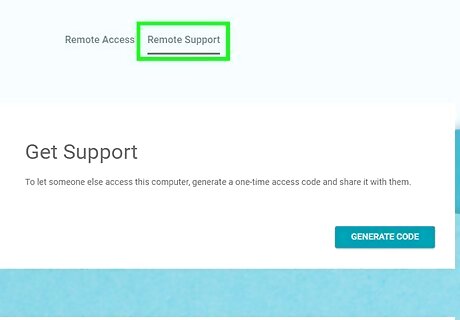
Generate a support code on the computer you want to access. Now that Chrome Remote Desktop is installed on both computers, you'll need to generate a code that the other computer can use to access it. The code will only be valid for 5 minutes from creation, so you'll want to do this right before you're ready to make the connection. Here's how to generate the code on the computer receiving the connection: Click the Remote Support tab near the top of the page. Click the GENERATE CODE button.
Go to https://remotedesktop.google.com/support on the computer that will make the connection. Remember, you'll need to do this using the Google Chrome web browser.
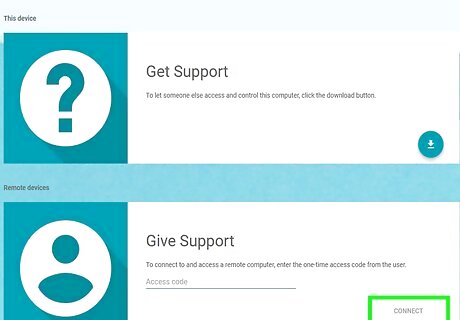
Type the support code into the "Give Support" blank and click Connect. It's the second blank on the page. An invitation will be sent to the computer that you're trying to access.
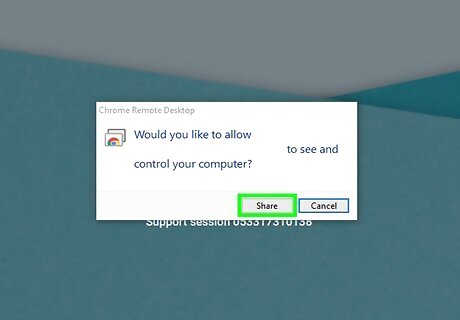
Click Share on the computer receiving the connection. In a few moments, the remote computer's desktop will appear in Chrome on the connecting computer.

Click Stop Sharing on the sharing computer to end the connection at any time.
TeamViewer
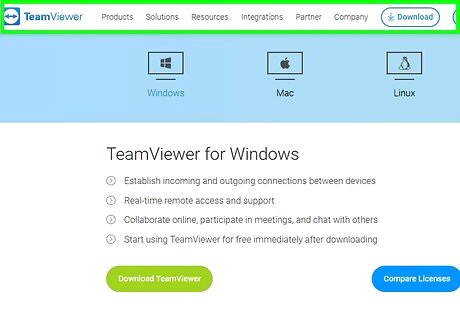
Go to https://www.teamviewer.com/en/download in a web browser. You can use TeamViewer to remotely control another PC or Mac from your own. TeamViewer is free for private/non-commercial use. If TeamViewer incorrectly determines your operating system, click your computer's OS in the row of options in the middle of the page.
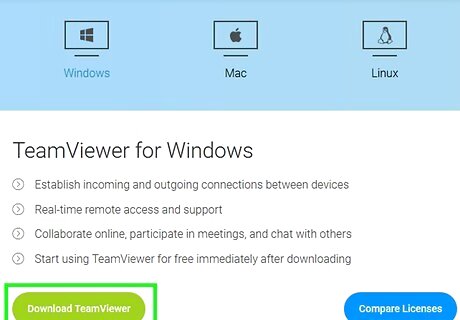
Scroll down and click Download TeamViewer. It's a green button near the top of the page. Doing so prompts the TeamViewer setup file to begin downloading to your computer. Depending on your browser's settings, you may have to save the file or indicate a download location before the file will actually download.

Double-click the TeamViewer file. On Windows, this is a setup file called "TeamViewer_Setup", while Mac users will double-click the "TeamViewer.dmg" file.
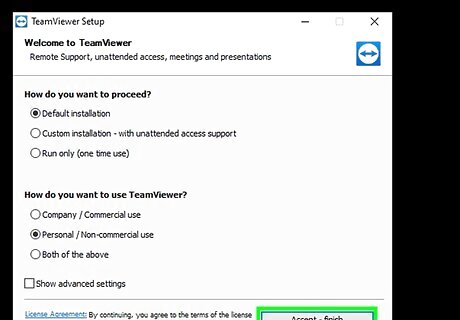
Install TeamViewer. To do so: Windows - Check the "Installation to access this computer remotely" box, check the "Personal / Non-commercial use" box, and click Accept - Finish. Mac - Double-click the installer package, click OK, open the Apple menu, click System Preferences, click Security and Privacy, click Open Anyway next to the "TeamViewer" message, and click Open when prompted. Follow the on-screen prompts.
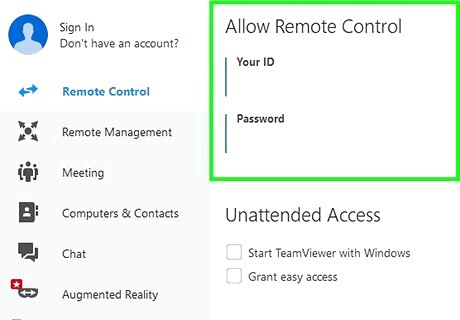
View your computer's ID. On the left side of the TeamViewer window, you'll see a "Your ID" section beneath the "Allow Remote Control" heading. You'll need this ID to access the host computer.
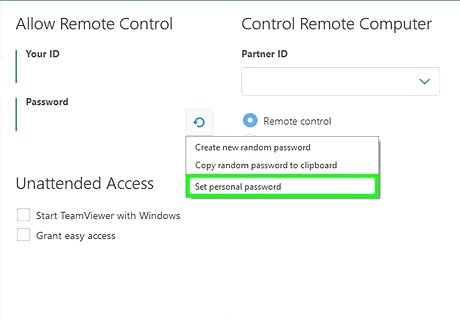
Create a custom password. To do so: Hover over the current password. Click the circular arrow left of the password. Click Set personal password in the drop-down menu. Enter your preferred password into the "Password" and "Confirm password" fields. Click OK.

Download, install, and open TeamViewer on your second computer. This should be the computer that you'll use to access the host computer. You can also download TeamViewer on your iPhone or Android.
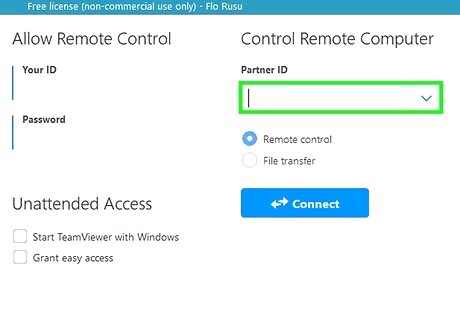
Enter the first computer's ID into the "Partner ID" field. This field is on the right side of the TeamViewer window, just below the "Control Remote Computer" heading.
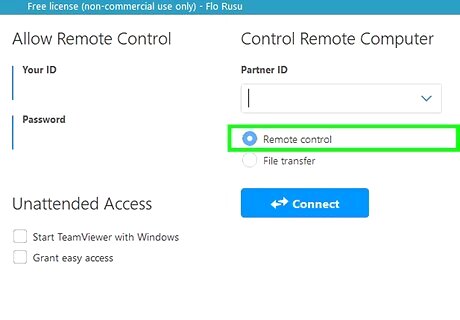
Make sure "Remote Control" is checked. If not, click the circle to the left of this option.
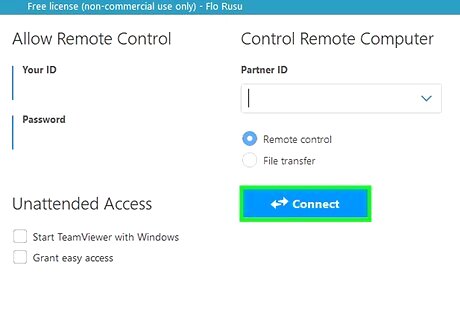
Click Connect to partner. It's near the bottom of the TeamViewer window.
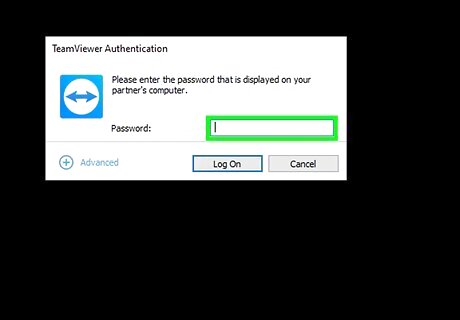
Enter the password. This is the password you set in the "Allow Remote Control" section of TeamViewer on the host computer.
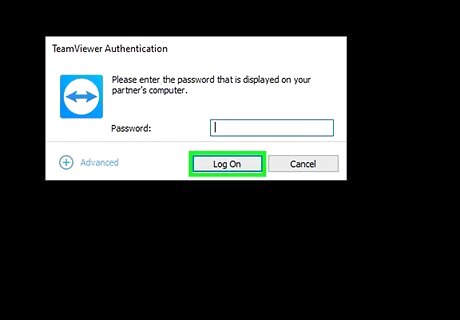
Click Log On. It's at the bottom of the TeamViewer Authentication window.

View your connected computer's screen. After a brief moment, you'll see the first computer's screen appear in the TeamViewer window on the second computer's screen. Once you see the host computer's screen, you can interact with it as though it were your own computer. To disconnect, you'll click the X at the top of the TeamViewer window.
Windows Remote Desktop
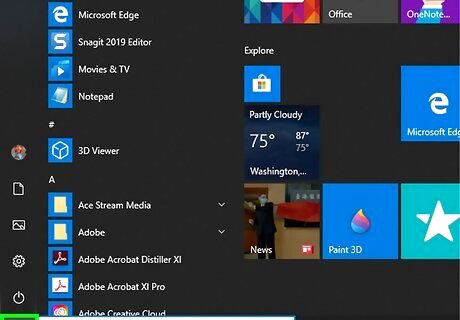
Open Start Windows Start on the host PC. Click the Windows logo in the bottom-left corner of the screen, or press the Windows key. Remote Desktop can only be used to connect PCs running Windows 10 Pro edition. If the remote computer is using a different version of Windows 10, such as Windows 10 Home edition, you'll need to use a different method.
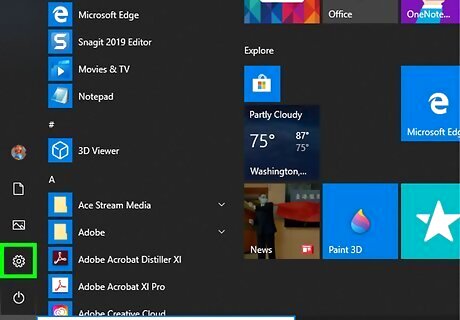
Click Settings Windows Settings. It's on the lower-left side of the Start menu.

Click System. This computer-shaped icon is near the top of the Settings page.
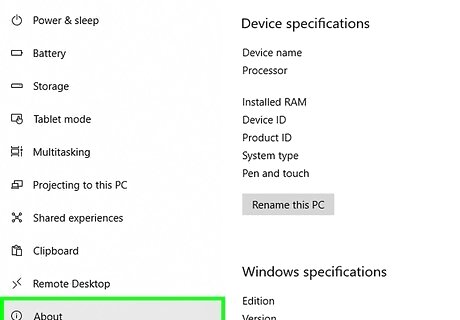
Scroll down and click the About tab. It's at the bottom of the column of options on the left side of the window. You'll have to scroll with your cursor hovering over this column.

Note your computer's name. It's at the top of the page, right next to the "PC name" heading. You'll need this to connect the second computer to this one.
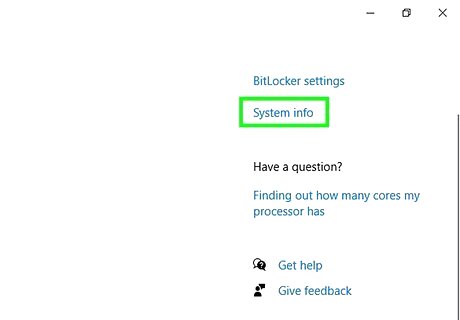
Click System info. It's beneath the "Related settings" heading in the top-right corner of the page. This option may also be at the bottom of the page if you haven't updated to the Windows 10 Creator version.
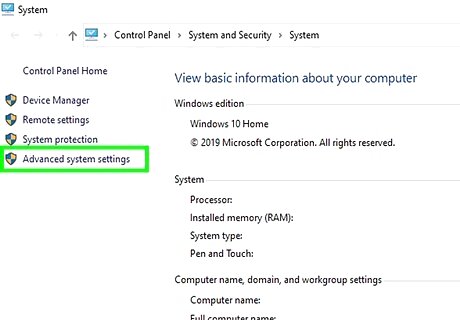
Click Advanced system settings. It's in the upper-left side of the System window.
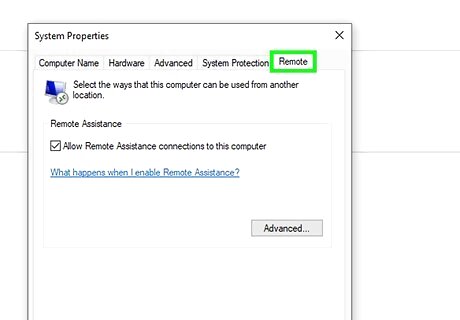
Click the Remote tab. This option is in the top-right corner of the System Properties window.
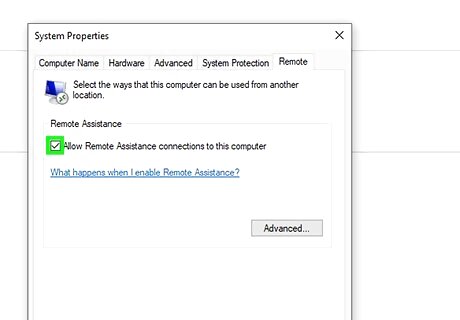
Check the "Allow Remote Assistance connections to this computer" box. It's below the "Remote Assistance" heading in the middle of the page. If this box is checked, you don't have to change anything.

Click OK, then exit the System window. This will save your settings.
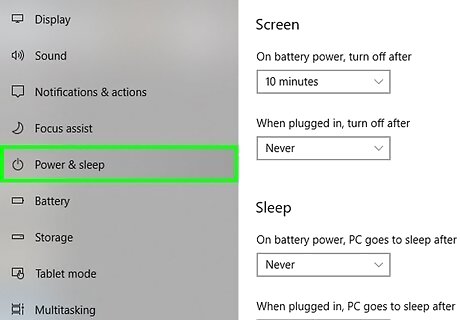
Scroll up and click Power & sleep. This tab is near the top of the column of options on the left side of the Settings window.
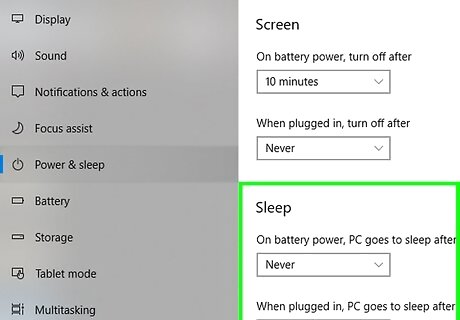
Click both drop-down menus and select Never for each of them. This will prevent the host computer from going to sleep or shutting down when you are remotely connected to it.
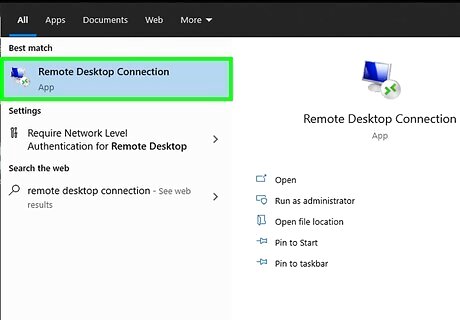
Open Remote Desktop on the second computer. To do so: Windows - Open Start Windows Start, type in remote desktop connection, and click the Remote Desktop Connection app. Mac - Download Microsoft Remote Desktop from the App Store, open Launchpad, and click the orange Microsoft Remote Desktop app.
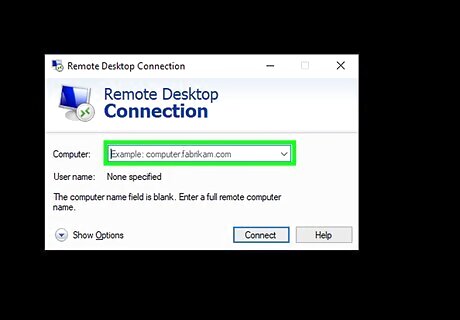
Enter the host computer's name. Do so in the "Computer:" field near the top of the Remote Desktop window. On Mac, first click + New in the top-left corner of the app window, then enter the computer's name in the "PC Name" field. You can also type the host computer's IP address into the computer's name field.
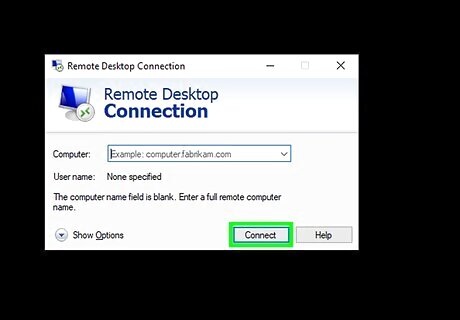
Click Connect. It's at the bottom of the Remote Desktop window. When the connection is made, the host computer’s display will appear in a window on your computer. On Mac, double-click the connection name you just created in the My Desktops drop-down list.


Comments
0 comment