views
- Place a bucket under the disposal. Detach the waste pipe and dishwasher hose, then turn the mounting ring with a screwdriver to remove the disposal.
- To replace the sink flange and mounting ring, loosen the mount screws and pry off the ring and the flange. Apply 1⁄2 inch (1.3 cm) plumber's putty and attach the new flange.
- Plug the disposal into the wall or wire it into the switch. Attach the waste pipe and the dishwasher hose to the disposal, then attach it to the new mounting ring.
Removing the Old Disposal
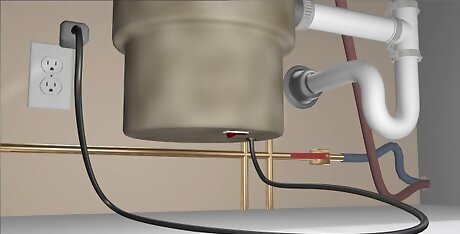
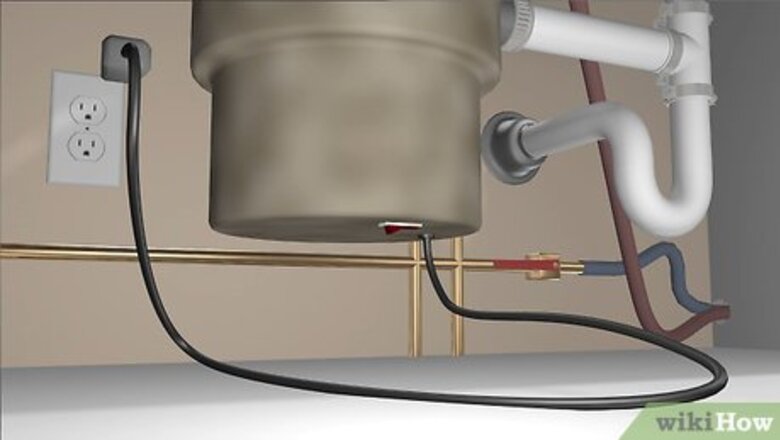
Turn off the water and power to the disposal. Turn off the hot and cold water lines underneath the sink by twisting the knobs or levers at the base of the pipes clockwise. Turn off the circuit breaker that connects to your disposal. If your disposal is hard-wired into your home, unscrew the electrical cover plate on the bottom of the disposal and detach the wires from each other. If your old disposal plugs into the wall, all you need to do is unplug it.
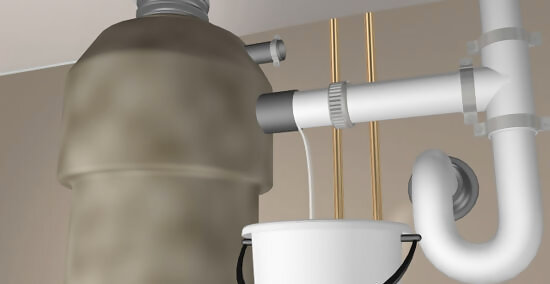
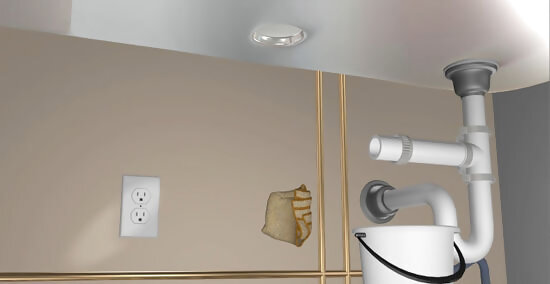
Detach the waste line and dishwasher hose from the disposal. Place a bucket underneath the disposal to catch any water or waste. If you have a dishwasher, use a screwdriver to loosen the top pipe that connects to it. Then unscrew and remove the bottom pipe that connects the disposal to the waste line.
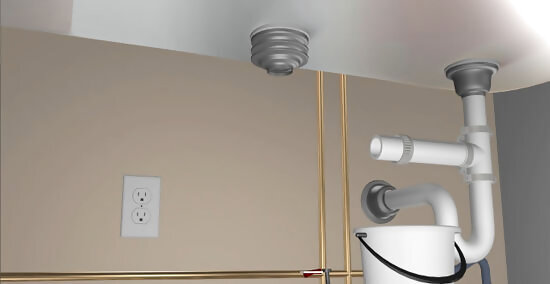
Turn the mounting ring with a screwdriver to remove the disposal. Remove the disposal by inserting a screwdriver into one of the small metal tubes on the bottom half of the disposal mount. Use the screwdriver to turn the ring clockwise and unlatch the old disposal from the mounting ring. The mounting ring is the large metal piece that attaches the disposal to the drain of your sink. The garbage disposal may be heavy to lift on your own. Ask a friend to hold the disposal as you loosen the mount or place an overturned bucket underneath to catch it.
Replacing the Sink Flange and Mounting Ring
Loosen the screws around the mounting ring and pry it off the flange. If you need to install a new sink flange, loosen the mounting screws around the mounting ring underneath the base of the drain. Use a flathead screwdriver to pry the snap ring off the bottom of the sink flange, then unscrew the mounting ring the rest of the way. If your mounting ring doesn’t have 3 screws attached to it, it might be an EZ mount system. Simply turn the mount clockwise until it comes off the flange. The flange connects the sink drain to the mounting ring and creates a tight seal. From the top of the sink, the flange looks like a metal ring around the edge of the drain. The snap ring is a thin metal band that wraps around the bottom of the drain. It may be tucked up above the mounting ring—use a screwdriver to pry it down and off the flange. If your new disposal is the same brand as your old one, you may not have to replace the flange and mounting ring.
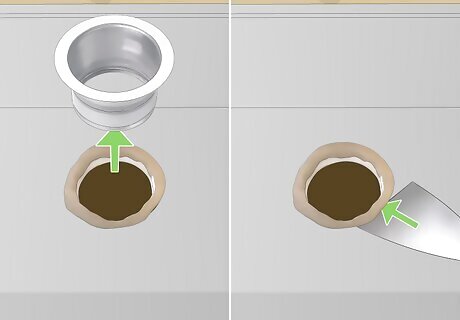
Remove the drain flange and scrape off the old putty. From the top of the sink, use a putty knife to pry the flange from the inside of the sink drain. Scrape off the old plumber’s putty from around the drain. If the putty is flaky, use a tissue or towel to clean it off the inside edge of the drain.
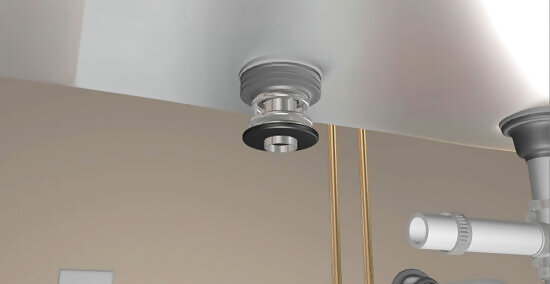
Apply ⁄2 inch (1.3 cm) plumber's putty and attach the new flange. Roll plumber's putty between your hands to form a snake about ⁄2 inch (1.3 cm) thick. Form a circle to fit around the bottom of the new sink flange. Insert the flange into the drain hole and press down evenly to ensure a tight seal. Place a towel and a heavy object, such as your new disposal or the putty container, on top of the flange to keep it in place while you’re screwing in the new mounting ring.
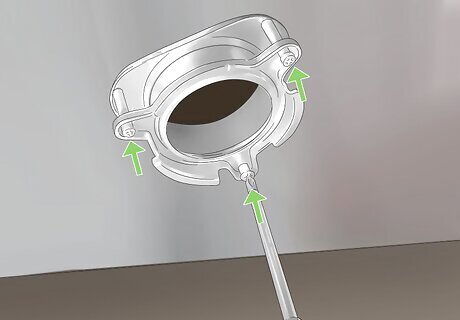
Screw the new mounting ring into place. If you have a 3-screw style mounting ring, align the rubber or fiber gasket, the backup flange, and the mounting ring and slide them onto the underside of the sink flange. Pull the snap ring open and snap it into place around the flange base. Tighten the screws evenly so they’re firmly against the backup flange. If you have an EZ disposal mount, follow the manufacturer’s instructions to screw the mounting ring, flange, and gaskets into place. Tighten each screw a little before moving to the next. Repeat this process all around the ring so that the mounting ring tightens evenly. Try not to overtighten the screws. Some of the putty might squeeze out around the flange inside the sink. Remove the towel and the object you used as a weight and use a putty knife to scrape it off.
Installing the New Disposal
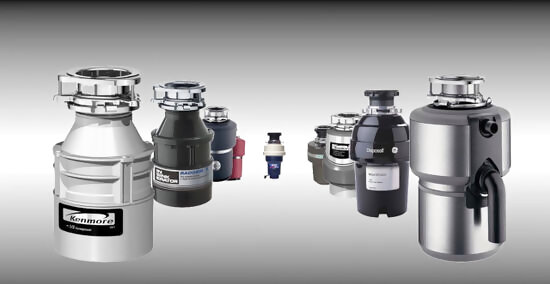
Choose a garbage disposal based on your needs and its horsepower. Garbage disposal motors come with various power ratings, ranging from 1⁄3 to 1 horsepower. Models with lower horsepower are suitable for small households with a small amount of food waste. Models with a higher horsepower might be better for larger households with more food waste. If you have children who will be using the disposal, consider getting a batch feed disposal that only operates when the drain is covered and can reduce the risk of injury. If your plumbing is connected to a septic tank, check with your local septic system inspector before installing a disposal.
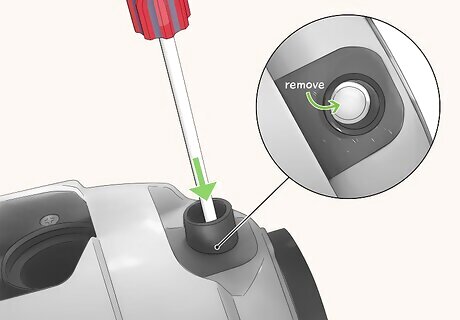
Knock out the plug in the disposal if you have a dishwasher. Remove the knock-out plug inside the dishwasher connection near the top of the disposal by tapping it with a screwdriver and hammer. If the plug doesn’t fall out of the disposal, use a pair of pliers to fish it out. If you can’t remove the plug from the disposal, you can leave it and the disposal may grind it up after several days of use. If you don’t have a dishwasher, leave the plug in place. The plug can prevent water from coming out of the tube.
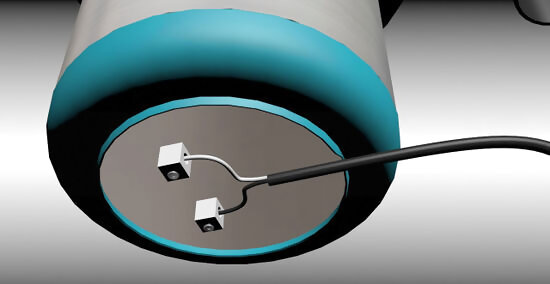
Attach the wires in the bottom of the disposal or plug it into the wall. If your disposal comes with a power cord, simply plug it into the wall. If yours doesn't, remove the cover plate underneath the disposal and attach the wires according to the manufacturer's instructions. Screw the cover plate back on. If your disposal is hard-wired and you’re not sure how to wire it into the disposal switch, it may be best to call an electrician to have them do it. To wire a garbage disposal yourself, master electrician James Hornof recommends taking out the “little round knockout” on the bottom of the disposal, “put a two-screw connector in there for your cable and then bring your cable up into the box where the switch is.” Attach the ground wire in the disposal to the box where the switch is. In the box, attach the white wires together and the black wires together using the “two little orange wire nuts.” Inside the switch, “You're going to take the black to one of your switch[es], your whites are going to be made up together, [and] your grounds are going to be made up together.” Both the black wires are “going to go to… each terminal of the switch for the garbage disposal… that's what opens and closes the circuit.”
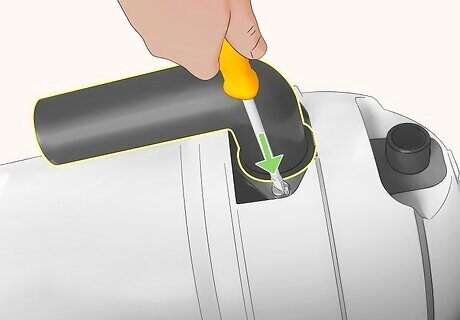
Attach the waste pipe to the lower hole on the disposal. Place the rubber gasket and metal bracket on the new connecting pipe according to the manufacturer’s instructions. Use a screwdriver to attach the metal bracket to the disposal. Usually, the rubber gasket wraps around the end of the pipe that connects to the disposal. The metal bracket slips on the other end of the pipe and rests around the gasket. Optionally, unscrew the plastic ring and the rubber connecting ring off the waste pipe and slip it onto the end of the new connecting pipe on the disposal to make it easier to attach.
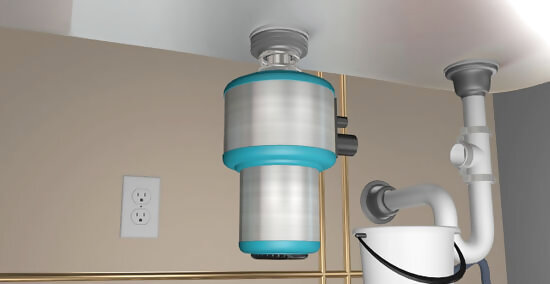
Attach the disposal to the mounting ring and the waste pipe. Slide the new connecting pipe into the waste pipe and align the top of the disposal with the mounting ring. If you have a 3-screw mounting ring, use a screwdriver to tighten the mounting ring around the disposal. Tighten the plastic ring between the waste pipe and the new connecting pipe. If you have an EZ mounting system, turn the mounting ring counterclockwise to tighten it against the top. If you can’t tighten the mounting ring with your fingers, use a wrench or screwdriver to make sure it’s snug against the sink flange. If you’re installing a disposal that’s a different size than the old one, home improvement specialist Patrick Johns says you may have to “see which direction our pipes need to go” and “add or take away” pipes underneath the sink so it’ll fit correctly.
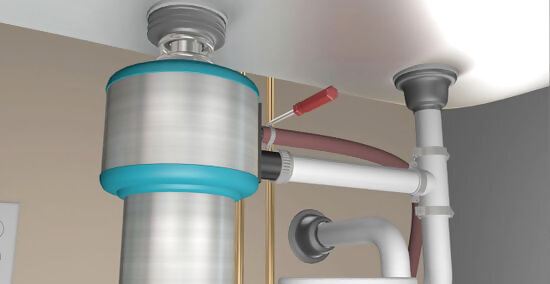
Attach the dishwasher pipe to the disposal. Slip the dishwasher drain pipe inside the hole above the waste pipe hole. Use a screwdriver to secure the pipe to the disposal.
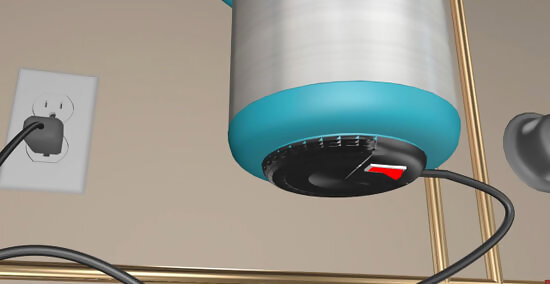
Turn on the water and power and check the disposal for leaks. Turn the power back on at the circuit breaker and turn on both water lines. Test the garbage disposal to make sure it’s working properly. Turn on the water for about 30 seconds and check underneath to make sure there aren't any leaks. If you notice any leaks, turn off the water and tighten the pipe connections. Check your disposal owner’s manual to see what can and cannot be put down your garbage disposal. If you have any issues during the installation process, contact the manufacturer or a certified plumber for assistance.


Comments
0 comment