views
- Start by washing your face with a gentle cleanser or micellar water and follow up with a dab of moisturizer. Makeup sits best on clean, hydrated skin.
- Apply a small amount of tinted moisturizer or foundation with your fingers. Pop on some concealer under your eyes or any blemishes, and gently bend with a concealer brush.
- Use an eyeshadow brush to blend a neutral shade like taupe across your lids in windshield-wiper motions. Then, swipe on a layer of mascara to make your eyes pop.
- Finish the look with a swipe of blush on the cheeks, blending it out with your fingers or a brush. Apply a swipe of lip gloss, and you’re ready to hit the town!
Skin Prep & Applying Your Base

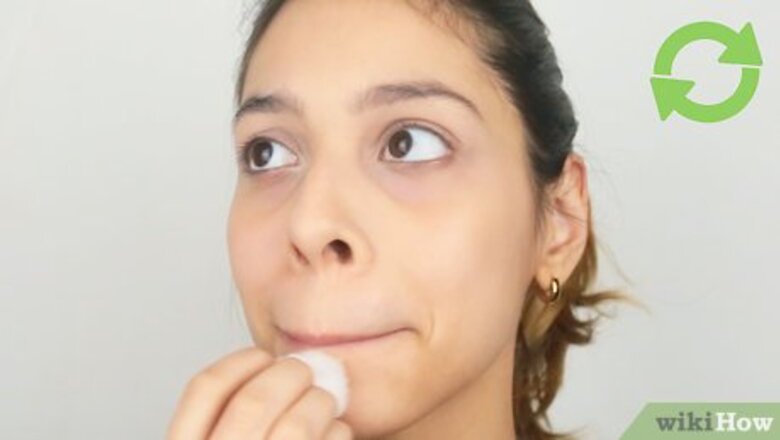
Start with clean skin. Wash your face with a gentle cleanser, or use a cotton pad with micellar water (skin-cleansing makeup remover) to wipe away any impurities from your skin. Starting with a clean base is a critical first step, as it helps your makeup apply as smoothly as possible, resulting in a more natural, blended finish.
Apply a light moisturizer. This will keep your skin from getting too oily during the day and help moisturize any dry patches, so your foundation applies seamlessly. If you have oily skin, don't skip on the moisturizer—instead, try a gel-based formula which absorbs quickly, hydrates, and won’t make you shinier. Wait five minutes before putting on foundation, so the moisturizer has time to sink in. A primer might be a good idea if you want your makeup to last throughout the day. A dab of foundation primer should be applied before foundation and after moisturizer—apply it like you would your moisturizer, and you’ll be good to go.
Dab on a tinted moisturizer or foundation to your skin. Apply just a few dots of foundation or tinted moisturizer with your fingers to your forehead, cheeks, nose, and chin. Then, gently blend it out with your fingers or a foundation brush, working the spots outwards from the center in all directions. Be sure to choose a foundation shade that matches your skin tone—when in doubt, go for a slightly lighter shade over a darker one. This will help you avoid looking orange and give you a more natural look. If you want more coverage, you can use a makeup sponge to apply, using the same blending technique.
Apply a dot of concealer under the eyes and blend with a brush. Use a concealer brush to dot on and blend a bit of concealer underneath and on the inner and outer corners of the eyes. Then, add a dot of concealer to any blemishes or spots peeking through, and blend it into the skin once more with your brush. For a brighter under-eye look, opt for a concealer one shade lighter than your natural skin tone. Use a concealer as close as possible to your natural shade for concealing blemishes, so they don’t stand out more.
Set the concealer and foundation with a translucent powder. Carefully dip your powder brush into your translucent face powder, tapping the brush on the side of the container to remove any excess product. Make sure you’ve blended enough to where there’s no visible residue left over on your face. Translucent powder reduces oil-causing shine and locks in your makeup so that it lasts all day.
Applying Eyeshadow, Eyeliner, & Mascara
Apply an eyeshadow of your choice to your eyelid. For beginners, try a single neutral shade like taupe or bronze. Use a blending brush or your finger to make windshield wiper like swipes across the lid, working your way up to the crease. Using a blending brush will allow you to be more precise over blending with your fingers if you’re starting out. If you're using a brush, tap it lightly on the side of the eyeshadow case to remove any excess. Rihanna Rihanna, Founder, Fenty Beauty Have fun and take risks with makeup. "Makeup is there for you to have fun with. It should never feel like pressure. It should never feel like a uniform. Feel free to take chances, and take risks, and dare to do something new or different."
Apply eyeliner. Use a black or brown eyeliner pencil to carefully draw a thin line along the rim of your upper lash line. Take your time here, and don’t get discouraged—nearly every makeup wearer has difficulty applying eyeliner. The best part is you can always remove it with a q-tip and micellar water before giving it another go! If you’re brand new to eyeliner, you may have an easier time applying gel eyeliner instead of a pencil, as gel eyeliners have a more slidable formula. Look down into a mirror as you apply your liner. This angle will make it easier to draw a straight line. Eyeliner is one of the areas that you can experiment with as you become more confident applying makeup. Factors like color and line type, like a cat-eye, can greatly enhance the appearance of your peepers!
Curl your lashes. Place a lash curler at the base of your upper eyelashes (along the lid) and press for five seconds. Be careful and take all the time you need to position your eyelash curler on your lid comfortably. You don’t want to pull any of those luscious lashes out! If you have stubborn, straight lashes, you may have to repeat this step 1-2 more times to achieve a lifted lash look.
Swipe on a coat of mascara. Apply your mascara to the upper and lower lashes with the wand's tip oriented towards the outer corner of your eye, wiggling your brush from root to tip. One coat is enough for a natural look, but you can layer up if you’re looking for some extra drama. Don’t worry about getting any on your eyelid. Just let it dry, and clean it up later with a q-tip. Keep in mind that the more coats of mascara you apply, the more likely it is to get clumpy or spidery.
Adding Cheek and Lip Color
Apply blush to the apples of your cheeks for a lifted look. Smile as you do this so you can see where the apples are. Dab on the blush and blend upwards towards your temples using your fingers or a blush brush. Try a cream blush for a natural glow that's easy to blend in. If you opt for powder blush, use a brush that's fluffy yet dense.
Swipe on a lipstick or lip gloss. Pucker your lips like you're about to plant a kiss and dab the lipstick or gloss to the center of your upper and lower lip. This first application can be straight from the tube—then, use your fingers to blend outwards, adding color with your fingertips as needed. If your lips are chapped, prep them before putting on lip color. Gently buff them with a warm, damp washcloth and put on a light layer of lip balm. Let the balm absorb before moving on to lipstick or gloss. For beginners, the lips are a great opportunity to add color and vary your makeup regime without fussing over application technique, etc. You can work with anything from neutral, barely-there gloss to creamy, fire-engine red.
Check if your look is properly blended. Take a moment to check yourself in bright light, preferably daylight if possible, to ensure everything is blended and beautiful. If you’re satisfied with your look, congratulations—you did it! If not, you can always go back in with your powder brush and blend out anything that’s bothering you. EXPERT TIP Kelly Chu Kelly Chu Professional Makeup Artist Kelly is the lead makeup artist and educator of the Soyi Makeup and Hair team that is based in the San Francisco Bay Area. Soyi Makeup and Hair specializes in wedding and event makeup and hair. Over the past 5 years, the team has created bridal looks for over 800 brides in America, Asia, and Europe. Kelly Chu Kelly Chu Professional Makeup Artist If you're not sure where to start, ask a professional for help! When you're just starting to wear makeup, watch a lot of makeup tutorials online and practice along with them. As you get more experienced, you'll start to understand your face shape and what color and makeup styles are most suitable for you. You can also invest in a personal makeup class with a professional makeup artist.


Comments
0 comment