
Activating Adobe Fonts
Open InDesign on your computer. It'll be in the Applications folder on a Mac, and in the Start menu on Windows. The 2019 and above version of Creative Cloud allows you to activate thousands of pre-licensed free fonts right inside InDesign and other Adobe products.
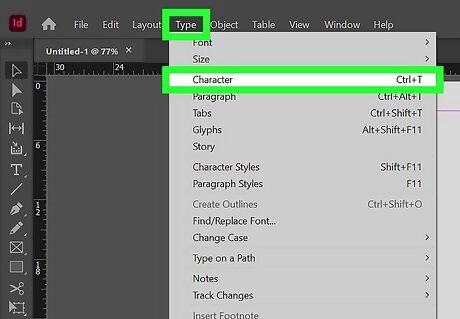
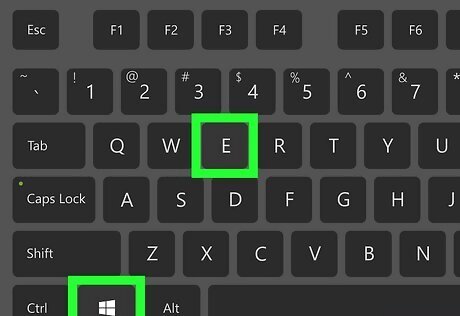
Open the Character panel. If you don't see the panel on the screen, click Type in the menu panel at the top, followed by Character. Alternatively, you can press Command + T (Mac) or Ctrl + T (PC) to open it.
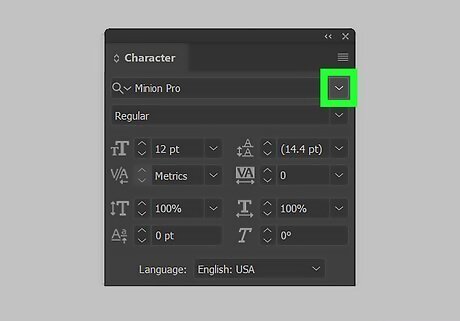
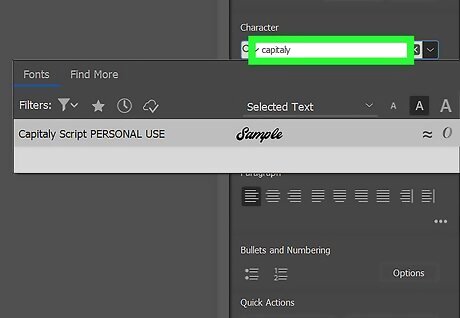
Click Android 7 Expand More next to the current font. Click the arrow pointing down, which is to the right to the current font at the top of the Character panel. This opens the Fonts menu.
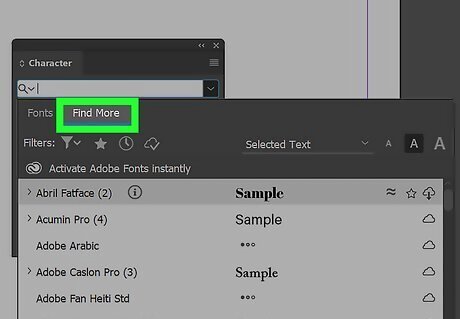
Click Find More tab. It's next to the Fonts tab at the top of the Fonts menu.
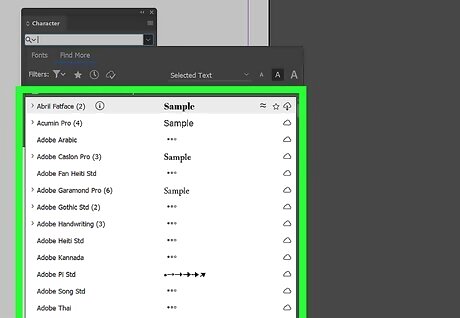
Browse the font list. The fonts that appear can all be downloaded at no cost. You can see a preview of each font in the list by hovering the mouse cursor over its name.
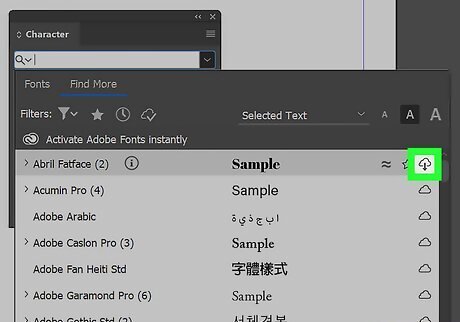
Click the cloud icon with a checkmark next to a font. Each font has a corresponding cloud icon to the right of its name. The fonts that have a cloud with a checkmark are not activated. Click the icon with a checkmark next to a font to activate it. The installed font will also be available in Illustrator 2019 and various other Adobe apps.
Downloading New Fonts in Windows

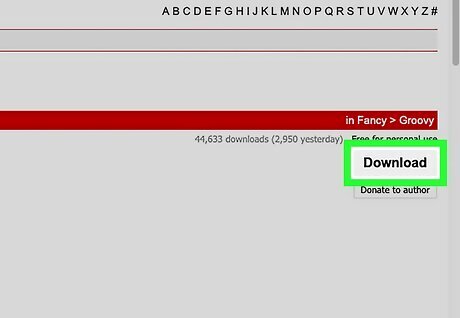
Download a font file to your computer. Many websites host free fonts you can download for personal use. Use your favorite search engine to find such websites and browse their selections. When you find a font, click the Download button to save it to your computer. Some popular font download sites are https://www.dafont.com, https://www.1001freefonts.com, and https://www.myfonts.com. InDesign supports the following font types: OpenType, OpenType SVG, TrueType, Variable Fonts, Adobe Fonts, Type 1, Multiple Master, and Composite.. If the font you're downloading asks you to choose a format before downloading, choose one of those formats. Warning: Most free fonts are for personal use only. If your InDesign project is a commercial project (e.g., ads, paid publications, websites designed to generate revenue, social media promotions), you'll typically need to purchase a license from the font's creator.
Close InDesign. Before installing the font, save your work in InDesign and close the application if you haven't already done so.
Press ⊞ Win+E to open File Explorer. You can open File Explorer in the Windows Start menu, or by pressing the Windows key and E at the same time.
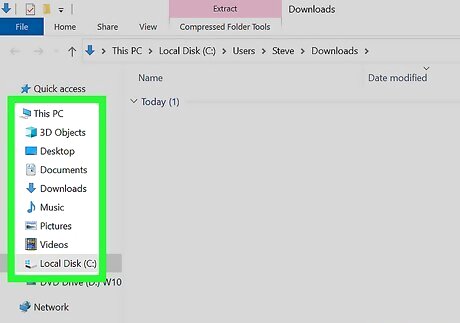
Navigate to the folder that contains your downloaded font file. Downloaded files can be found in the Downloads folder by default. If the file you downloaded is zipped/compressed (usually ending with ".zip" or ".rar"), right-click the file, select Extract All, and then click Extract. This will either extract a folder that contains the fonts or extract individual font files. Downloaded fonts will usually end with .otf or .ttf.
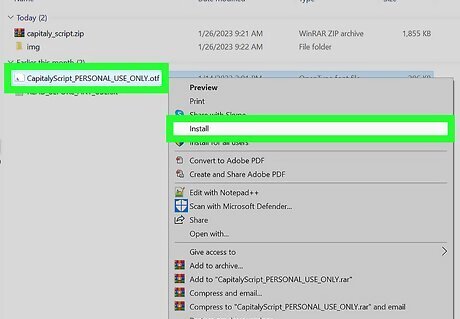
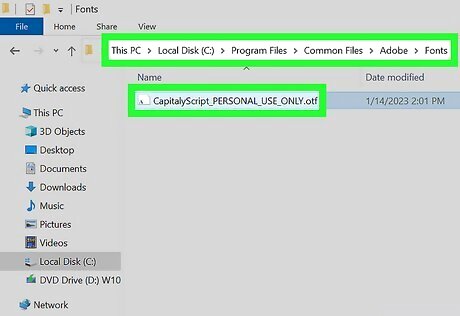
Right-click the font file and select Install. This installs the font on your Windows computer. Alternatively, you can copy and paste the font file into the "C:\Windows\Fonts" folder to install the font on your Windows system. Adobe also has its own dedicated font folder, which is "C:\Program Files/Common Files/Adobe/Fonts." Drop the font file into this folder to install the font on all Adobe products.

Open InDesign. You should find it in the Start menu. The font you installed will now appear in the Font menu on the Character panel.
Downloading New Fonts on a Mac
Download a font to your computer. Many websites host free fonts you can download for personal use. You can use your favorite search engine to find such websites and browse their selections. When you find a font, click the Download button to save it to your computer. Some popular font download sites are https://www.dafont.com, https://www.1001freefonts.com, and https://www.myfonts.com. InDesign supports the following font types: OpenType, OpenType SVG, TrueType, Variable Fonts, Adobe Fonts, Type 1, Multiple Master, and Composite. If the font you're downloading asks you to choose a format before downloading, choose one of those formats. Warning: Most free fonts are for personal use only. If your InDesign project is a commercial project (e.g., ads, paid publications, websites designed to generate revenue, social media promotions), you'll typically need to purchase a license from the font's creator.
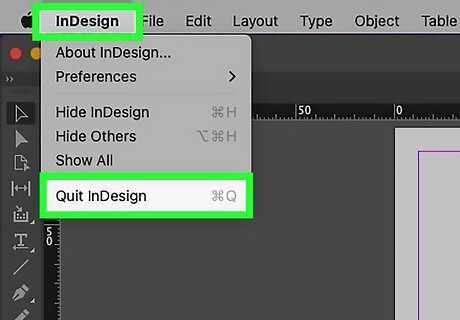
Close InDesign. Before installing the font, save your work in InDesign and close the application if you haven't already done so.

Open Finder Mac Finder on your Mac. It's the blue and white icon with a smiley face. It's at the bottom of the screen in the Dock.
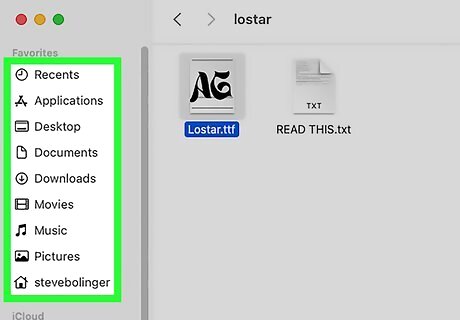
Navigate to the folder that contains your downloaded font. Downloaded files are saved to the Downloads folder by default. Downloaded fonts will usually end with .otf or .ttf. If the file you downloaded is zipped/compressed (usually ending with ".zip" or ".rar"), double-click it to unzip the file.
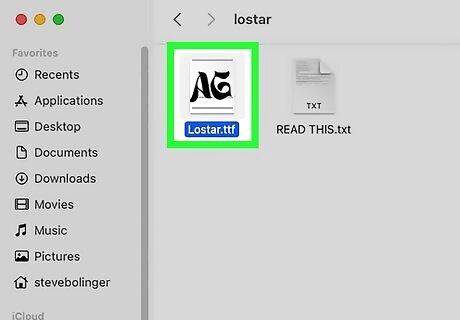
Double-click the font file. This opens the font in a preview window.

Click Install Font. It's the blue button at the bottom-right corner of the dialog window. This installs the font on your Mac. Alternatively, you can install Fonts using Font Book, or copy and paste the font file into the "~/Library/Fonts" in Finder to install the font on your entire system. Adobe has it's own font file folder, which you can use to install fonts on Adobe products. Copy and paste the font file into "~Library/Application Support/Adobe/Fonts" to install the font on Adobe products.
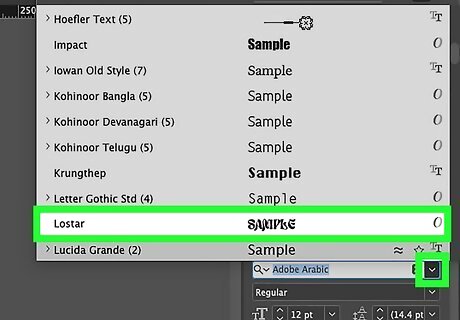
Open InDesign. You'll find it in the Applications folder. The font you installed will now appear in the Font menu on the Character panel.
Troubleshooting
Search for the font by name. If a font you have installed is not showing up in the Fonts menu, there could be several reasons for this. One reason could be that it's in a different location in the Font menu. Some fonts may have the name of the foundry in the title before the name of the font. Therefore, the font does not appear in alphabetical order. In this case, you can try searching for the font by name. Open the Font drop-down menu and type the name of the font in the bar at the top of the page.
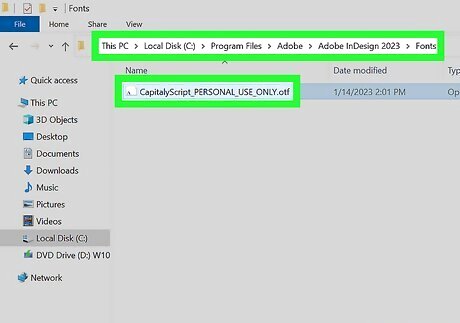
Install the font into the Adobe Font folder. To do so, open File Explorer on Windows or Finder on Mac. Then navigate to "Program Files/Common Files/Adobe/Fonts" on Windows or "~Library/Application Support/Adobe/Fonts" on Mac. Copy and paste the font file directly into this folder.
Install the font from the Document folder. When you open an InDesign file from another computer, the file will usually come in a document folder that contains a subfolder with the fonts used in the file. These fonts are only to be used with that specific document. To use the font in other documents, you will need to open the "Document fonts" folder within the folder that contains the InDesign document. Copy and paste the fonts to the Adobe font folder on your PC or Mac.
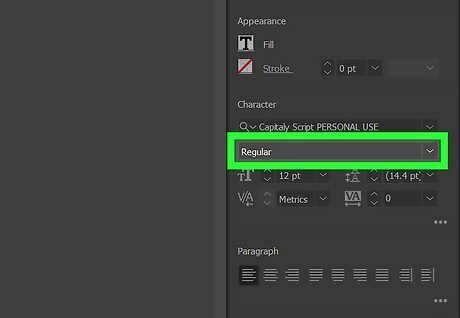
Check that you have the correct font style. Many fonts come with different styles (i.e, italic, bold, heavy, black, etc). It's possible that the font file you have downloaded doesn't have the font style you need. If this is the case, you will need to download or activate the correct font file.
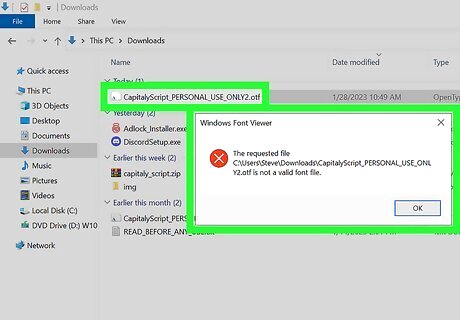
Check that the font file isn't corrupt. If you download a free font from the internet, it could just be a corrupt file. Check and see if the font is available from a different website or see if it's available from Adobe Fonts.


Comments
0 comment