views
Applying Foundation, Highlighter, and Contour

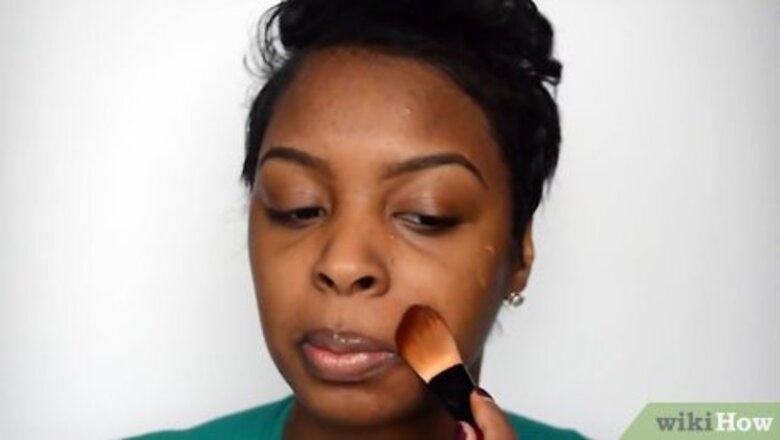
Start with a base of your regular foundation. You want to start by applying your regular foundation that matches your natural skin tone. Use this to smooth out uneven patches of skin and cover up things like blemishes and acne. You can apply your foundation with a sponge or makeup brush. If you use a brush, apply the foundation in circular motions throughout your face. If you use a sponge, use soft, patting motions to apply.
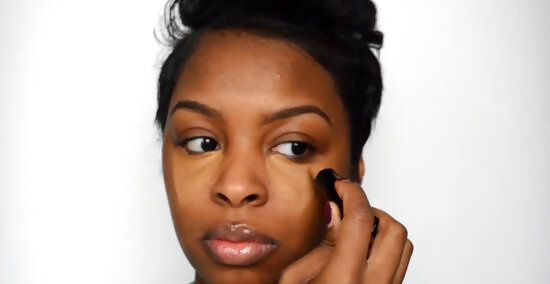
Start with a shade a few tones lighter than your natural skin. With dark skin, you want to create definition using lighter shades. Applying lighter concealer to areas where light naturally hits your face can help your face look slimmer and more defined. Go for a concealer or foundation that's two to three tones lighter than your natural skin tone. Try a powder highlight designed for dark skin. The formula you use should have warm gold, copper, or chestnut undertones. To cover up dark circles under your eyes, opt for a concealer in a deep orange tone.
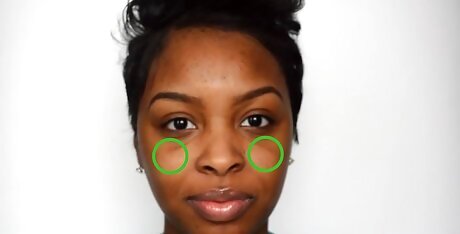
Figure out where the light naturally falls on your cheekbones. Before you start contouring, you need to find your cheekbones. Much of contouring revolves around accentuating your natural cheekbones. Sit before a mirror and examine your face. Look at where light naturally falls on your face. You can also feel around on your face until you find the indent on your cheeks. Highlight the top of the cheekbone above this indentation in a diagonal sweep.
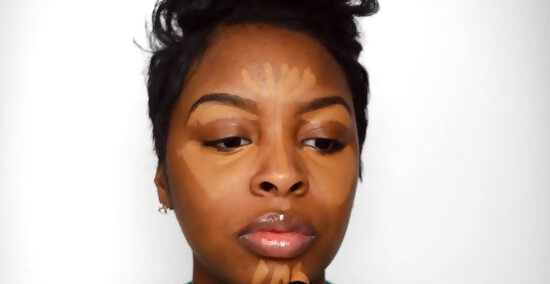
Apply the highlighting shade strategically on your face. To start, you'll be applying your highlighting shade. This is the foundation or concealer that is slightly lighter than your natural skin tone. You'll be applying this shade using a large brush, your fingers, or the end of the tube the container came with. Apply two isosceles triangular shapes just below your eyes. The large base of the triangles should be under your eyes, and the point should fall downwards in line with your nose. Doing this will slim the appearance of your nose, though it may also draw attention to it. Highlight along the top of your cheekbone, just above where you placed your blush. Draw a thin line down the bridge of your nose. Place a dot in the center of your chin or skip it, your preference. Draw a line under your eyebrows that follows the natural curve of your brows. Draw four lines of concealer on your forehead like a sun, radiating from the above the space in between your eyebrows. Skip this if you’d like to deemphasize your forehead.
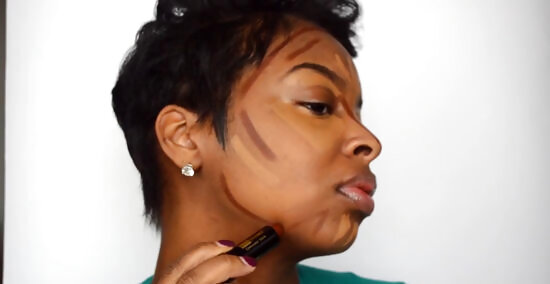
Add the contouring shade. Once you've added your lighter shades, you can add darker shades. Use a darker foundation to shade around your highlighted regions. Draw a dark line down each of your cheekbones, close to the triangles you drew below your eyes. If you want to make your forehead look smaller, use a cooler-toned color on the sides of your temples and right at your hairline. Make sure you start the color in your hairline so it looks natural. Apply a vertical line on either side of the nose to narrow it. Draw two more diagonal lines above the lines on your forehead. Keep the lines parallel. The higher lines should stretch downward until they almost connect with the lines on your cheekbones. Draw two slanted lines on your chin on either side of the highlighted lines. Apply the contouring shade to your jawline if you’d like to make your jaw more prominent.
Blending Your Makeup

Start by blending your highlighting makeup. Take a clean makeup sponge or large kabuki brush and gently dab it on the highlighting makeup. Remember, the highlighter makeup is the makeup that's a lighter shade. Work in small, delicate dabs, moving around your face until the highlighted makeup has blended. You want the makeup to be evenly blended and look smooth on your face. If you are using a brush, use gentle pressure and light circular motions to blend your highlight.
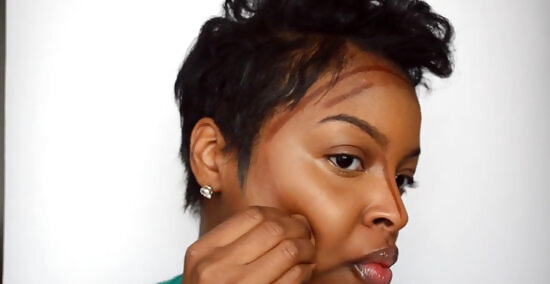
Move on to the contouring makeup. When you're done, blend the contouring makeup. This is the darker makeup you applied around the highlighting shade. Blend it in the same fashion you blended the highlighting makeup. Dab the makeup into you skin in short, delicate circles. Keep blending until there are no regions that look caked on and the makeup is free of streaks. You should use a separate brush or makeup sponge to blend the contouring makeup. If you do not have a separate makeup sponge, clean the first under running water and let it dry before you continue blending.
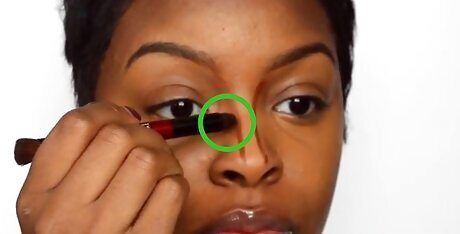
Use a smaller brush to blend the makeup on your nose and brow bone. When dealing with makeup around your brow bone and nose, use a small makeup brush. It can be difficult to fit a sponge in these regions. Move the brush up and down your nose in small, circular motions until the makeup is blended. Do the same to the makeup underneath your eyebrows.
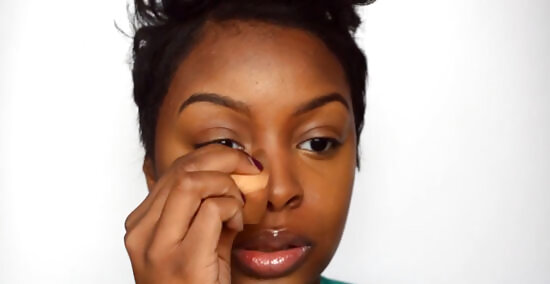
Blend until the makeup looks smooth and natural. When you're finished blending the contouring and highlighting makeup, there will be areas where the contrast between colors looks unnatural. Try to blend these areas together to create a more even contrast. You can dab a sponge brush between the highlighting and contouring makeup. You can also wipe a contouring brush down areas like your nose and cheekbones to encourage the makeup to blend. Keep blending until there are no dramatic changes in color and your makeup looks natural. It can take a long time to contour, which is why most people do not contour on a day-to-day basis. Be patient and keep blending until your makeup looks smooth. Do not be surprised if this takes a long time. If needed, pause to clean excess makeup off of your sponge or brush while blending. Use a brush cleaner and dab the edge of your tool with a tissue.
Assuring Quality Contouring
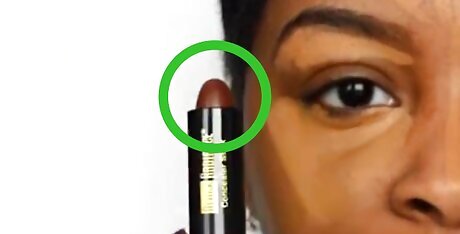
Opt for matte colors. When it comes to contouring, you should go for matte colors. Matte colors reflect less light and tend to look more natural. Shimmery or watery foundations and concealers may look caked on if you use them to contour.
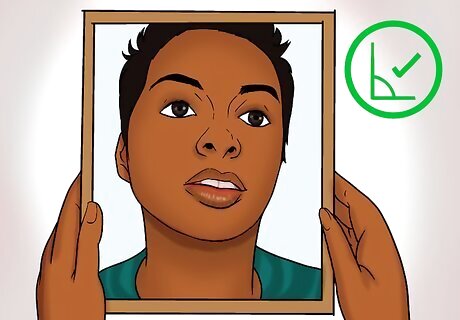
Angle your mirror correctly. If your mirror is angled downward or upward, it will be hard to see the natural angles of your face. You want to make sure you're contouring where the light hits your face and accentuating your cheekbones. When you contour, you want to be looking straight into your mirror.
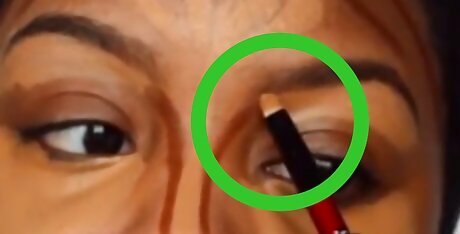
Invest in high quality brushes. Contouring can be difficult work. You want to make sure you have high quality brushes. When purchasing brushes at a drugstore or makeup store, opt for higher priced tools. While you may worry about overspending, pricier brushes will contour more precisely and will also do less damage to your face. Cheap laser-cut brushes can irritate your skin. As contouring takes a long time, you want to use finer brushes to prevent irritation.





Comments
0 comment