
- Lubricate the nut or bolt with penetrating oil, then twist it off with a pair of adjustable pliers or an adjustable wrench.
- Use a metal file to file flat surfaces into the rounded nut or head of the bolt, making it easier to grip with a wrench.
- Heat up the nut or bolt with a propane torch for 30 seconds to loosen it, then unscrew it with a wrench or pliers.
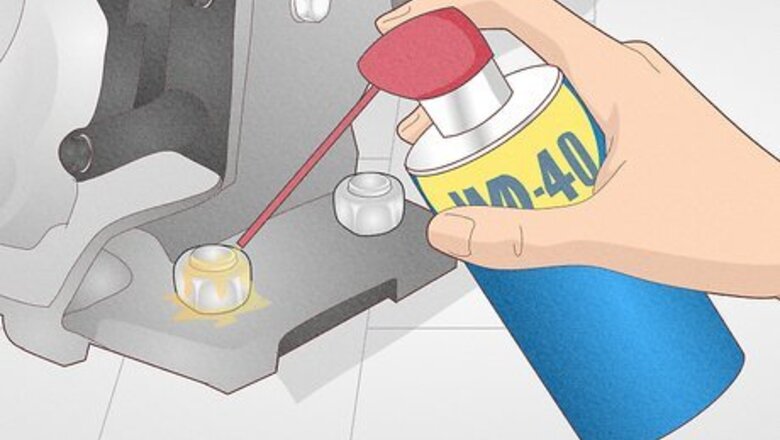
Lubricate the nut or bolt with WD-40.
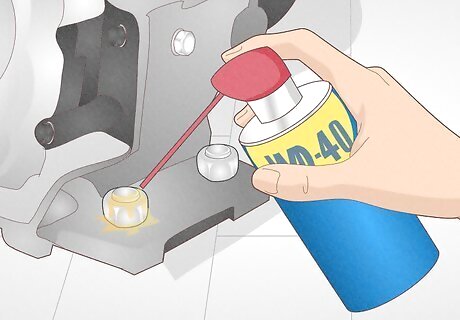
Apply penetrating oil to the nut or bolt, then twist it away. Spray a generous amount of WD-40 or penetrating lubricant on and around the nut or bolt, then wait 5-10 minutes to let it work its way into the threading. After, twist the nut or bolt counterclockwise with some pliers to loosen it. With a little luck, your problem could be solved with just a little coaxing. Even if this first method doesn’t do the trick, it may make subsequent methods easier.
Use crescent or lockjaw pliers if there’s space.
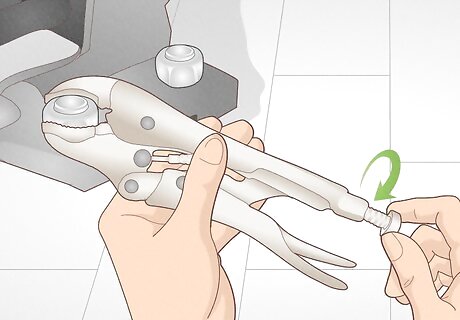
Grip and turn the nut with a lockjaw wrench. Using an adjustable wrench is another simple solution. Grab a pair of clamp or lockjaw pliers, or a pipe or crescent wrench. Then position the wrench’s “jaws” around the head of the nut and tighten the jaws so that they’re snug and secure around the nut. After that, it’s lefty-loosey until the nut comes away. This is your go-to solution if there’s room to maneuver the pliers. A wrench with curved jaws will grip the nut more easily and tightly than one with flat jaws. To preserve the look of the nut, first drape an old towel or cloth around it to avoid scratching it or leaving marks with the wrench.
File some flat edges back onto the nut or bolt.
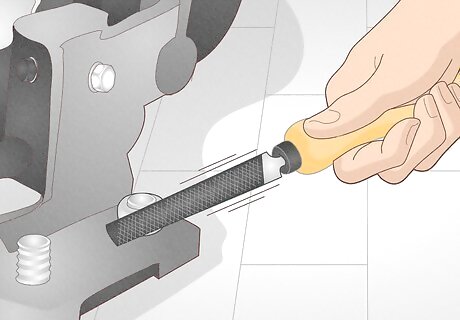
Use a metal file to restore the nut’s shape, then remove it with a wrench. Hold the textured face of a metal file up against the side of the nut’s head, aligning it with the once-flat edges of the nut. Then, make short, quick, back-and-forth strokes to wear away the rounded edge of the nut, making a new, flattened edge. Once you have a flat edge, rotate the file around the nut and file away another edge, repeating until you restore enough of the nut’s shape to remove it with a typical wrench. This works best with nuts that aren’t completely rounded off, as it’s easier to guess the shape of the nut. You may only need to restore 1-3 edges to make the nut grippable again. Be careful not to file away the entire head of the nut.
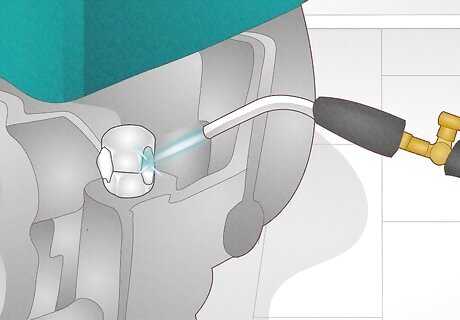
Heat up the nut or bolt with a propane torch.
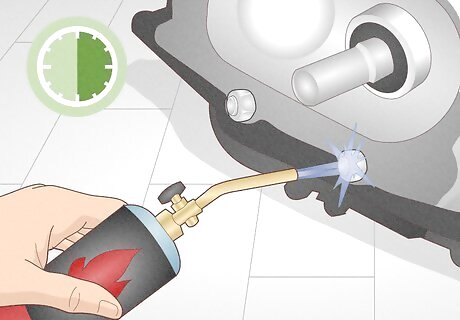
Heat the nut with a blowtorch for 30 seconds to loosen it. Hold a blowtorch up to the stuck nut for about 30 seconds. Then, while wearing heat-proof gloves, use a sturdy wrench or pliers to grip and turn the nut loose. As the nut heats, the nut expands, making it much easier to unscrew. Drop the freed nut in water to rapidly cool it down. Be sure to wear gloves and eye protection while using a blowtorch, and keep a fire extinguisher handy. Avoid this method if the nut is near any plastic, which may melt under the heat of the blowtorch.
Use a bolt extractor for tighter spaces.
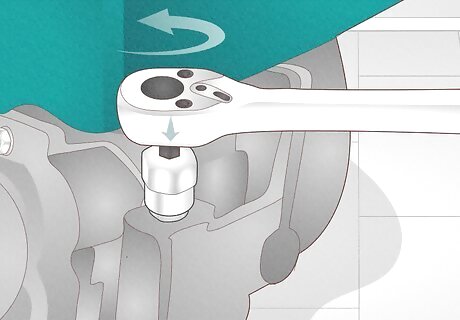
Hammer an extractor onto a rounded bolt for a better grip. A nut or bolt extractor is a specialized tool made just for this purpose. Simply select the extractor that corresponds with the size of the bolt and hammer it firmly onto the bolt’s head. Then, fit a drive ratchet onto the extractor, and twist off the bolt counter-clockwise. The spiralized, tapered teeth inside the extractor grip the bolt and force it to turn. “Easy outs” are another type of extractor that are used on broken or flush bolts. These require you to drill a hole into the center of the bolt to insert the extractor, then use your power drill to attach to the extractor and unscrew the broken bolt.
Lubricate the nut or bolt with wax.
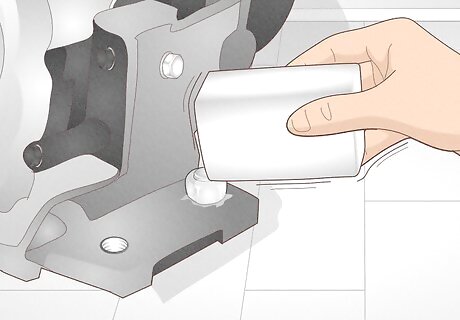
Place wax on a heated nut or bolt to lubricate the threads. Here’s an old shop trick: If a blowtorch alone doesn’t free the nut, hold a chunk of paraffin wax or beeswax up to the hot nut or bolt, melting the wax and allowing it to penetrate into the threads of the nut. This helps to grease those threads. Let it cool for 20-30 minutes, then twist it off with your adjustable wrench or pliers.
Make a bolt into a screw with a Dremel.
Drill a groove for screwdriver into the head of the bolt with a Dremel. Here’s yet another use for that handy rotary tool. Change the Dremel bit and attach a flat, thin grinding wheel to the Dremel. Then use the Dremel to drill a notch across the top of the bolt, near its center. Make the notch at least ⁄8 in (3.2 mm) deep. Finally, use a flat head screwdriver to turn the bolt like a screw. Or, use a square shank screwdriver if you need a little extra grip.
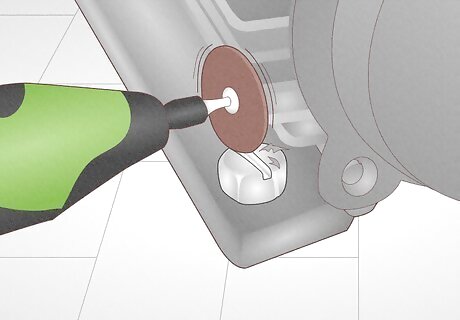
Cut and split the nut or bolt with a Dremel.

Drill through the nut or bolt, then hit it with a hammer to break it off. With your flat, thin grinding bit attached to your rotary tool, carefully cut through the head of the bolt 2-3 times, or directly through the nut. Then, a few strikes of a hammer and a chisel are usually enough to split the nut or bolt, making it fall away. If it’s a bolt, the head splits in two, making it easy to twist out with a pair of pliers. If you break off the head of the bolt completely, you’ll need to drill into the threads of the bolt to free them, as described in the next method.
Drill into the bolt to break it away.
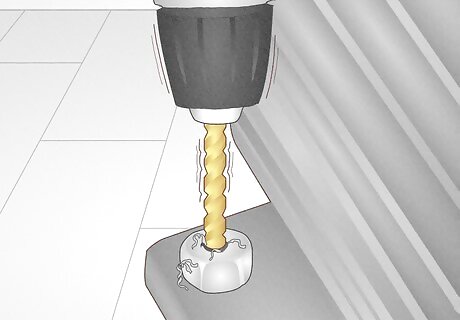
Use a power drill to drill into the center of a broken bolt, then extract it. Fit your power drill with a small drill bit, then bore directly into the center of your broken bolt. The heat and friction alone may be enough to loosen it. If not, go a size up on your drill bit and bore again, repeating until you’re using a bit just smaller than the diameter of the bolt. Then, use a chisel to break away what’s left of the bolt, and use some tweezers to remove the pieces. Note that if the head of the bolt is still intact, you may need to break or cut it off with a dremel to access the threads.
Add another nut to give you something to grip.
Weld or glue a nut on top of the first, then twist them both away. It sounds a bit counterintuitive, but it’s good in a bind. If you’re handy with a torch, weld an unrounded nut to the top of the rounded nut or bolt. If not, attach the intact nut with a bit of Loctite—coat the bottom with the glue, then place it onto the nut until the glue is set, or about 24 hours. Then, use your wrench or pliers to twist off the new nut, and the old, rounded nut comes with it.
Use blunt force to loosen the nut or bolt.
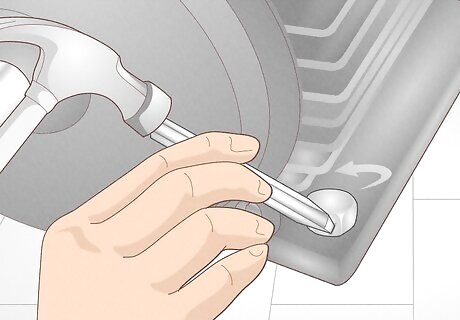
Strike the nut with a hammer or a chisel to unscrew it. It’s not pretty, but it might work in a pinch. We recommend holding a diamond-shaped chisel up to one of the rounded faces of the nut, then using a mallet to strike it counter-clockwise. Or, just strike it firmly with a hammer 10-15 times to loosen the threads, then use a pair of pliers to twist it off. This method may damage your project, so it’s best to work carefully, or save it for a last resort.


Comments
0 comment