views
Buying a New Cover and Preparing Your Tool
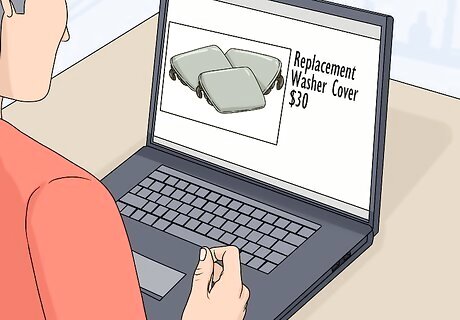
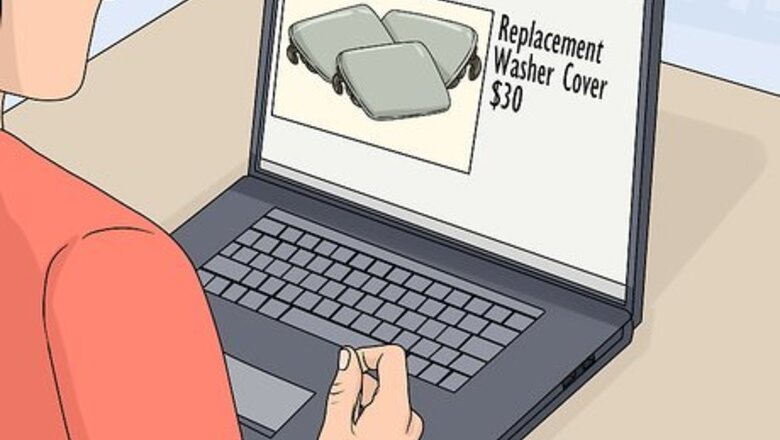
Order a set of replacement washer covers for your make and model. Go online or contact your vehicle’s manufacturer. Purchase a set of replacement headlight covers for your specific vehicle. These pieces are not universal, so you can only replace the covers with a set designed for your specific make, model, and year. Get the covers in the same color as your vehicle’s paint job if possible. If you have a custom paint job, you’ll need to repaint these pieces before installing them on your vehicle. Some people use reflective metallic covers to replace the stock versions to add a littler personality to their vehicle. The price of these covers depends on whether your vehicle is still in production or not. They typically cost $10-30. You can easily replace the covers for your headlight washers, but you must take your vehicle to a certified mechanic if the nozzle or hydraulic system for your headlight washers aren’t working properly. Replacing these parts involves taking large portions of the car apart and messing with the electrical components in your vehicle.
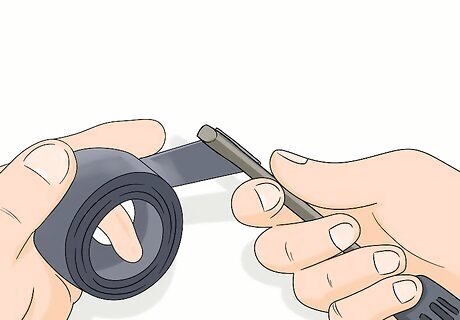
Wrap the head of a flathead screwdriver in duct tape to protect the paint. The easiest way to access the cover is to pry it out with a screwdriver. To avoid scratching the paint next to your covers, wrap the head of the flathead screwdriver in 3-4 layers of duct tape. This tape will keep your paint job from getting scratched by the screwdriver. You can use electrical tape instead of duct tape if you prefer.
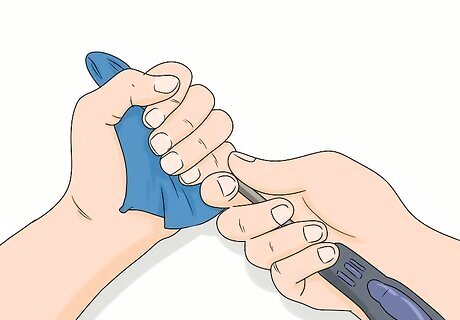
Wrap the head of the screwdriver in a microfiber towel for extra protection. If you really want to protect your fender, grab a microfiber cloth. Spread the cloth out in your hand and stick the head of the screwdriver in the middle of the cloth. Then, wrap the cloth around the metal part of the screwdriver. This will give the fender an even bigger cushion when you pry the old cover up. You may have trouble sliding the head of the screwdriver into the seam between the cover and the fender if you do this, but it should work in most cases.
Prying the Old Cover Up
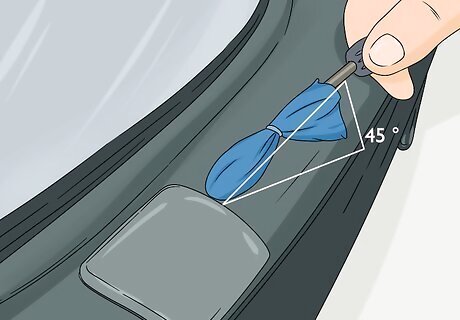
Slide the flathead in between the cover and the fender at a 45-degree angle. Take your screwdriver and gently place the head on the seam where the side of the cover meets the vehicle. Dig the flathead in between the cover and the fender. You may need to apply a fair bit of pressure to dig into this seam so use a little bit of force if necessary. Don’t worry though, there’s plenty of space behind the seam for you to force the screwdriver through. It’s easier to do this on one of the vertical seams on the left and right of the cover. If you do it from the top or the bottom, you may pop the cover off without accessing the head of the nozzle. You’ll still be able to pull it out and replace the piece, but it’ll be harder to reach inside the port to grab the nozzle and pull it out.
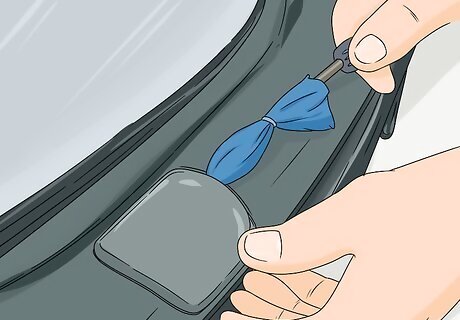
Press the screwdriver’s handle towards the vehicle to pry the cover up. Once the flathead is in between the cover and the fender, apply pressure to the handle to lift the cover up. If the cover doesn’t pop up, continue digging the flathead deeper into the seam and try again. The nozzle under the cover is controlled by a hydraulic pump. When the vehicle is off, the pump is still holding the cover in place. You have to apply enough force to overcome the force from this pump. You will not damage this pump by prying the cover out like this, though.
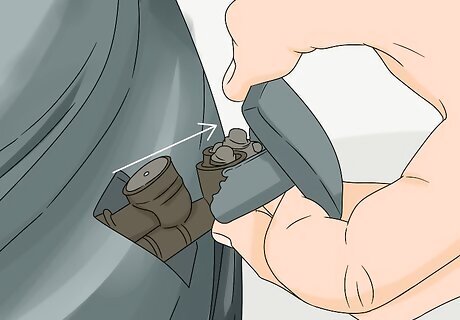
Pull the cover out to extend the nozzle behind the cover and hold it in place. Once you’ve pried the cover up with the screwdriver, hold the screwdriver in place and use your free hand to grip the edges of the cover. Gently pull the cover directly out from the vehicle as far as it will go. Let the screwdriver go and hold the nozzle behind the cover in place with your nondominant hand.Variation: There is usually a 0.5–1 in (1.3–2.5 cm) gap in the middle of the nozzle itself. Instead of holding the cover in place, you can slide the screwdriver into this gap and slowly let the nozzle tuck back into the vehicle. The screwdriver will catch on the body of the vehicle and hold the nozzle in place. The nozzle is the round component that sits directly behind the cover. It is connected to a bar that leads into the vehicle where the entire system is controlled by a pump. You may need to pull fairly hard to lift the cover out. The hydraulic pumps for headlight washers can be fairly strong—especially on newer vehicles.
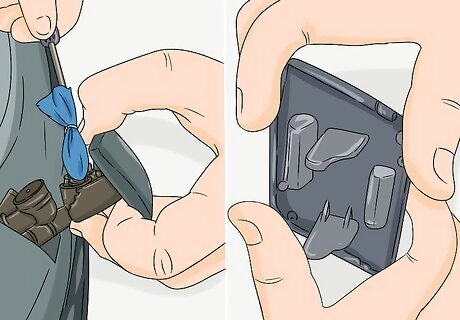
Pop the cover off by prying it off of the pegs on the nozzle. Use your nondominant hand to grab the bar connecting the nozzle to the pump. Release the cover. Then, inspect the pegs that are holding the cover in place on the head of the nozzle. Simply pull the cover off of the pegs by prying the plastic off of them. The cover is typically a pretty flexible piece, so this shouldn’t be particularly hard to do.Warning: Keep the nozzle’s bar still while you’re doing this. If you release it, the cover will start receding into the vehicle and you may pinch your fingers. If you can’t pry the cover off of the pegs, use your flathead screwdriver to dig in between the cover and the nozzle. Pop it off of the pegs the same way you pried the cover up in the first place. The configuration of the pegs is different on every vehicle, but every cover is essentially removed the same way.
Attaching the New Cover
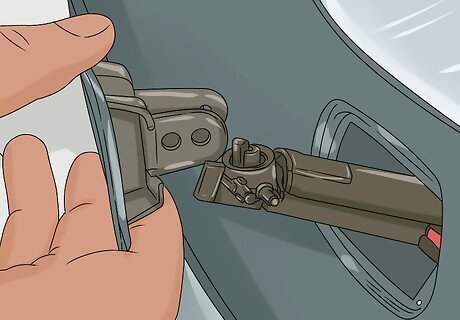
Slide your new cover over the nozzle and slip it over the pegs to attach it. Take your new cover and hold it over the nozzle. Push the edges of the cover over the sides of the nozzle until the slots on each side of the cover catch on the nozzle’s pegs. Make sure that every slot on the cover is attached to a peg before releasing the cover and letting it draw back into the vehicle. Make sure that you’re using the correct cover. When facing your hood, the right headlight cover leans a little to the right and the left headlight cover leans a little to the left. If the cover is sticking out a little past the fender after it recedes into the vehicle, try pressing gently on it. Sometimes the nozzle pops out a little when you pull on it.
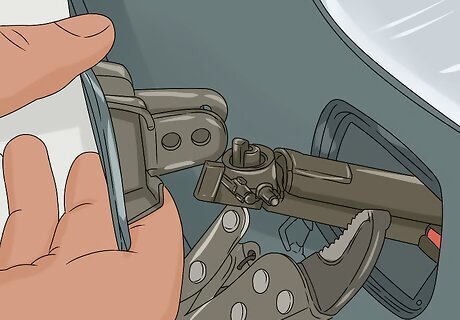
Hold the nozzle in place with vice grips if you’re struggling to attach the cover. The hydraulic pump in the vehicle will keep trying to pull the nozzle back into the vehicle, which can make attaching the new cover a pain. If you’re struggling to slip the new cover over the pegs on the nozzle, grab a set of vice grips. Pull the nozzle out of the port a second time, but instead of holding it still, grip the nozzle with your vice grips. This will make it easier to hold the nozzle still while you attach the new cover. To relieve even more pressure, grab a towel or cloth and set it between the vice grips and the fender. Rest your vice grips against the towel to brace them against the vehicle. You can use channel locks instead of vice grips if you prefer.
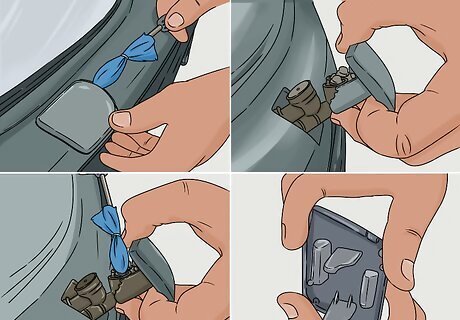
Repeat this process on your other headlight cover if necessary. If you’re replacing both headlight covers, repeat these steps on the other side. Pry the side of the cover out and pop the old cover off before replacing it. Let it go when you’re done to finish installing your new headlight washer covers.




Comments
0 comment