views
X
Expert Source
David BalkanProfessional Plumber & CEO of Balkan Sewer & Water Main
Expert Interview. 30 March 2021.
Water hammer happens when water flowing with a lot of momentum suddenly comes to a stop, such as when a washing machine's automatic shut-off closes. Fixing the problem can be as easy as shutting off the main valve and draining your plumbing system. If that doesn't work, installing an arrestor or adding pipe straps and insulation can make a big difference.
Draining Your Plumbing System
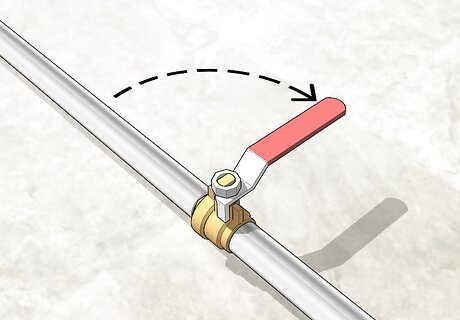
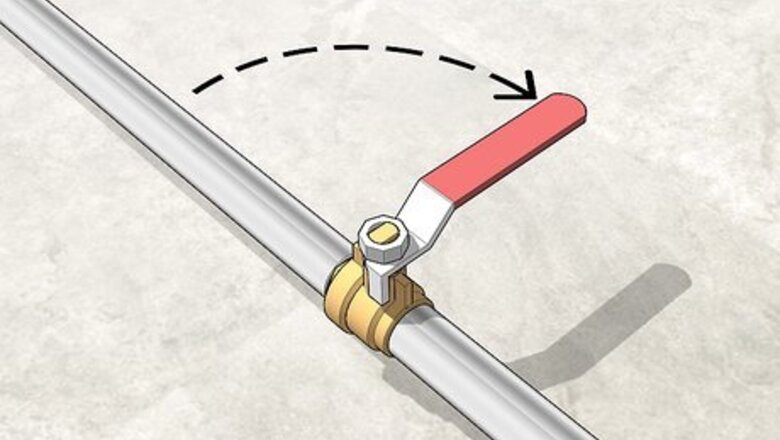
Shut off the main water valve. The main valve will be controlled by either a gate valve with a wheel or a ball valve with a long, straight handle. For a gate valve, turn the wheel clockwise until you can't turn anymore. For a ball valve, turn the lever 90 degrees clockwise. Usually the main water valve is located on a perimeter wall of your house, inside. It is usually at ground level, in a straight line from your outdoor water meter. It will not be located under a sink or next to your water heater, but could be behind an access panel. In warm climates, the main water valve can be outside.
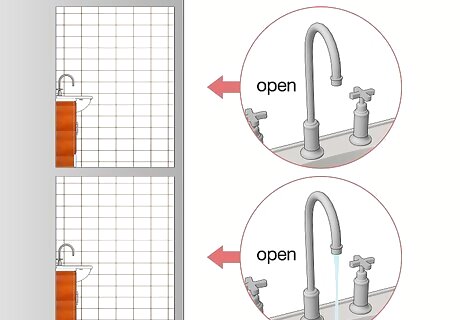
Open the highest faucet and drain water from the lowest faucet in your home. Open a faucet on the top floor of your home. Then, turn on a sink or valve on the lowest floor of your home, either the basement or the ground floor. This relieves the pressure in the pipes and drains the water. Open both the hot and cold taps to fully drain the pipes.
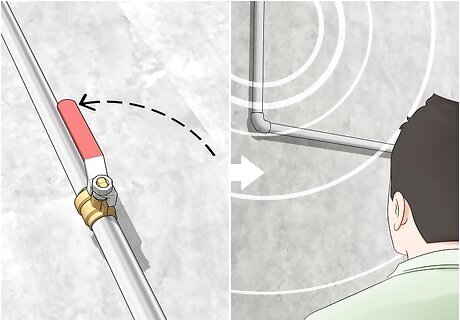
Turn the main water valve back on and listen to see if the problem is fixed. Once the water has completely drained, close the taps and then turn the main valve back on. Turn the valve of the main supply line counterclockwise to turn the water back on. Listen to see if the problem is fixed when you turn on the problem tap. This works by draining any air chambers of water and replacing it with air. This cushions the pipes and helps prevent water hammer. If the issue isn't solved, you may have to have a professional install an air chamber, install water hammer arresters, or adjust water pressure reduction valves.
Installing Water Hammer Arrestors
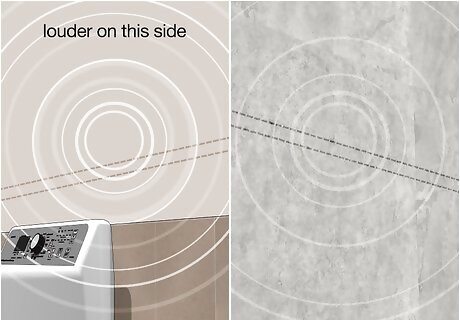
Determine what valve is causing water hammer. Water hammer occurs when a tap turns off. When you turn a tap turn off, listen for where the banging is the loudest to determine what supply line is causing the water hammer. This is the line where you will install a water hammer arrestor. Washing machines and dishwashers often cause water hammer because they have automatic valves that close quickly.
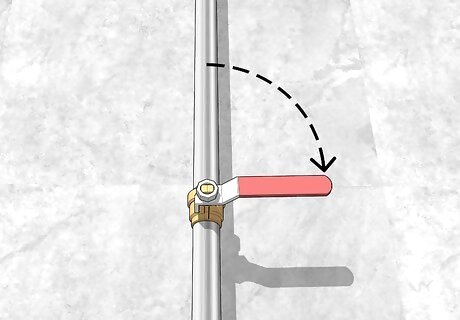
Turn off the main water supply before installing arrestors. Arrestors work by providing an air cushion and absorbing shock when taps shut off. Turn off the water supply to your home before starting the install process. Find the main water supply and turn the valve clockwise to shut off the water. Then drain the pipes by opening a tap on the lowest floor of your home and letting it run until the pipes are empty. The pipes need to be completely empty before installing an arrestor.
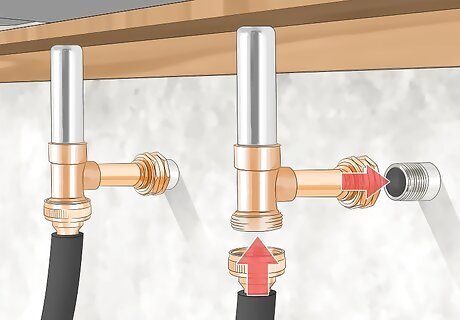
Install 2 arrestors, 1 on the cold water supply line and 1 on the hot. Installing arrestors on both supply lines will protect both pipes from damage from water hammer, even if you don't hear them both banging. Whether using arrestors on washing machines or other taps, install them on both hot and cold taps. Call a plumber if you don't feel confident about installing arrestors.
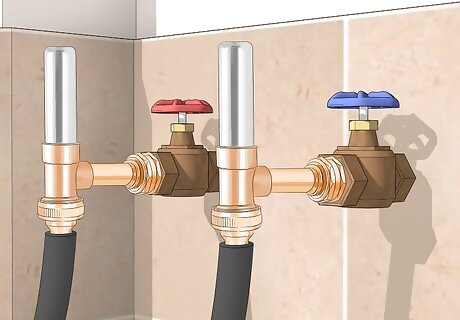
Install a washing machine arrestor by screwing it onto the supply valve. An arrestor specifically used for washing machines will say "hose attachment" on the packaging and is designed to fit where the supply line attaches. Disconnect the water supply from the washing machine. Screw the arrestor onto the washing machine where the supply line was attached. Then screw the supply line onto the other end of the arrestor. Measure the diameter of the washing machine supply line and make sure it is the same size as the arrestor's attachment. Remember which supply pipe is hot and which is cold when reattaching them.
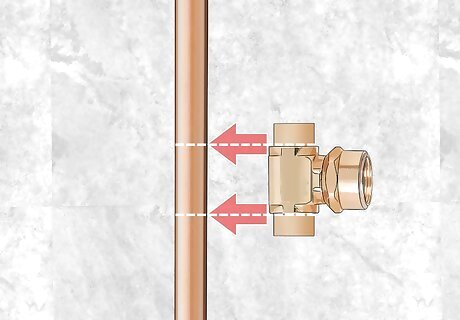
Mark tap supply lines where you want to install arrestors. For taps other than washing machines, the supply line needs to be cut in order to install copper t-fittings and arrestors. Measure the diameter of the supply pipe and purchase a t-fitting that matches in size. Purchase an arrestor that will screw into the t-fitting. Hold the t-fitting up to the pipe and use a pencil mark the place where the t-fitting will attach. Choose a place you can easily access, but where the arrestor will be out of sight, such as behind an access panel or in the basement. There will be an indent about 1 inch (2.5 cm) into the t-fitting on either side. This is the place to mark on the supply pipe.
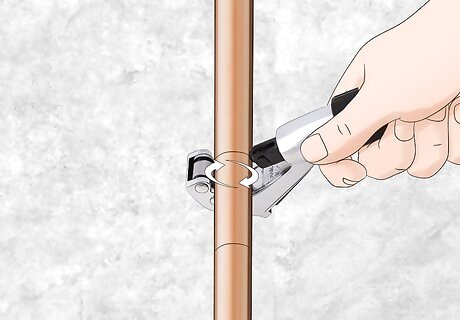
Use a pipe cutter to remove the marked section. Open the pipe cutter to a size that will fit the supply pipe by loosening the screw. Then slide the cutter onto the pipe and turn the screw to bring the blade into contact with the pipe. Rotate the cutter once completely around the pipe to cut it. If the pipe is thick, you may have to tighten the cutter and then rotate it around the pipe again. You can also use a hacksaw, if you prefer, but a pipe cutter will give a cleaner cut.
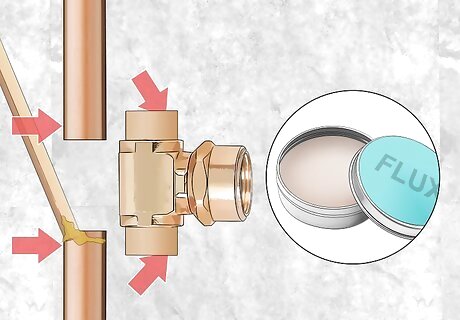
Apply flux to the pipe where you cut it and slide the t-fitting on. Prepare to solder the t-fitting to the pipe by applying soldering flux for copper pipes. Flux facilitates soldering by allowing the metals to melt together while preventing oxidation. Apply flux where you will attach the t-fitting. Then slide the t-fitting into the pipe. To make soldering easier, clean the pipe with an emery cloth where it attaches to the t-fitting.
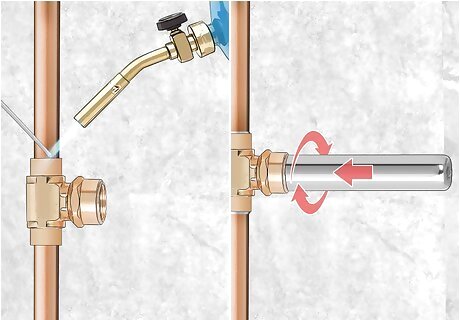
Solder the pipe to the t-fitting and screw on the arrestor. Turn on the gas tank of a propane torch and light it with a lighter, if it's a manual torch. Use the hottest part of the flame, at the tip, to heat the flux until it starts to bubble. Move the torch around so that it doesn't heat one section up too much. Then, apply the solder to the opposite side of the pipe from the flame. The solder will melt right away, attaching the pipe to the t-fitting. Work all the way around the pipe with the flame and solder to seal it. Then, you can screw the arrestor onto the t-fitting. You can use a small propane torch for this project. Use safety goggles when soldering.
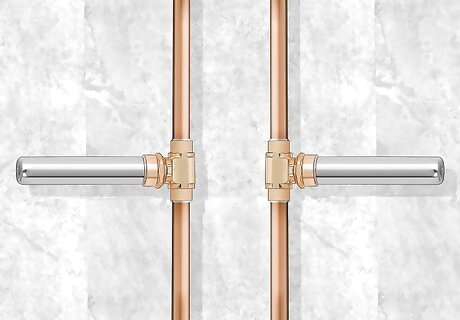
Repeat the process on the other side and turn the water supply back on. Once the arrestors are installed on both the hot and cold water supply lines, you can turn the water back on. From the main supply line, turn the valve counterclockwise. Make sure the t-fittings are soldered all the way around the pipe and the arrestor is tightly screwed onto the t-fitting. To regulate water pressure, make sure your pressure-reducing valve is set below 50 PSI. Adjust the valve by turning it clockwise or counterclockwise until the meter reads at below 50 PSI.
Tightening Loose Pipe Straps and Adding Insulation
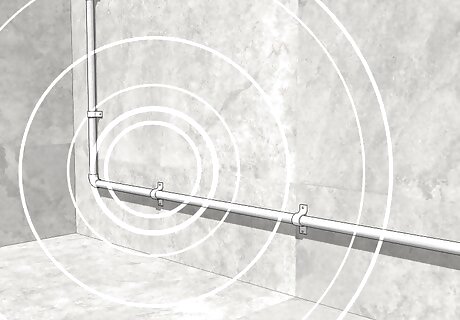
Identify where the pipes are banging. You can identify where the water hammer is happening by listening for where the banging is loudest. Take note of anywhere you might be able to add pipe straps or insulation to stabilize the supply lines. Either of these solutions will reduce vibrations and water hammer. If there is a wooden beam nearby, you can strap the supply lines down. If there is no support beam, you can cover the pipes with insulation.
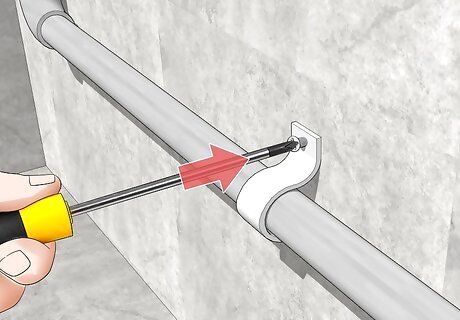
Tighten loose pipe straps or add them to secure the pipes. Tighten any existing straps, if they are loose. If there is no strap where the pipes are banging, try installing one wherever the pipes are exposed, such as in your basement. For the most security, fasten a pipe strap around the pipe with a U-shaped strap at each floor joist and drill them directly into the drywall. Use metal or plastic pipe straps. Avoid using galvanized or steel straps on copper pipes.
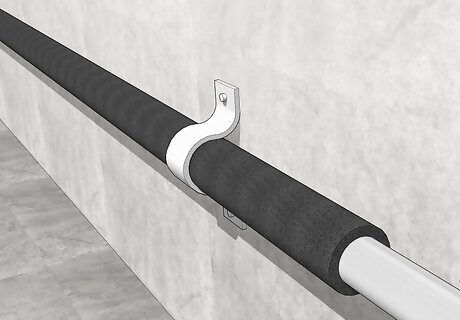
Add pipe insulation around the supply line to quiet them down. You can buy pipe insulation in foam tubes at a hardware store. Pipe insulation usually comes in a length of 6 feet (1.8 m) and is pre-slit down one side. Simply open the insulation up along the slit and fit it over the pipe at the point where it is banging. The insulation should snap into place. If the insulation is too long for the length of pipe that is exposed, cut it to a smaller size with a pair of scissors. The extra cushioning will prevent the pipes from banging around and hitting the walls.


Comments
0 comment