

X
Expert Source
Benjamin HansenLicensed Landscape Contractor
Expert Interview. 6 October 2020.
Getting the Soil Ready

Test your soil pH. Start by determining whether you have the right kind of soil to allow clover to thrive. Most varieties of clover do best in soil with a pH between 6.0 and 7.0, although some do well in soil with a pH as high as 8.5. Purchase a soil testing kit from your local nursery or garden center. A soil testing kit can also tell you if your soil has any nutrient or mineral deficiencies. If your soil pH is too low, you can adjust it by adding lime to the soil. Correct a soil pH that is too high by mixing in peat moss or sawdust. You may need to allow up to 6 months for any adjustment to take full effect, so do your testing well in advance of when you want to plant. Get a type of clover that works best with your soil pH. Research clover varieties online, or check with your plant nursery or garden center.
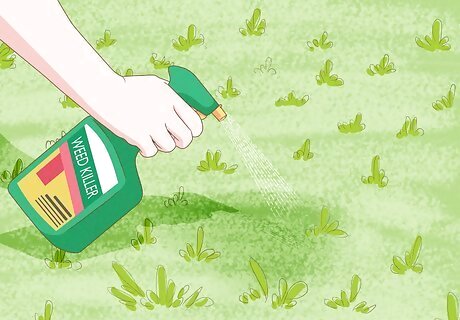
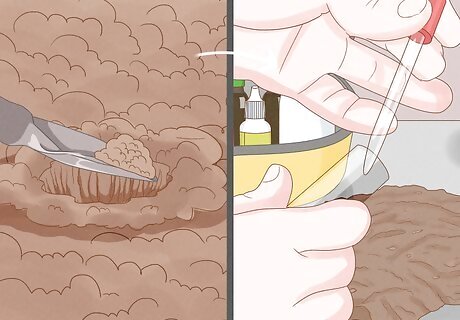
Treat the area with weed killer. Before you plant clover, you will need to get rid of any unwanted plant growth. You may use a weed killer, to eliminate any existing turf, weeds, or other unwanted plants. Some types of weed treatments, such as systemic herbicides or chemical broadleaf treatments, may require you to wait up to two weeks before planting new ground cover. Follow all label directions carefully. If animals may feed on your clover, if you may allow the clover to flower for bees to pollinate, and if the area drains into existing groundwater, avoid using chemical compounds such as Roundup.
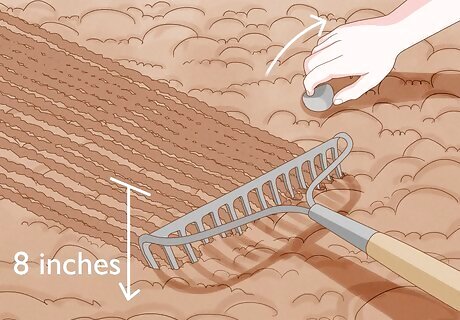
Till the soil a month before planting. Clover seeds will do best if they don't have to compete with weeds while they're getting established. To remove all vegetation, rocks, and debris from the area, till or rake the soil to a depth of about eight inches (20 cm). Tilling a month in advance will give any weeds time to regrow so you can remove them before planting. Tilling now will also make it easier to change the soil if the pH needs to be adjusted.
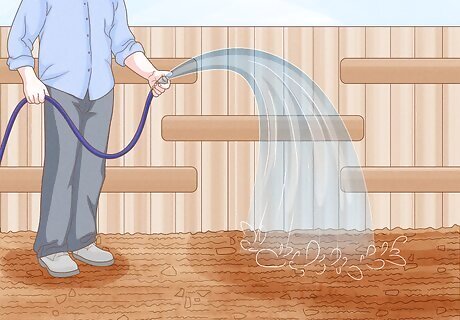
Water the area daily. To encourage latent weeds and vegetation to grow, provide the tilled area with a light misting of water every day. This process will help you eliminate weeds in a couple weeks, right before planting the clover seeds. You don't have to worry about watering if you're getting sufficient rain during this time.
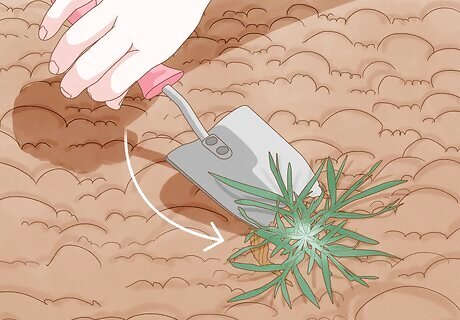
Remove weeds. A couple days before planting, use a spade or small shovel to dig up any weeds that have sprouted up since you tilled the land. This will kill competition and give the clover the best possible chance of thriving. You can also use a scythe to cut them out.
Planting Clover Seed
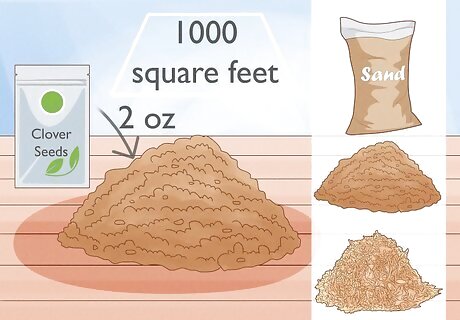
Mix the seed with sand. Clover seeds are very small and lightweight. To ensure they spread evenly, it's best to mix them with another medium that will make them easier to distribute on the ground. You will need about 2 oz. (57 grams) of seed to cover 1000 square feet (93 sq. m.) of lawn. Before planting, mix your seeds with one of the following: Soil (preferably unfertilized, to discourage the growth of weeds) Sand Sawdust

Spread the seed. Use your hand to spread the seed evenly over the lawn. If you have a large lawn, you can use a broadcast spreader, which you can buy at local garden stores and home improvement stores. You can also spread seed over large areas by smoothing the seed and sand mixture over the ground with a leaf rake turned so that the tines face up.
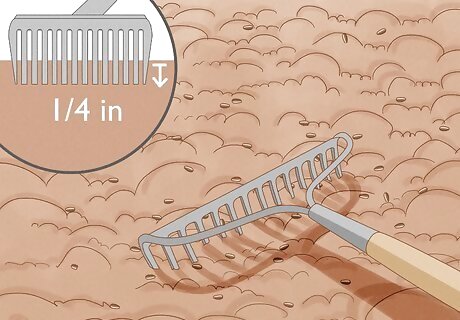
Rake the area. Clover seeds will not grow if they are buried in the ground, but covering them with a thin layer of soil will help to keep them in place and prevent wind or predators from disturbing them. Go over the area you've seeded with a rake that is turned so that the tines face up, and gently mix the seeds into the top layer of soil. Do not rake more than a quarter-inch (6 mm) deep, otherwise the seeds won't grow.
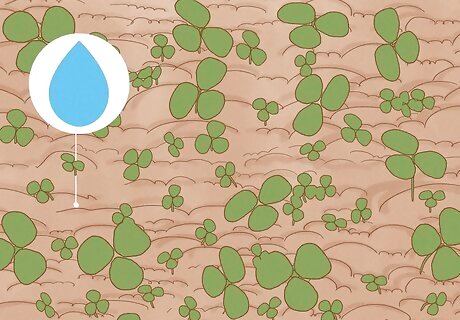
Keep the seeds moist until the clover is established. Water the seeds immediately after spreading them. This process will help the seeds stick in the ground and encourage germination. Provide the seeds with a light misting of water every day that it doesn't rain until the seedlings grow leaves. During the spring, summer, and warmer fall months, make sure the clover gets about 1.5 to 2 inches (3.8 to 5 cm) of water per week. When planted during the warmer spring or summer months, clover seeds will germinate in one to two weeks. Make sure that the seeds do not have a chance to dry out during the day, or the sprouts will not survive.
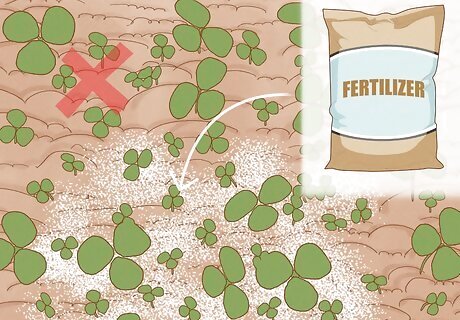
Skip the fertilizer. Clover can produce nitrogen all on its own, as long as it forms the proper relationship with the soil (which you encourage by adding a clover inoculant when planting). Adding in fertilizer will usually encourage grasses and weeds to grow instead of the clover. Use a testing kit to check whether your soil is missing any important nutrients before you plant, and adjust accordingly.
Test your soil occasionally after your lawn is planted. Once your clover lawn is established, take soil samples at least every 2-3 years. Check your soil nutrient and mineral levels, and make adjustments as needed. Try taking samples in spring one year, and in fall the next year. This will help give you an idea of which nutrients are most needed during different parts of the growing cycle.
Picking the Right Time and Place to Plant
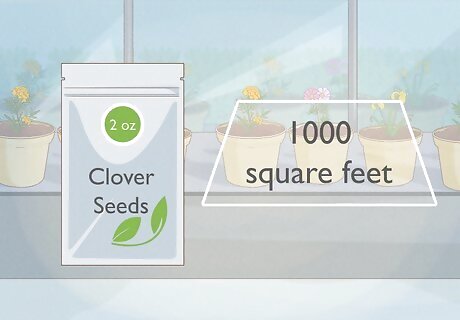
Buy clover seed. You can purchase clover seeds at garden stores, at most home and hardware stores, and online. You'll need roughly 2 ounces (57 g) of clover seeds per 1,000 square feet (93 square meters) of lawn. The most popular types of clovers for lawns are Dutch White (a perennial that grows to 8 inches, or 20 centimeters) and Microclover (a durable clover that has small leaves and short stems). Inoculated clover seeds of any variety are also popular, because it means you don't have to inoculate them yourself. Inoculation is the process of coating the seeds with a nitrogen-fixing bacterium that allows the clover to produce its own nitrogen. Be sure to store these seeds in a cool, dark place.
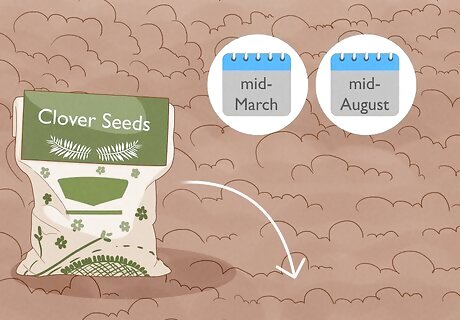
Plant according to the season and weather. The best time to plant clover is in spring or summer. To plant in spring, make sure the last frost has occurred, and that nighttime temperatures are staying above 40° F (4° C). The best time to seed clover is between mid-March and mid-August. In warmer areas, you can plant clover in September and October, but plant it at least six weeks before the first frost. In the warmest areas where winters are mild and there's rarely snow or freezing temperatures in winter, you can plant clover all year round.

Choose a sunny location. Depending on the size of your lawn, you may have conditions that vary greatly from one area to another, so some areas may not be ideal for clover. Clover is very hardy and will even grow in partial shade, but it will do best when it gets between four and six hours of sunlight per day. Where possible, prune and trim trees, hedges, and brush to ensure the clover gets enough light.


Comments
0 comment