
views
Positioning Your Fretting Hand

Position your fingers around the neck so they’re parallel to the frets. Place your left hand at the end of the neck with the tuning pegs and set your palm against the bottom. Wrap your 4 fingers around the neck so they’re parallel to the metal frets and point toward the ceiling. Keep your knuckles slightly bent for the best way to hold the guitar neck without any strain. Don’t use your left hand to support the weight of the guitar since it will put additional strain on your muscles and joints. Avoid keeping your fingers at an angle when you hold the guitar since it won’t allow you to move your hand as easily. If you’re left-handed, use your right hand to hold the neck.Tip: After you wrap your fingers around the neck, slide your right index finger between your left palm and the bottom of the neck. Loosen the grip of your left hand so your palm doesn’t touch your index finger. This will allow you to stretch your hand easier.
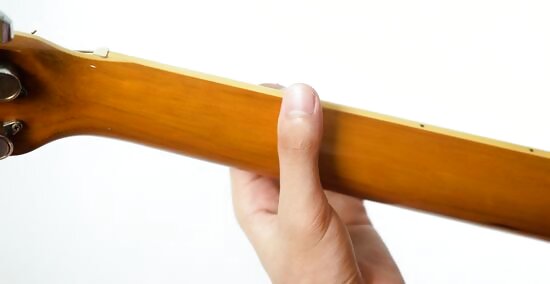
Set your thumb on the back of the neck so it’s in line with your index finger. Press the pad of your thumb lightly onto the back of the neck so it’s the same distance from the top and the bottom. Make sure your thumb is on the same spot of the neck as your index finger so you have the most flexibility while you’re playing. Don’t press the tip of your thumb forcefully into the neck since it can cause muscle strain and long-term harm. Avoid wrapping your thumb around the top of the guitar neck since you won’t be able to stretch your fingers to play notes.

Keep your wrist slightly bent so you easily change hand positions. Try to keep your wrist relaxed with a slight bend to keep your fingers parallel to the frets. Make sure your palm doesn’t touch the back of the neck while you’re holding it. Avoid bending your elbow more than 90 degrees since it will change the angle of your wrist and restrict your movement. If you keep your wrist too tense, it will strain your joints and make it uncomfortable to play your guitar.

Press down on the strings with the tips of your fingers. Position your finger on the string you want to play so it’s just to the left of the metal fret. Keep all of your knuckles slightly bent as you press down on the strings you want to play. Make sure you only press down with the tips of your fingers rather than the pads since you won’t play as clean of a note. Don’t press the string directly on the metal fret, or else the note will sound fuzzy when you play it. If you need to stretch your fingers further down the neck to play a note, move your thumb closer to the bottom of the neck so your fingers can reach the fret you want to play.

Slide your hand up and down the neck when you need to change chords. Relax your arms and hands when you need to change their positions so you can move them easily. Keep your fingers as close to the strings as you can as you slide them to their new position. As you stretch your fingers, move your thumb closer to the bottom of the neck so you can reach the strings you need. Practice playing chords individually first so you can get used to the hand position. As you start feeling more comfortable with the chords, try switching between them. If the chords you’re switching between share the same note, keep that string held down as you change positions.
Playing with Correct Posture

Rest the waist of the guitar on either of your legs. The waist of the guitar is the curved notch where the body gets thinner. Sit on a chair or stool so your feet are flat on the ground. Position the guitar neck so it points to the left side and set the waist on your thigh. For a more casual playing posture, set it on your right thigh. For a classical posture, place the guitar on your left thigh. Resting the guitar on your legs helps support the weight more and takes pressure off of your fretting hand so you can easily move it around. Classical posture allows you to access the higher frets without your legs getting in the way. If you’re playing your guitar while you’re standing, tighten a guitar strap so the guitar sits at chest level.Tip: If the guitar isn’t level with your chest when you rest it on your lap, use a guitarist’s footrest to raise the leg you’re resting the instrument on.

Hold the guitar so the neck points up at an angle. Keep the front of the guitar perpendicular to the floor and hook your right elbow around the front of the body to hold it in place. Angle the neck so it points up between a 30–45-degree angle so you’re able to move your hand easily and reach all of the frets. Holding the guitar at an angle allows you to reach the highest frets on the guitar neck. If you play guitar left-handed, then use your left arm to support the guitar body and hold the neck with your right hand.

Keep your back straight as you play. Relax any tension in your neck and shoulders so you don’t feel stiff while you play your guitar. Sit or stand up straight so you’re looking forward rather than arching or twisting your neck. Try to keep your arms loose rather than tensing them so you’re able to move your fretting hand easily. Take breaks frequently while you’re playing and practicing so you can stretch. That way, you can avoid getting tense or sore. If you play with poor posture, you could cause long-term damage to your joints.
Straightening the Neck with the Truss Rod
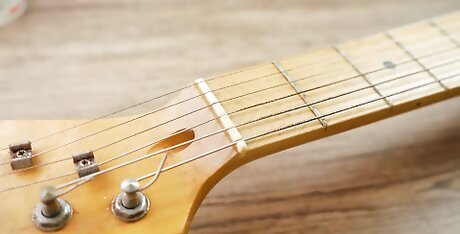
Remove the truss rod cover if your guitar neck has one. Set the guitar down so the strings are parallel to the floor. Look for a rectangular or circular plastic cover near the tuning pegs or at the end of the neck where it attaches to the body. Use a screwdriver to unscrew the cover from the neck. Set the cover aside while you’re working so you don’t lose it. Your guitar neck may not have a cover for the truss rod adjustment. Look for a hole in the neck by the tuning pegs or where it connects to the body. If you do not see a cover or hole for the adjustment nut, then you may need to remove the neck from the body to access it.
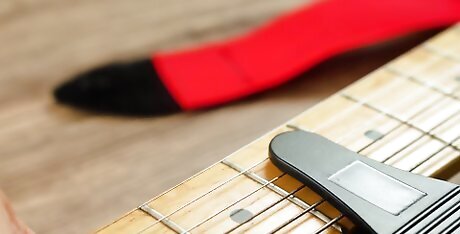
Secure capos against the 1st and 15th frets. Capos are clamps that hold the strings down against the frets to change the tuning. Clip the first capo to the left of the first metal fret from the end of the neck with the tuning pegs. Make sure it holds all of the strings down tightly against the neck. Find the 15th fret on the guitar neck and secure a capo to the left of it. The capos will keep the strings straight so you can see how much the neck bows in either direction. You can buy capos from music supply stores.
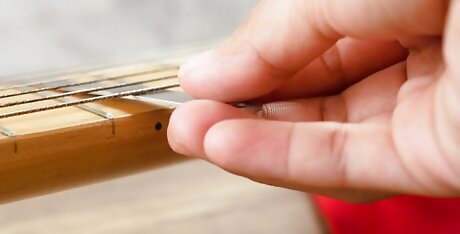
Check the gap between the top string and 7th fret with a feeler gauge. Feeler gauges are thin pieces of metal that are used to measure the gap size between the strings and the neck. Choose a 0.007 in (0.18 mm) feeler gauge and slide it on top of the 7th fret so it goes underneath the thickest string, which is at the top of the neck. If the feeler gauge touches the string without forcefully lifting up from the neck, then you don’t need to make any adjustments. If you needed to lift the string in order to slide the feeler gauge underneath it, then loosen the adjustment nut. If there’s a gap thicker than the feeler gauge, then you need to tighten the truss rod. You can buy a set of feeler gauges from your local hardware store.
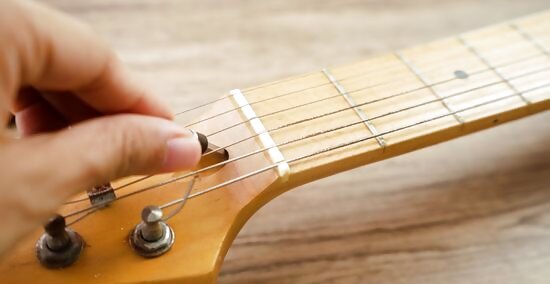
Turn the nut counterclockwise if the neck bows up and touches the strings. Look at the strings near the 7th fret to see if they touch the neck. If they do, insert an Allen wrench into the hole for the adjustment nut and make sure the wrench is firmly seated. Rotate the nut counterclockwise by a quarter turn at a time to straighten out the neck. Check the gap with the feeler gauge to see if you’ve adjusted it enough. If you don’t raise the strings off of the neck, the strings will produce a buzzing sound when you play them.Warning: Don’t force the adjustment nut to turn if it doesn’t easily move, or else you could snap the truss rod. If you snap the truss rod, you will need to replace the neck.
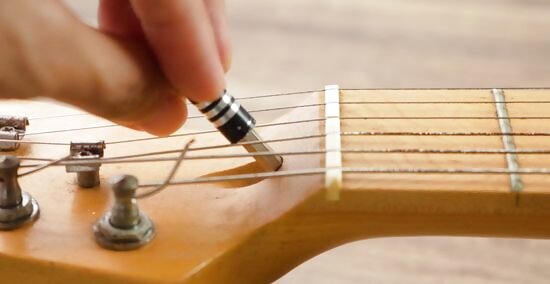
Rotate the nut clockwise to reduce the gap between the strings and neck. If the strings were too far away from the neck or you over-adjusted, use your Allen wrench to turn the nut clockwise instead. Work a quarter turn at a time so you don’t break the truss rod. Check the gap between the 7th fret and the top string with your feeler gauge after making an adjustment to ensure it’s the right distance. If the strings are too far off of the neck, then they will be more difficult to press down and play individual notes. Usually, the strings play well if they’re 0.006–0.012 inches (0.15–0.30 mm) above the frets.





Comments
0 comment