views
Lifting Your Vehicle
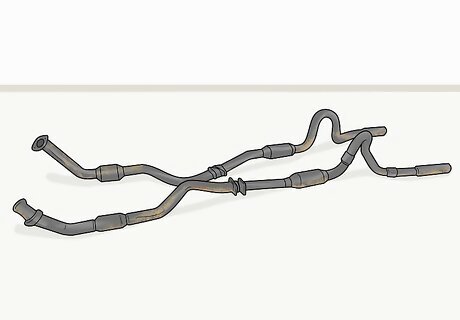
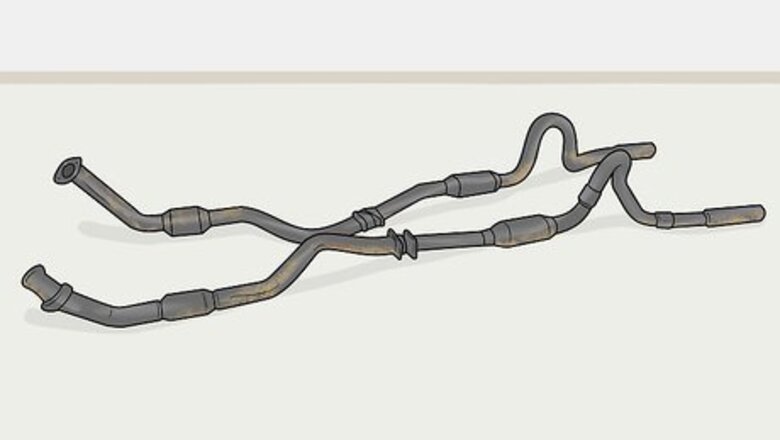
Familiarize yourself with the parts of the exhaust system. Look up diagrams for the make and model of your vehicle so you can locate the exhaust system. The exhaust system starts with the manifold, which is the section of 4–8 pipes that connect to your engine guide the fumes underneath your vehicle through a metal downpipe. Look for a long pipe that has metal boxes near the front and back and runs from the engine to the vehicle’s rear. The catalytic converter is a metal box near the front of the exhaust pipe that filters out harmful gases, such as nitrogen oxide and carbon monoxide. Your exhaust system may have more than 1 catalytic converter. The oxygen sensors are electronic ports that plug into the exhaust system before and after the catalytic converters to check if your engine is burning oxygen efficiently. The wires for the oxygen sensors will go directly into your vehicle’s body. The resonator is a slightly wider section of your exhaust pipe that helps reduce the amount of noise when you run your engine at certain RPMs. Not every exhaust system will have a resonator. The muffler is the large metal box near the rear of your vehicle that helps reduce the amount of noise your exhaust makes. The tailpipe is the small section of tubing that connects to the back of the muffler and allows the fumes to escape into the air.
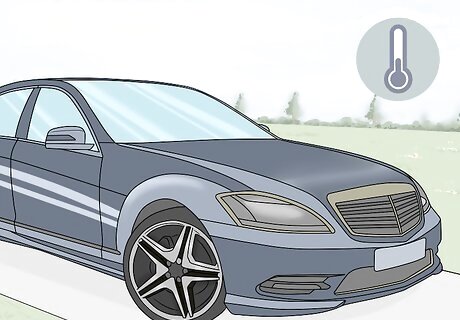
Let the exhaust system cool if you’ve used your vehicle recently. Exhaust fumes can get extremely hot while you’re driving, which can cause the pipes to heat up and cause burns. If you’ve driven your vehicle before you want to install the new system, put it in park, turn off the ignition, and allow the engine and pipes to cool down. Leave the vehicle alone for about 1 hour until you can comfortably handle the exhaust pipes. Don’t touch the exhaust pipes immediately after running your vehicle since they will be extremely hot. You can try spraying the exhaust system with lukewarm water to help cool it down faster.
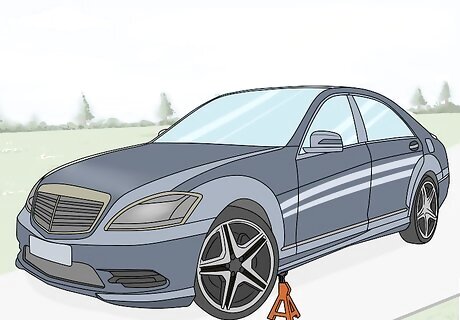
Raise your vehicle so you can work underneath it using a jack. Park your vehicle on a flat, level surface so it’s less likely to roll or move while you’re working. Place the jack so the arm that raises up underneath the frame at the front or back of the vehicle. Pull the handle of the jack down to lift the vehicle off of the ground high enough so you can get underneath it. Avoid using a scissor jack when you raise your vehicle since they aren’t as reliable and they could easily slip. You can also drive your vehicle onto ramps to lift it off of the ground. If you use ramps, be sure to put heavy blocks behind your tires so they’re less likely to roll.
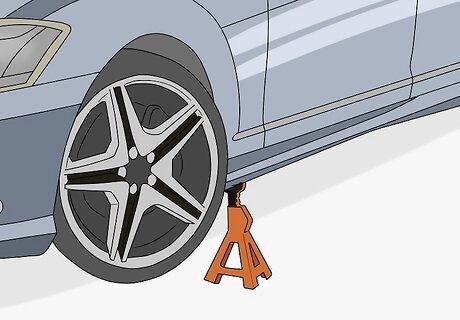
Place jack stands near each tire to keep the vehicle from moving around. Jack stands have sturdy bases and are less likely to slip than when you’re using a jack. Position the jack stands underneath the vehicle’s frame or lift points in front of or behind the tires. Slowly lower your jack so the body of your vehicle sits on the jack stands. You can buy jack stands from an automotive supply shop. Don’t get underneath your vehicle until you have jack stands firmly in place, or else the vehicle could fall on top of you.
Removing the Old Exhaust
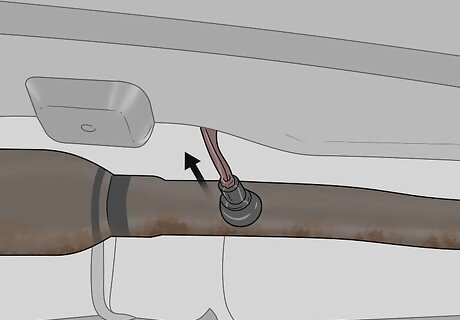
Disconnect the oxygen sensors from underneath your vehicle. The oxygen sensors are small metal pieces attached to wires that connect into the sides of the exhaust pipe. Place a wrench around the bolt connecting the sensor to the pipe and rotate it counterclockwise until it’s loose. Pull the oxygen sensor straight out from the pipe before unplugging it from the wires connecting to your vehicle. Your vehicle will usually have 1–2 oxygen sensors connected to the exhaust, but it may vary between make and model. Vehicles only have oxygen sensors if they have a catalytic converter. If your vehicle is from 1974 or prior, then the exhaust may not have oxygen sensors. Lie on a rolling creeper trolley to move around under your vehicle more easily. You can buy a creeper trolley from an automotive supply store. Wear clothes that you don’t mind getting dirty as well as disposable gloves so you don’t get too greasy. Make sure you don't touch the oxygen sensor when the car is hot — or the engine and the exhaust are hot —, since it is attached to the exhaust pipe or to the muffler pipe. Most manufacturers of oxygen sensors now provide anti-seizing or corrosion lubricant that should be applied to the new oxygen sensor when being installed. This is to prevent seizing from occurring.
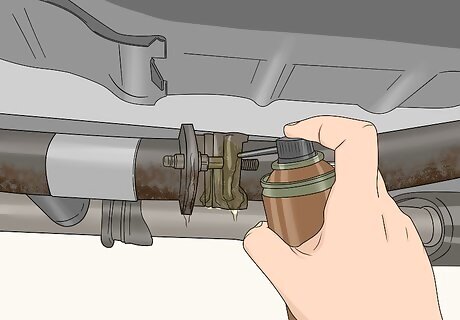
Spray the nuts along the exhaust pipe with penetrating fluid. Penetrating fluid works between the bolt and nut threadings to add lubrication and make it easier to unscrew the system. Point the spout of the penetrating fluid directly at the nuts connecting the exhaust pipe to the downpipe attached to your engine. Make sure to coat all of the threadings evenly to make the job easier. You can buy penetrating fluid from your local hardware or automotive care store. If you don’t have any penetrating fluid, it may be difficult to remove your exhaust system on your own. If your exhaust system is made up of multiple pieces, then look for bolts where the pieces connect to one another. Spray those with your penetrating fluid as well so you can remove each of the pieces separately.
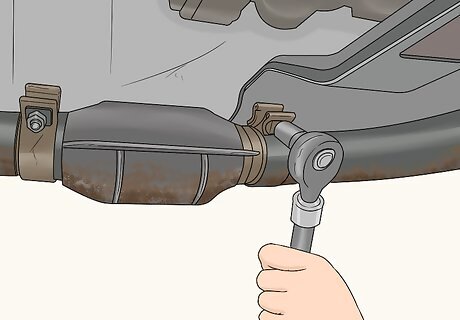
Unscrew the nuts with a ratchet. Start where your exhaust pipe connects to the engine at the front of your vehicle. Choose a ratchet bit that matches the size of the nuts holding the exhaust system to your vehicle. Place the end of the ratchet over the nut you’re loosening and turn it counterclockwise. Apply firm pressure as you rotate the nut since it may be stuck or locked in tightly. Continue unscrewing the rest of the nuts if the pieces of your exhaust system are held together by other bolts or clamps. Use a ratchet with a long handle so you can get more leverage while you’re disconnecting the old exhaust system.
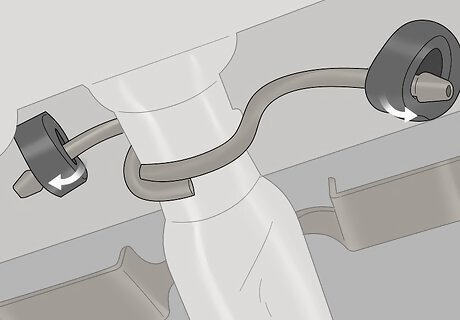
Unhook the pipes from the rubber exhaust hangers. Look near the top of the pipe along its entire length to find the metal pins that extend up and into rubber rings on your vehicle’s body. Support the exhaust pipe with your nondominant hand as you slide the metal pin out from the rubber. Slowly and carefully take the other pins off so the exhaust system comes loose from the body of your vehicle. If you have trouble pulling the metal pins off of the rings, try lubricating them with soapy water to help them slide out more easily. Don’t let the exhaust pipe drop since it could be heavy and it may hurt you or damage other components under your vehicle.
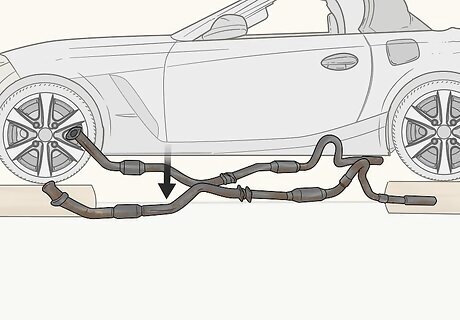
Pull the exhaust system down from your vehicle. Slowly take the exhaust system from the catalytic converter to the tailpipe and lower it to the ground. Carefully remove the system out from underneath the vehicle so it’s out of the way while you’re working. You can either throw the old exhaust system away or you can try to sell the parts if they’re in usable condition. Do not drive your vehicle while you have the exhaust system removed since it may be illegal in your area and you will release harmful fumes.Tip: If the exhaust pipe bends over your rear axle, it may be difficult to pull out in 1 piece. Instead, you can cut through the pipe at the top of the bend with a hacksaw or reciprocating saw with a metal-cutting blade. Remove the pieces of the exhaust system separately.
Positioning the New System
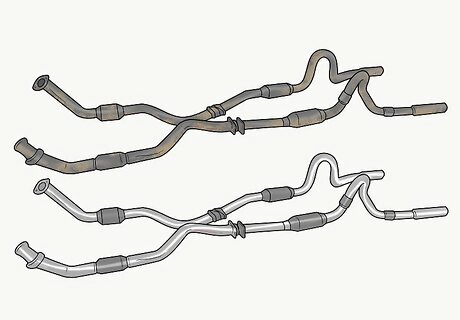
Get a new exhaust system that matches the make and model of your vehicle. Look up your vehicle’s year, make, and model online or at an auto parts store to find out what systems are compatible in your vehicle. The system will contain the main exhaust pipe, catalytic converters, a muffler, and tailpipe. Choose a system that’s within your budget and is made from stainless steel so it’s less likely to rust or corrode after heavy use. Order the exhaust system you want so you can install it on your vehicle. Compare the layout of your old exhaust system to the new one to make sure it can fit. For example, if you have a dual-exhaust engine, then you need a system that has 2 exhaust ports. If your old exhaust system went over your rear axle, then get an exhaust system that comes in multiple pieces so you can easily install it. If you aren’t able to, then you need to see a mechanic to install the system for you.
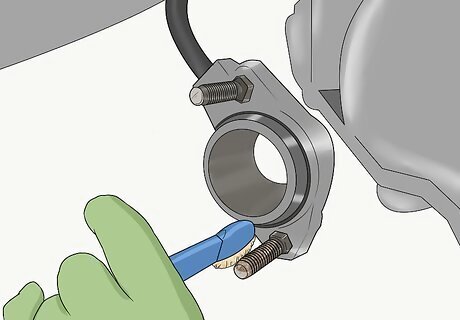
Clean the rust off of the bolt threads with a wire cleaning brush. Use the bolts you removed from the old exhaust system if they’re still in good condition. Rub a wire brush horizontally across the threadings of each bolt to remove any rust or corrosion that’s stuck on the surface. Try to get the most rust off of the threadings as possible so you can easily screw and unscrew the nuts on them. You can buy a wire cleaning brush from a hardware or automotive care store. If you can’t get the rust off of the bolts, then you may need to replace them so they don’t get stuck later on.
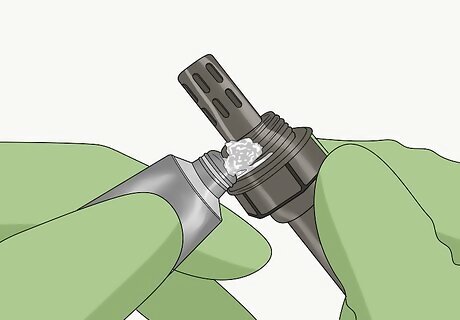
Apply anti-seize fluid on all of the bolt threadings. Anti-seize fluid helps prevent bolts from locking in place so they’re easier to remove when you need to make repairs or buy replacements. Put the anti-seize fluid on your finger and rub it around the threadings of the bolt. Make sure that each bolt has an even coat of the fluid so it doesn’t get stuck later on. You can buy anti-seize fluid from an auto care or hardware store. You can also apply the anti-seize fluid on the threadings for the oxygen sensors, but don’t let the fluid touch the interior metal sensors, or else they won’t work properly.
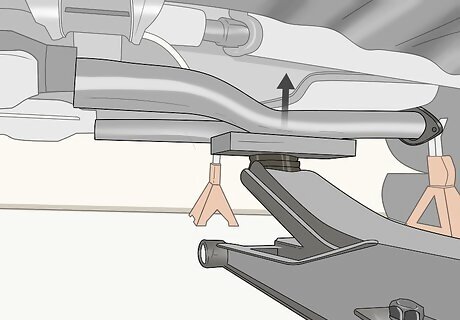
Lift the new exhaust system into place using your jack. Ask a helper to guide the exhaust system underneath your vehicle without it touching the ground so it doesn’t get scratched. Place the front end of the exhaust pipe on top of the jack’s arm and carefully raise it up so it doesn’t fall. Keep lifting the exhaust system until the end of the pipe lines up with the port on the downpipe, which comes down from the engine and connects to the entire system. You don’t need to use a jack, but the exhaust system may be too heavy to support and secure on your own.Tip: If your exhaust system comes in multiple pieces, start with the section of pipe that attaches to the downpipe. Continue installing the pieces of your exhaust system as you work back toward the rear of your vehicle.
Connecting the Exhaust
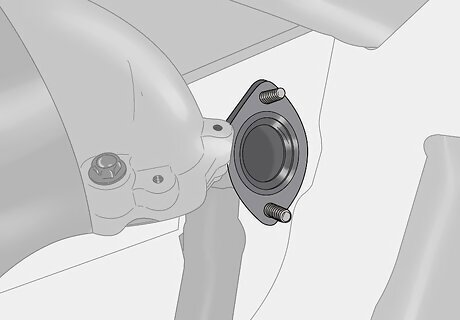
Place a gasket over the downpipe with one of the bolts. A gasket is a thin piece that fits between pipes to prevent any leaks from escaping the connection. Hold the port at the end of the downpipe steady and lay the gasket on top of it. Slide one of the bolts through the downpipe and gasket so the threaded end points toward the rear of your vehicle. Your new exhaust system should come with a gasket, but you can also buy them from an auto supply shop.
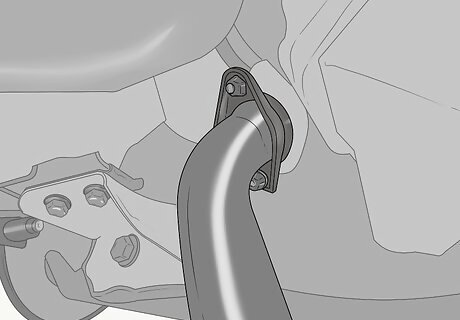
Attach the front of the exhaust system loosely to the downpipe with the bolts. Position the end of the new exhaust pipe with the port on the downpipe so the bolt holes line up. Slide a nut onto the bolt that you’ve already installed and turn it clockwise by hand until it holds the new system against the downpipe. Slide the rest of the bolts through the other holes on the pipe connection and tighten them with nuts until they’re halfway down the threading. Don’t fully tighten the nuts and bolts yet, or else you won’t be able to move the exhaust system around if you need to reposition it slightly.
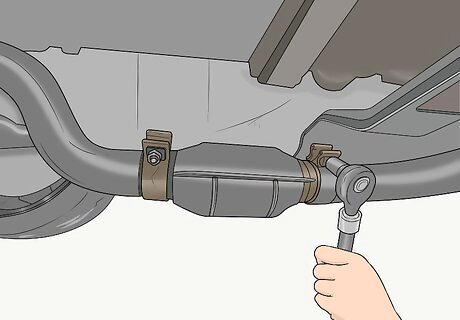
Connect sections of your system with exhaust clamps, if needed. Exhaust systems that come in multiple pieces will fit together easily, but they may be prone to leaking if they aren’t tightened. Get exhaust clamps, which are metal loops that you can tighten around pipes to hold them together, from your local hardware or automotive store. Slide the clamp onto the section of pipe you’re attaching before you connect it to the exhaust pipe. Tighten the clamp with a ratchet so it holds the pieces tightly. Working from the engine toward the back of your vehicle, connect the first exhaust pipe followed by the catalytic converters, the resonator, the muffler, and end with the tailpipe. You may also have extension pipes that connect between some of the pieces. In some cases, you may need to weld the pieces together rather than use clamps, so see what the manufacturer recommends. Systems that come in a single piece won’t use exhaust clamps.
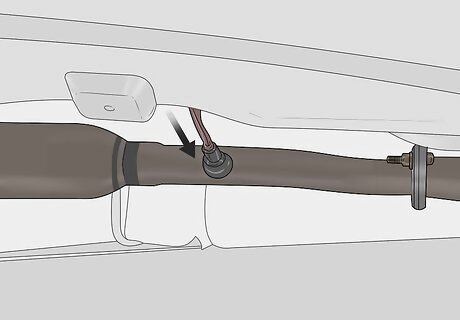
Plug the oxygen sensors back into the ports on your vehicle. Locate the small holes in the sides of the exhaust pipe near the front axle of your vehicle. Slide the old oxygen sensors back into the holes and tighten them by hand by turning the bolts clockwise. Use your ratchet or wrench to fully secure the sensors so they’re tight. Plug the ends of the sensors back into the wires so they’ll work when you start your vehicle. You can also screw in the oxygen sensors before you install the exhaust system if it’s easier to access.
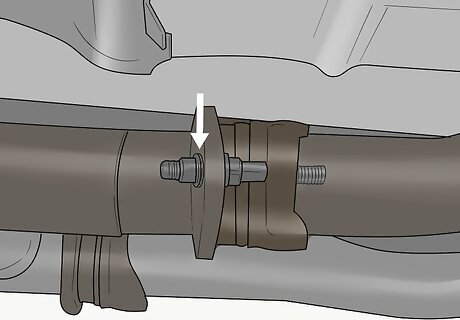
Slide the metal pins on the system into the rubber exhaust hangers. The metal pins will line up with the rubber hangers you already have under your vehicle. Find the hole on the hanger that’s slightly smaller than the width of the metal pin and push the pin through it. Apply firm pressure until you see the end of the pin poke through the other side of the hanger. Continue putting the pins through the other hangers to secure the pipe against your vehicle. If you have trouble sliding the pins into the hangers, lubricate them with soapy water so they’re easier to move.

Tighten the bolts at the front of the exhaust until they form a tight seal. Go back to the front of your exhaust system and use your ratchet to rotate the nuts clockwise. Continue tightening the nuts until the pipes are firmly connected to one another and don’t move around easily. Be careful not to overtighten them since you could damage the exhaust system or cause leaks. If your exhaust system came in pieces, then make sure all of the bolts are tight along the length of the pipe.
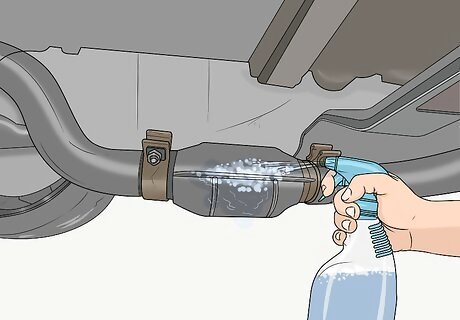
Spray the connections with soapy water to see if there are any leaks. Turn your vehicle’s engine so fumes run through the new exhaust system. Fill a bottle with soapy water and spray any areas where you had to connect pipes to one another. If you notice bubbles forming around the connection, tighten the bolts more to see if it fixes your problem. Try repositioning the gasket inside the pipe if you still notice a leak. If your vehicle doesn’t have any exhaust leaks, you can remove the jack stands and lower your vehicle with a jack.Tip: If you still have an exhaust leak, then you may need to see a mechanic to check if there’s anything wrong.


Comments
0 comment